


You know you're a nerd when you carry around a Ventoy USB loaded with all your favorite Linux ISOs. Wondering what Ventoy is? It's an open-source tool that allows you to create a bootable USB drive for ISO files, eliminating the need to reformat the disk repeatedly. Instead, you simply copy the ISO to the USB drive and boot from it. One of Ventoy's standout features is its ability to create persistent bootable Linux drives with multiple distros, all on one USB stick. And the best part? As far as we can tell, it hasn't been compromised by the CCP yet (though it's always wise to stay vigilant).
Linux is fantastic, but we get that not everyone is ready to part with their Windows license. Booting a persistent Linux OS from a USB means your files and installed programs remain intact across reboots. This comes in handy if your main operating system needs file repair, if you seek a secure OS separate from your primary one, or, for instance, if Microsoft was hacked and their source code leaked, leading you to distrust the OS. In these scenarios, a secure bootable Linux system proves invaluable. A Linux desktop can not only run TorGuard, qBittorrent, and KeePass, but it also comes equipped with all the apps you need, including a web browser and office programs.
This might sound complicated, but we're here to show you it's actually quite straightforward. So, grab a USB 3.0 thumb drive, fire up your BitTorrent client, and let's dive in.
Setting Up the Ventoy Drive
For this walkthrough, we'll focus on using Windows, although it's entirely possible to achieve this on Linux as well. If you're a Linux user, you probably don't need much guidance in this area.
First things first: download the latest version of Ventoy from SourceForge and unzip the contents. A quick search on SourceForge for "Ventoy" followed by the version number (e.g., v1.0.97) should lead you right to it.
Once you have the file, it's time to prep your USB drive. We recommend using a USB 3.0 drive for its faster read/write speeds, which can significantly reduce any operating system lag. After your drive is ready and plugged in, locate and run the Ventoy2Disk.exe file from the unzipped files.
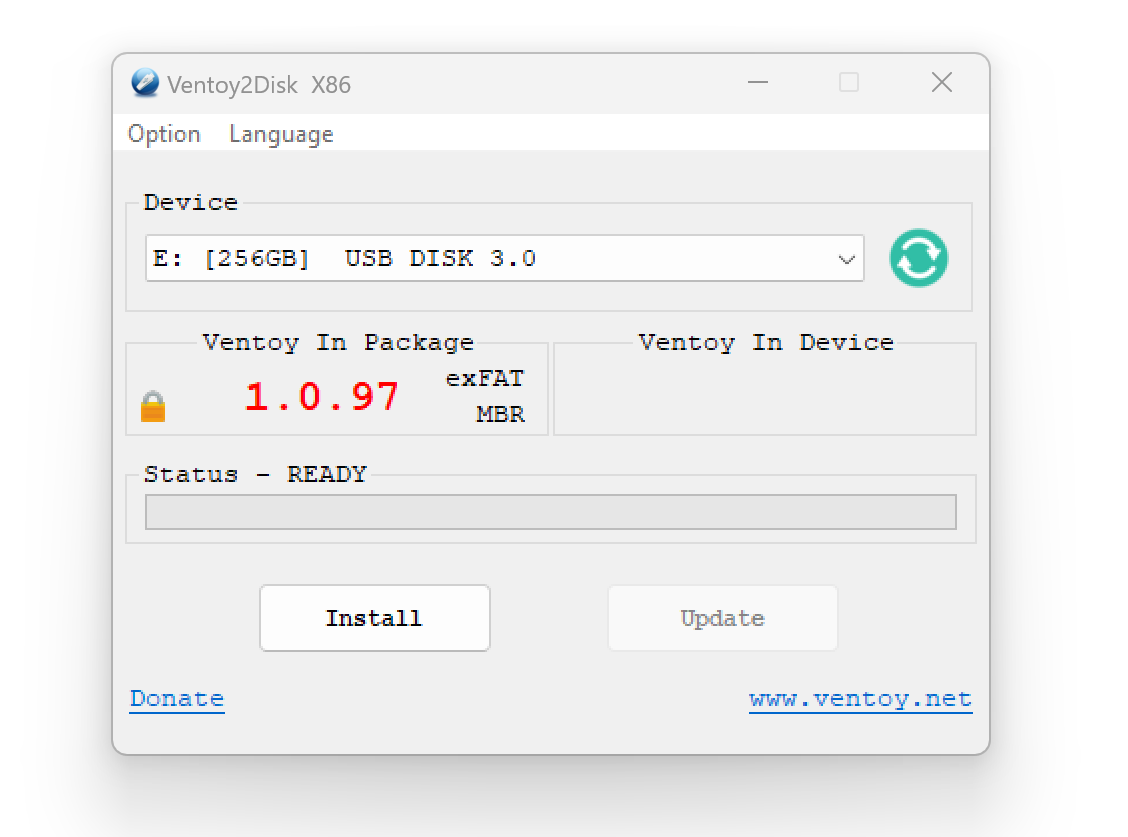
In the device dropdown within the Ventoy application, be very careful to select your USB thumb drive and not any other important drive. Ventoy will overwrite the selected drive, so double-check to ensure you're not accidentally erasing something critical. Once you're certain, hit the "Install" button to begin the Ventoy installation on your USB.
Torrenting Data Files and ISOs
This step involves gathering the ISOs of your preferred Linux distribution. Whether you're a fan of KDE or Gnome, ensure the version you select supports live preview; otherwise, you might be limited to just the installation process. You can download ISO's from the distro's website or use the Linux Mint and Ubuntu Mate ISO torrent files we used for this tutorial. For a smooth experience, we recommend downloading the latest Linux Mint ISO through BitTorrent, ideally using TorGuard's super-fast SOCKS5 or VPN to speed things along.
Next up, you'll need a large .dat file. This file serves as the persistent partition for the bootable ISOs, allowing you to save changes between sessions. Creating these files is straightforward on Linux, but to keep things simple for Windows users, we've prepared a variety of sizes available for download via BitTorrent. Select a size that matches the capacity of your USB drive. If you plan to include multiple ISOs, consider downloading several .dat files of different sizes to accommodate them. Here are the options:
- 512 MB hash: 6798A95F5525AFBBFFDB506ACD25CF0B7853C34EC353F8CD1998A65BA34E36CD
- 1 GB hash: 0635139718C26477E35B009A552AABE40CCD919BCD4391DA259963DFEA64B8BC
- 2 GB hash: 03EC1CA6EADCDCFDE0191B8D7778FEA56C129BFA2E04A0A06F080AA3CBEEB4A6
- 20 GB hash: 4888A16A9FA7BE44713410CCFA72C8AB2E39E36194D964079B857F88333FAD7B
- 40 GB hash: 41FCE0225A8A0CEEA8E9284571DE6BC88CBF2ACD0779794A132215F10B5EA041
- 110 GB hash: B5B8DCE8E5819E6FACCB10AC1C63B173AD285F6C4ADAC051B42EB18EE71660CA
Choose the appropriate .dat file sizes and add them to your BitTorrent client—we recommend qBittorrent for its ease of use. Once added, proceed to download the .dat file(s). (Since you are using Windows you'll need 7zip to extract them.)
Ventoy Plug, Son
By now, you should have your USB plugged in, armed with a freshly downloaded Linux Mint ISO and the custom .dat file we’ve prepared for you.
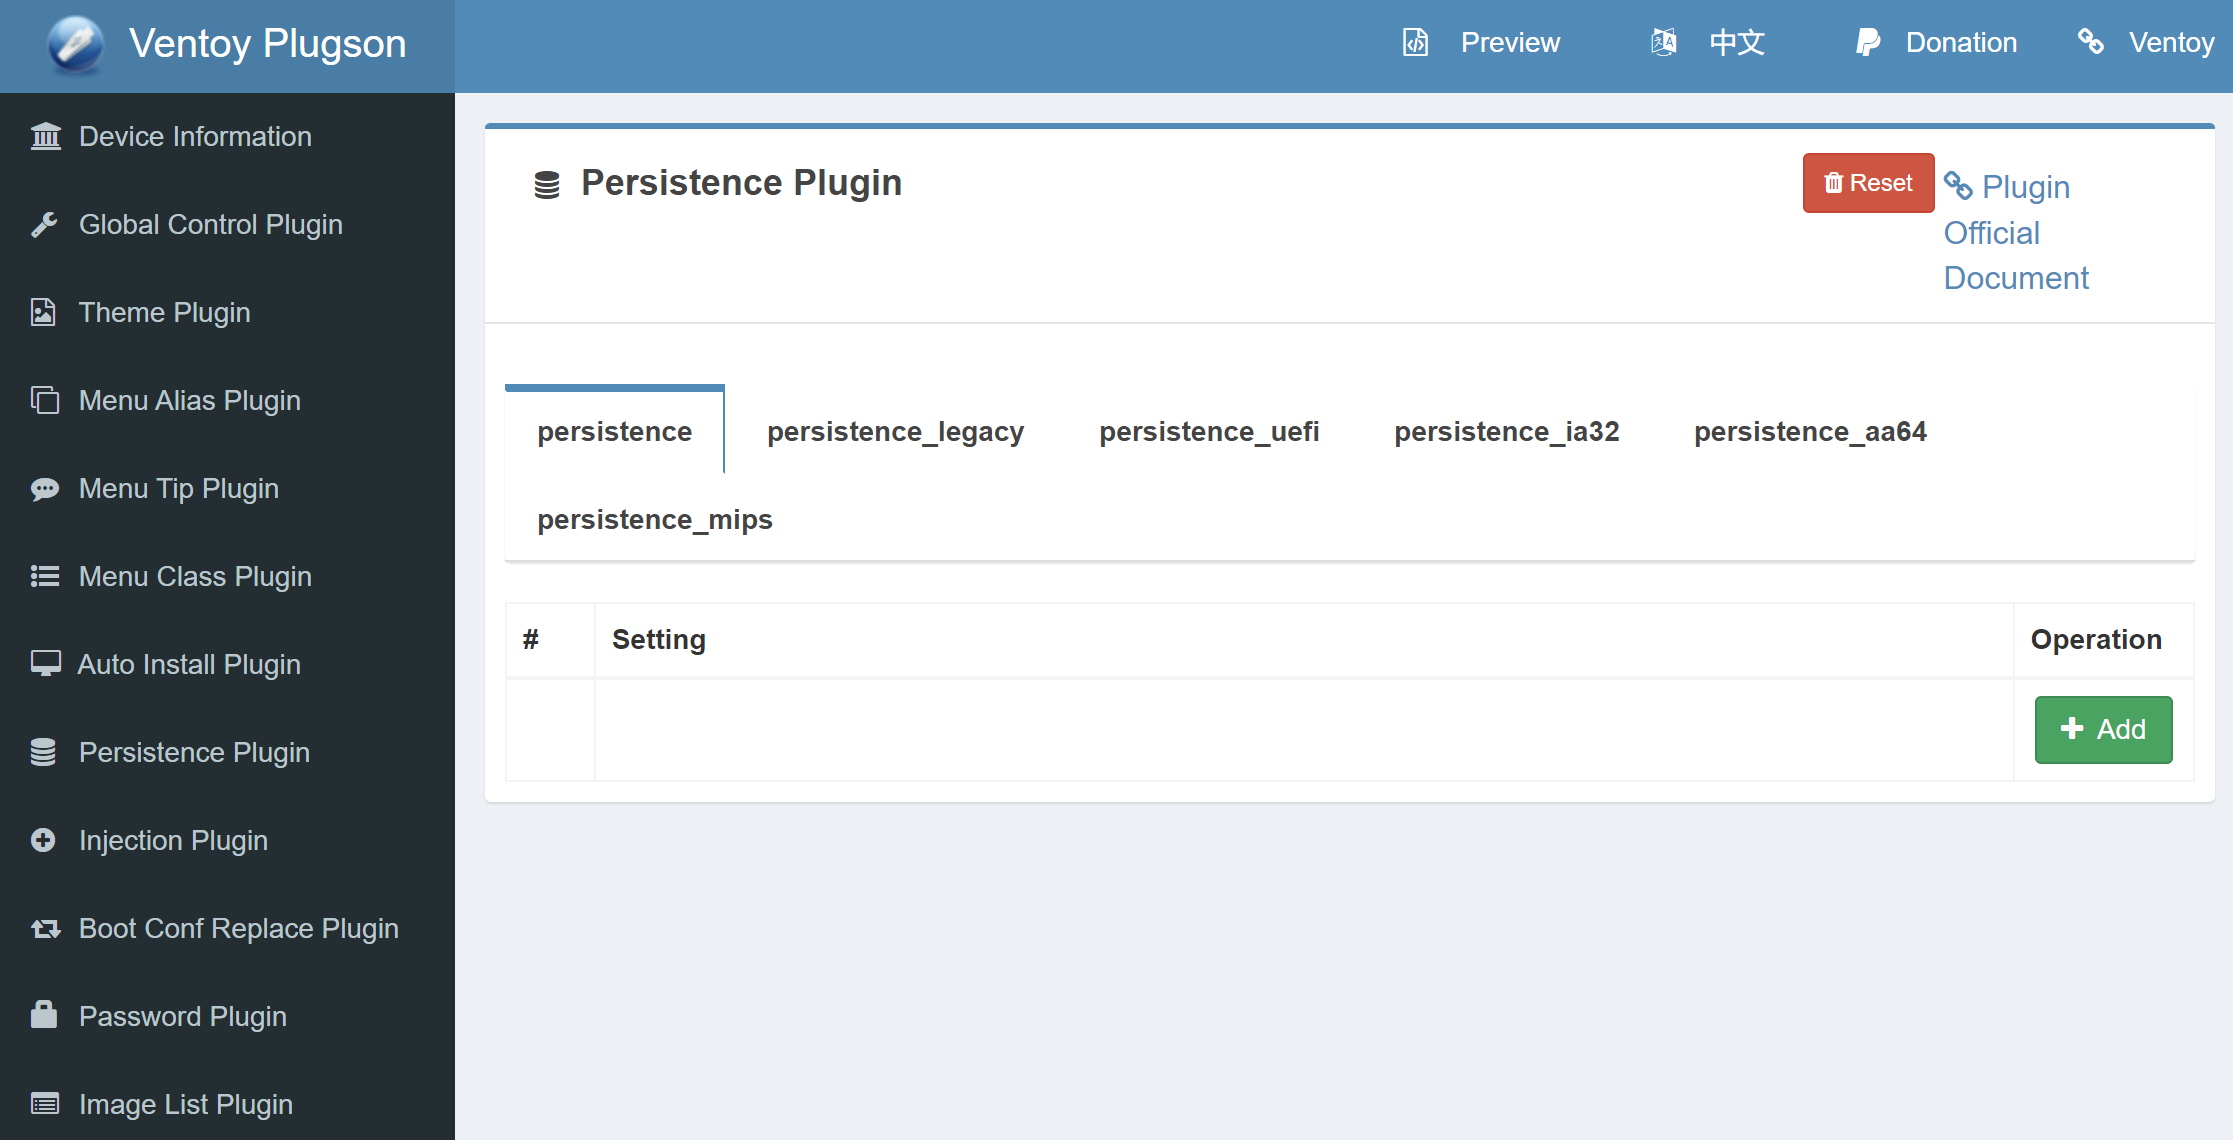
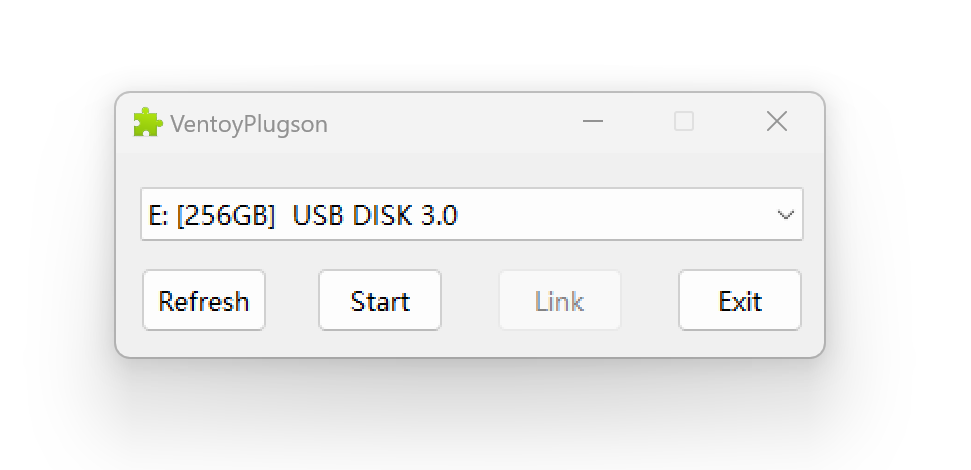
From the Ventoy zip file you downloaded earlier, launch the VentoyPlugson.exe program. Select your USB drive from the dropdown menu and click "Start". This action will launch a web browser filled with various options that might seem daunting at first glance. However, focus on clicking the "Persistence" plugin option from the left menu, followed by the "Add" button. This process will set up the JSON file that directs the Ventoy ISO file to the corresponding .dat file.

Before proceeding further, open File Explorer and navigate to your USB drive. Here, create a folder named "ISO" alongside the "ventoy" folder. Now, move the Linux Mint ISO into the ISO folder.
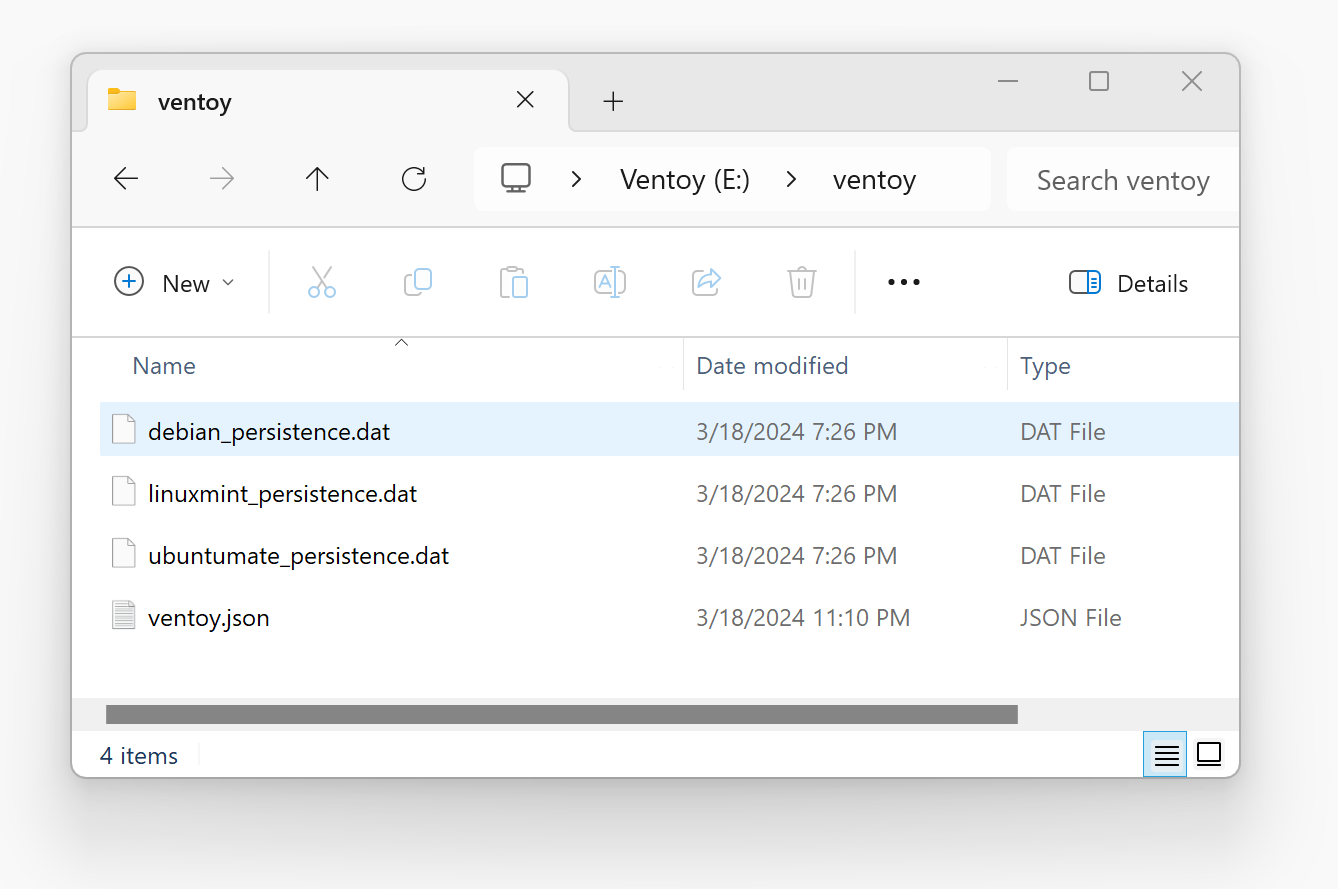
Next, place the .dat file you acquired via BitTorrent into the Ventoy folder. Although you can rename it to anything, for the purposes of this tutorial, let's rename it to linuxmint_persistence.dat.
That wasn't too difficult, was it? To recap, your USB should now have:
- Your ISO files within the "ISO" folder.
- Your .dat file within the "ventoy" folder.
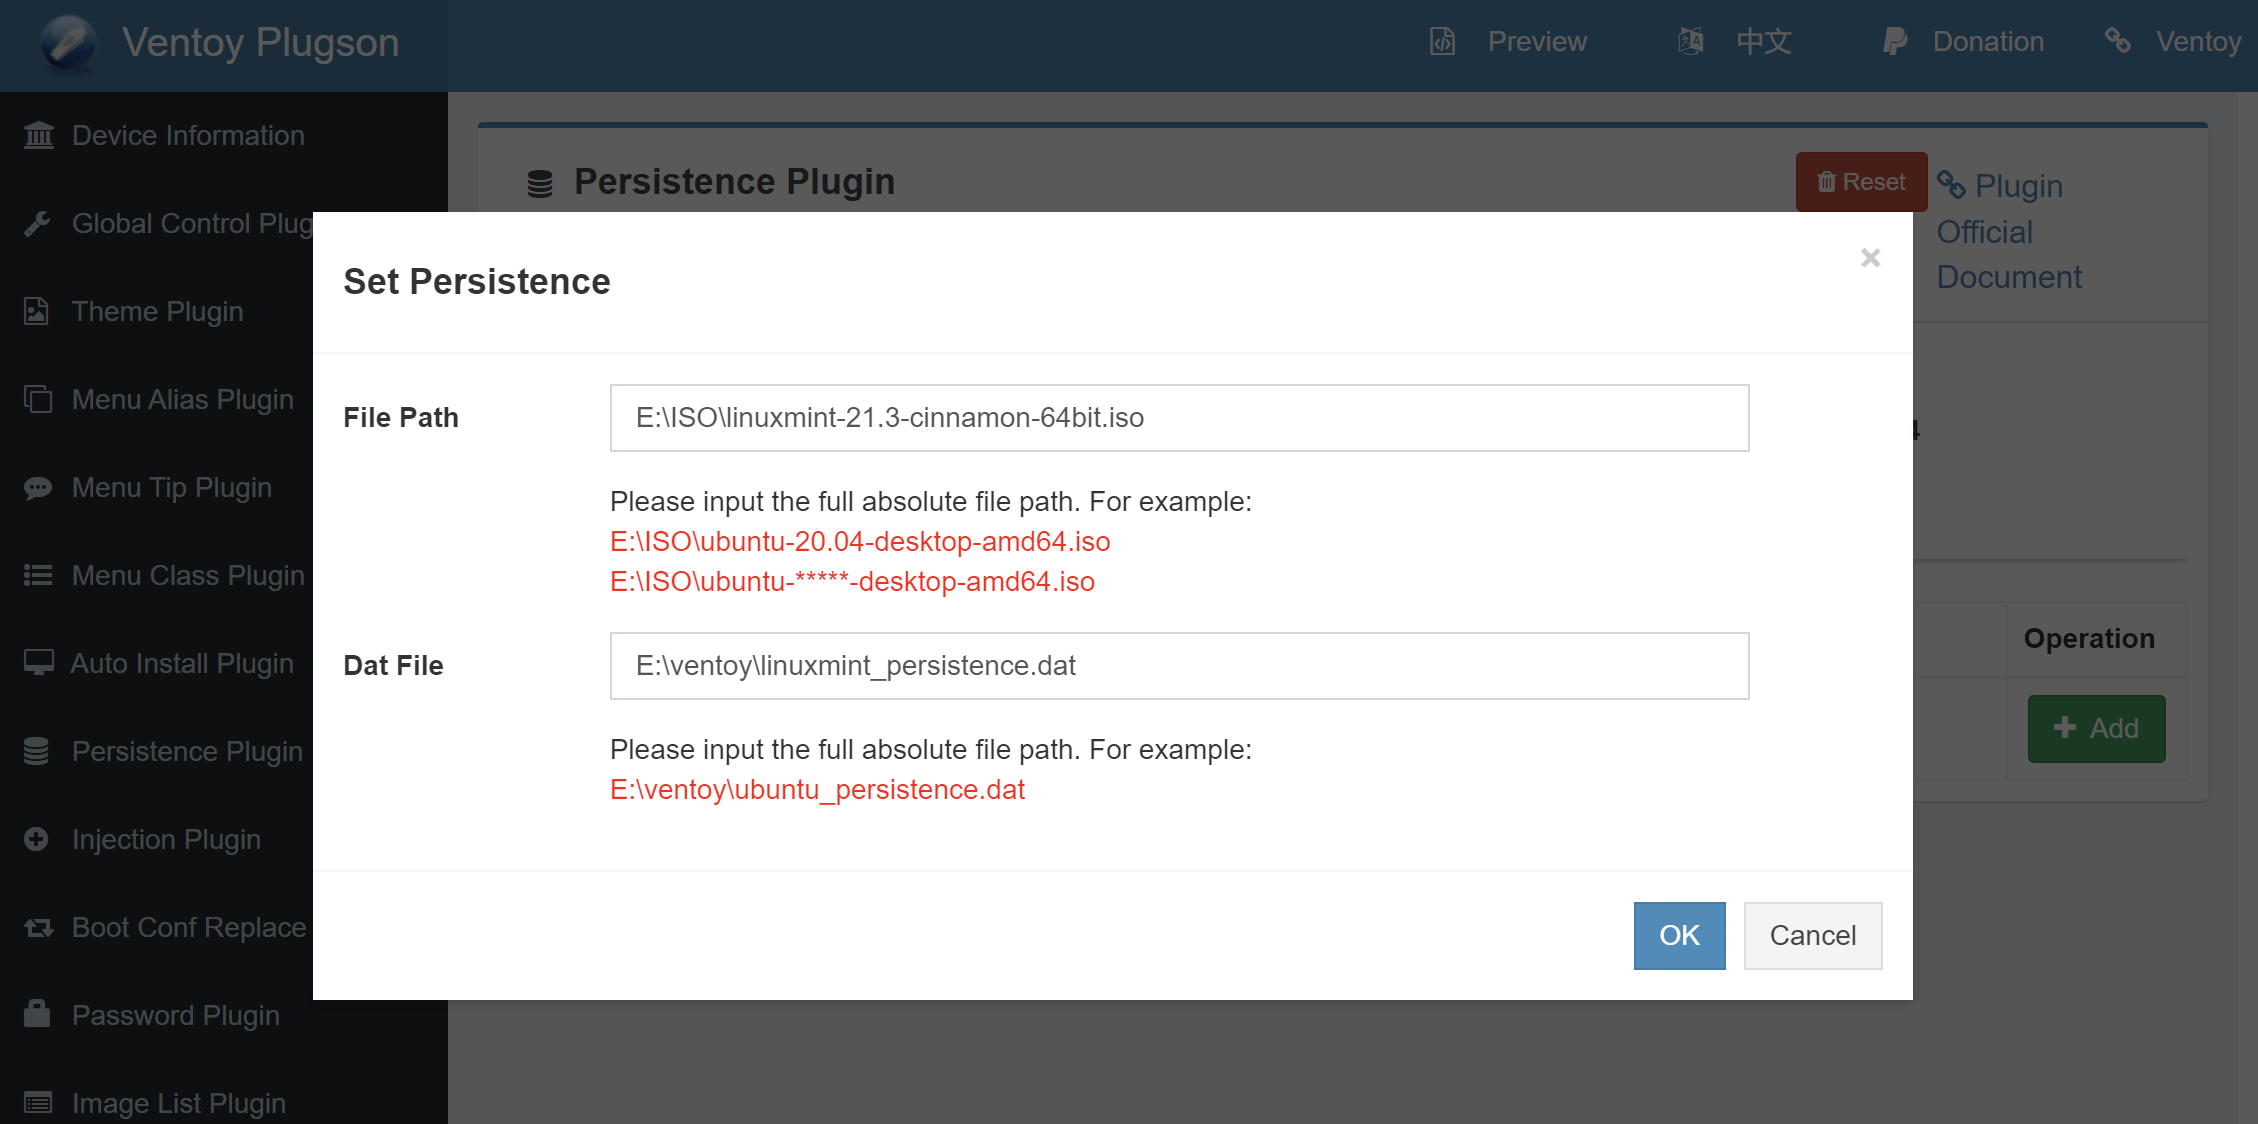
Now, revert to the web browser menu for Ventoy Plugson. For the file path, enter the exact path of the ISO file you've just copied. The interface should conveniently display the drive path for you, but ensure the ISO file name matches precisely.

Subsequently, input the exact path for the .dat file located in the ventoy folder. The tool will suggest the appropriate drive and folder path; just confirm that the .dat file name you enter is correct. Click the "OK" button. You should see an "OK" status next to both the ISO file and .dat file in the Ventoy Plugson menu. This process can be repeated for adding multiple ISO distributions and .dat files, but for now, let’s move forward.
Plug It In and Boot Up
With the Ventoy Plugson browser window closed and the VentoyPlugson.exe exited, it's time to gently unplug your USB drive. Your bootable, persistent Linux system is now primed for a test drive. All you need is another computer equipped with a USB port, preferably a USB 3.0 for optimal performance.
Once the computer is powered off, insert the USB drive. Then, power on the computer. Accessing the boot mode typically involves pressing one of several keys — ESC, F12, F10, or DEL are common options. If you're unsure, a safe bet is to press all these keys in quick succession until a boot menu appears. (Note: On some older machines, you might need to enter the BIOS to access the boot menu.) For instance, on an older Microsoft Surface book, we achieved this by holding down both the power button and the volume UP button.
Once in the boot menu or BIOS, navigate to the boot configuration settings and adjust them so the USB option is at the top of the list. This change instructs your computer to prioritize booting from the USB drive over the hard drive. Rest assured, this alteration doesn't modify anything on your hard drive; it merely adjusts the boot sequence. Depending on your computer model, you may also need to disable secure boot to proceed.

After making these adjustments, reboot your computer with the USB drive still inserted. You should now be greeted by the Ventoy menu, signaling the start of your Linux exploration.
Choose Your Bootable OS

Now, for this pivotal step, while you could simply press the enter key three times, understanding the process enriches the experience. Hit enter the first time to select your bootable ISO. Press it again to choose your persistent .dat file. A final press, and you're on your way.
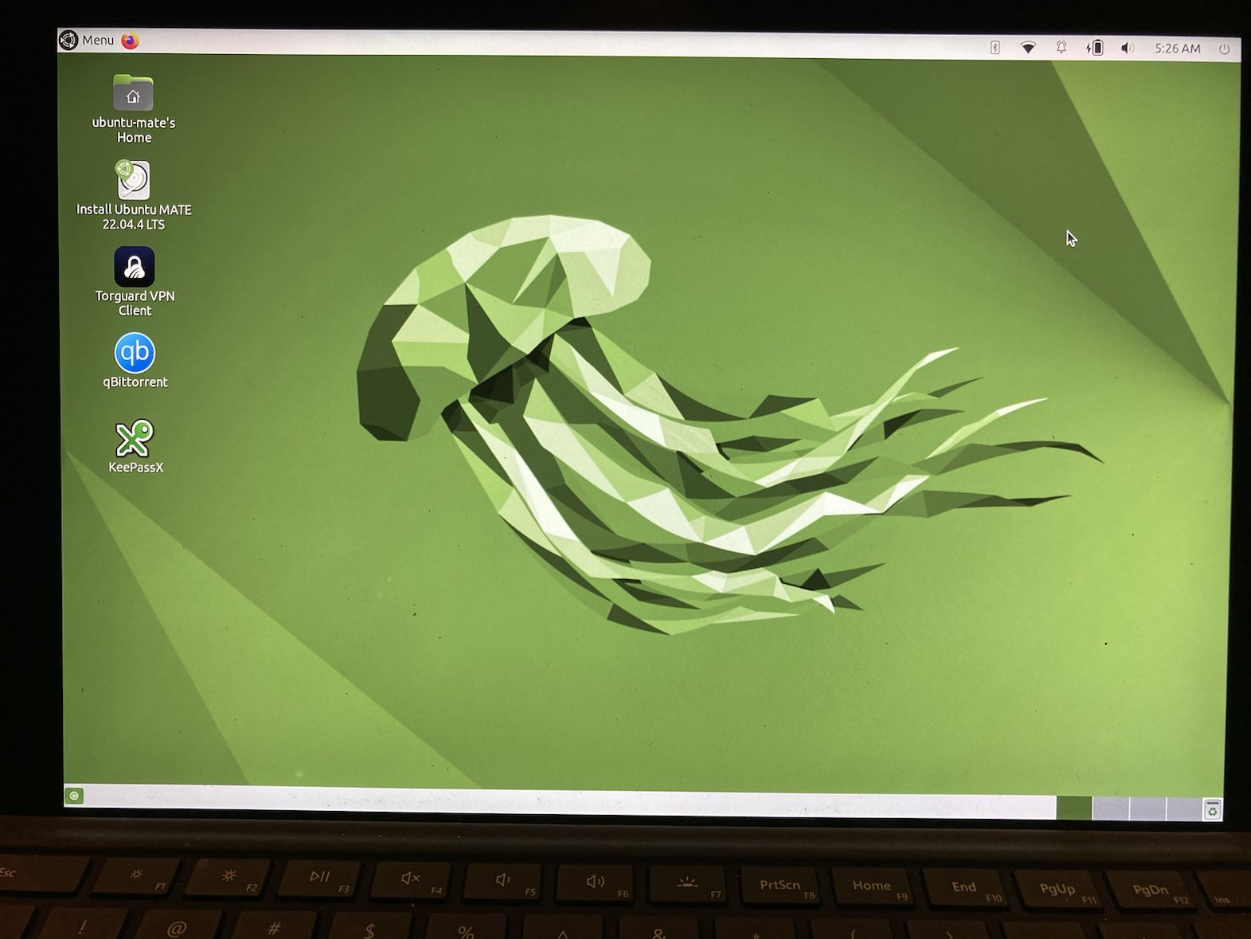
You should now find yourself booting into Linux. What's next? Dive in and explore! Don't hesitate to experiment—remember, you're operating from a USB drive. If you encounter any mishaps, you can always start afresh with a clean slate.
For newcomers, we highly recommend installing the TorGuard Linux application as your first step. Once that's set up, open the terminal and bring some of our favorite applications into your Linux environment with the following commands:
sudo apt update
sudo apt upgrade
sudo apt install qbittorrent keepassx vlc
Welcome to the Linux community, friend. Our hope is that, in time, you'll grow to appreciate it as much as we do.