Window’s 8 PPTP settings aren’t all that different from previous versions. In this how t0, we’ll go over setting up an anonymous TorGuard PPTP VPN.

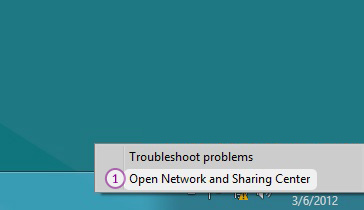
  • First, Click on “Open Network and Sharing Center” from the network icon from the taskbar (1) or click on “Network and Sharing center” from Control Panel.Windows8 PPT VPN Setup: Step 1
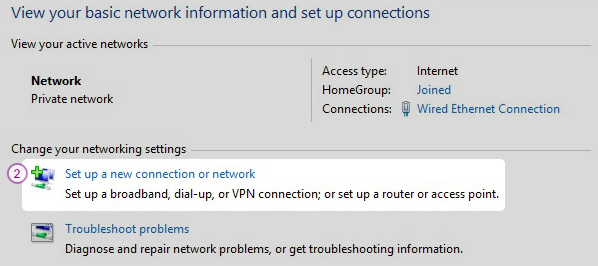
  • Click on “Set up a new connection or network” (2).Windows8 PPT VPN Setup: Step 2
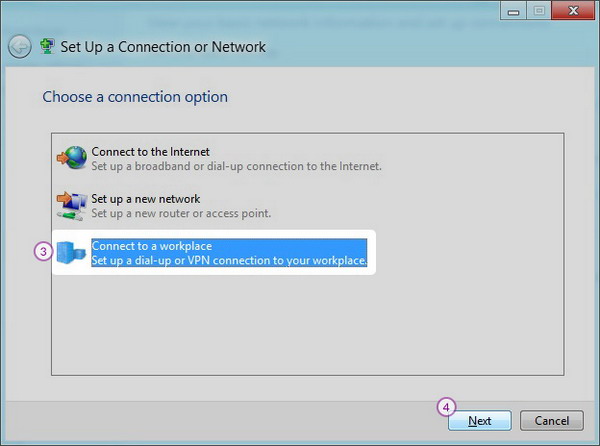
  • Select “Connect to a workplace” (3) and click “Next” (4).Windows8 PPT VPN Setup: Step 3
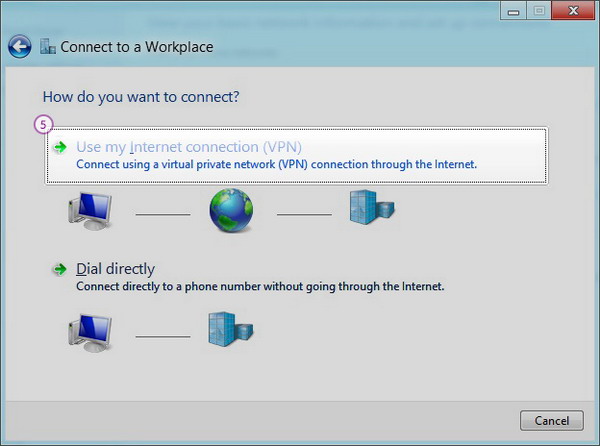
  • Choose “Use my Internet Connection (VPN)” (5).Windows8 PPT VPN Setup: Step 4
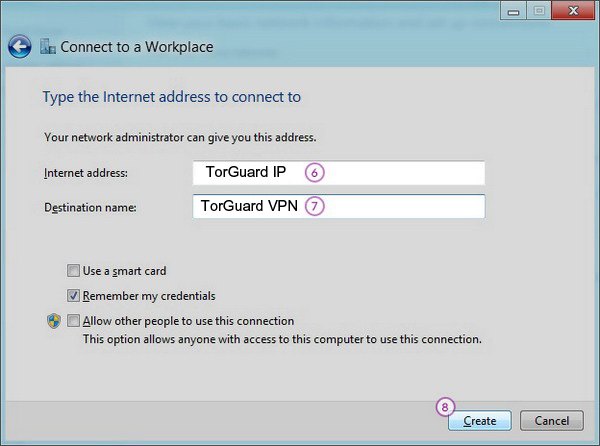
  • In the “Internet Address” (6) field type IP address of the TorGuard VPN server you want to connect to. You have to check the email you have received when you have paid for the TorGuard VPN account. You will find there the available servers. In the “Destination name” field (7) type “TorGuard VPN (PPTP)”.
    Click “Create” (8).Windows8 PPT VPN Setup: Step 5
  • Click on the monitor icon (9) on the bottom right-hand corner.Windows8 PPT VPN Setup: Step 6
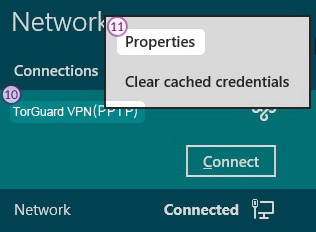
  • Right–click on the “TorGuard VPN (PPTP)” connection (10), and choose “Properties” (11) from the menu.Windows8 PPT VPN Setup: Step 7
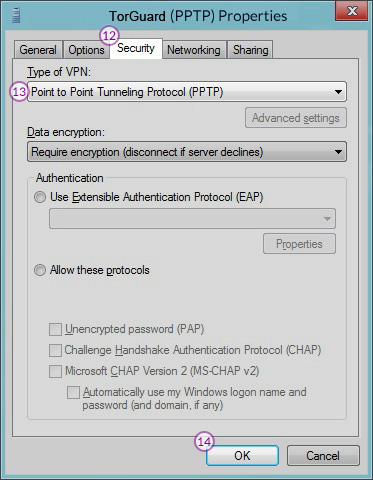
  • Select “Security” tab (12) and for “Type of VPN” select “Point to Point Tunneling Protocol (PPTP)” (13).
    Click “OK” (14).Windows8 PPT VPN Setup: Step 8
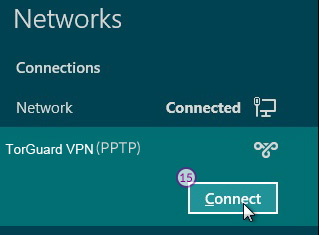
  • Click again on the monitor icon on the bottom right-hand corner, and click “Connect” (15) to “TorGuard VPN (PPTP)”.Windows8 PPT VPN Setup: Step 9
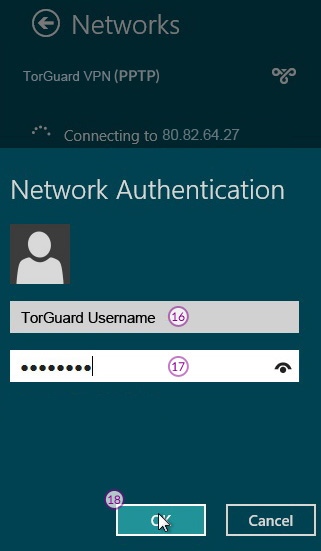
  • In the next fields type your VPN username (16) and password (17) and click “OK” (18).Windows8 PPT VPN Setup: Step 10
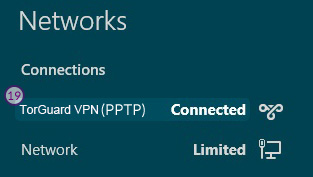
  • When next to “TorGuard VPN (PPTP)” is written “Connected” (19) your connection has been created.Windows8 PPT VPN Setup: Step 11
Share this post