
Want to use your TorGuard VPN service on a pfsense enabled firewall device? This is a very popular setup configuration as running your OpenVPN encryption on a separate firewall box allows both improved VPN performance and security. Pfsense offers top notch OpenVPN support and speeds making it a must have for any home or business network. In this tutorial we will walk you through step by step in configuring OpenVPN service with pfsense.
Don’t be afraid to let our support team know if you run into any questions!
1. Introduction
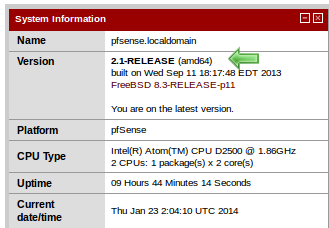
pfSense is a free open source firewall and router solution based on FreeBSD operating system. This tutorial was written using the following version of pfsense:
2. Preparation
Before getting started, we must first download the TorGuard pfsense setup configs from here:
http://torguard.net/downloads/TorGuard.pfsense.zip
Choose one of the server config files to add to pfsense and move to step 3. For this example, we will setup a “TorGuard Netherlands UDP” VPN connection.
3. CA Manager
Navigate to pfsense via your web browser (usually 192.168.1.1). Default username and password is “admin/pfsense”.
Go to System > Cert Manager
Click on the CAs Tab and hit the + button to insert a new CA.
Open the “TorGuard.Netherlands.UDP” file from step 2 and copy/paste the entire CA portion into the Certificate data box. Click Save.
You will now see your CA as follows. You can add multiple CA’s for each VPN connection you wish to add to pfsense. (Notice TorGuard Netherlands CA below)

3. VPN Username/Password Login File
Navigate to Diagnostics > Edit file
Write /root/vpnpassword in the Save/Load from path box.
Add your TorGuard VPN username and password on the first and second line as seen below, then click save:
4. OpenVPN Client
Go to VPN > OpenVPN
Choose the Client tab.
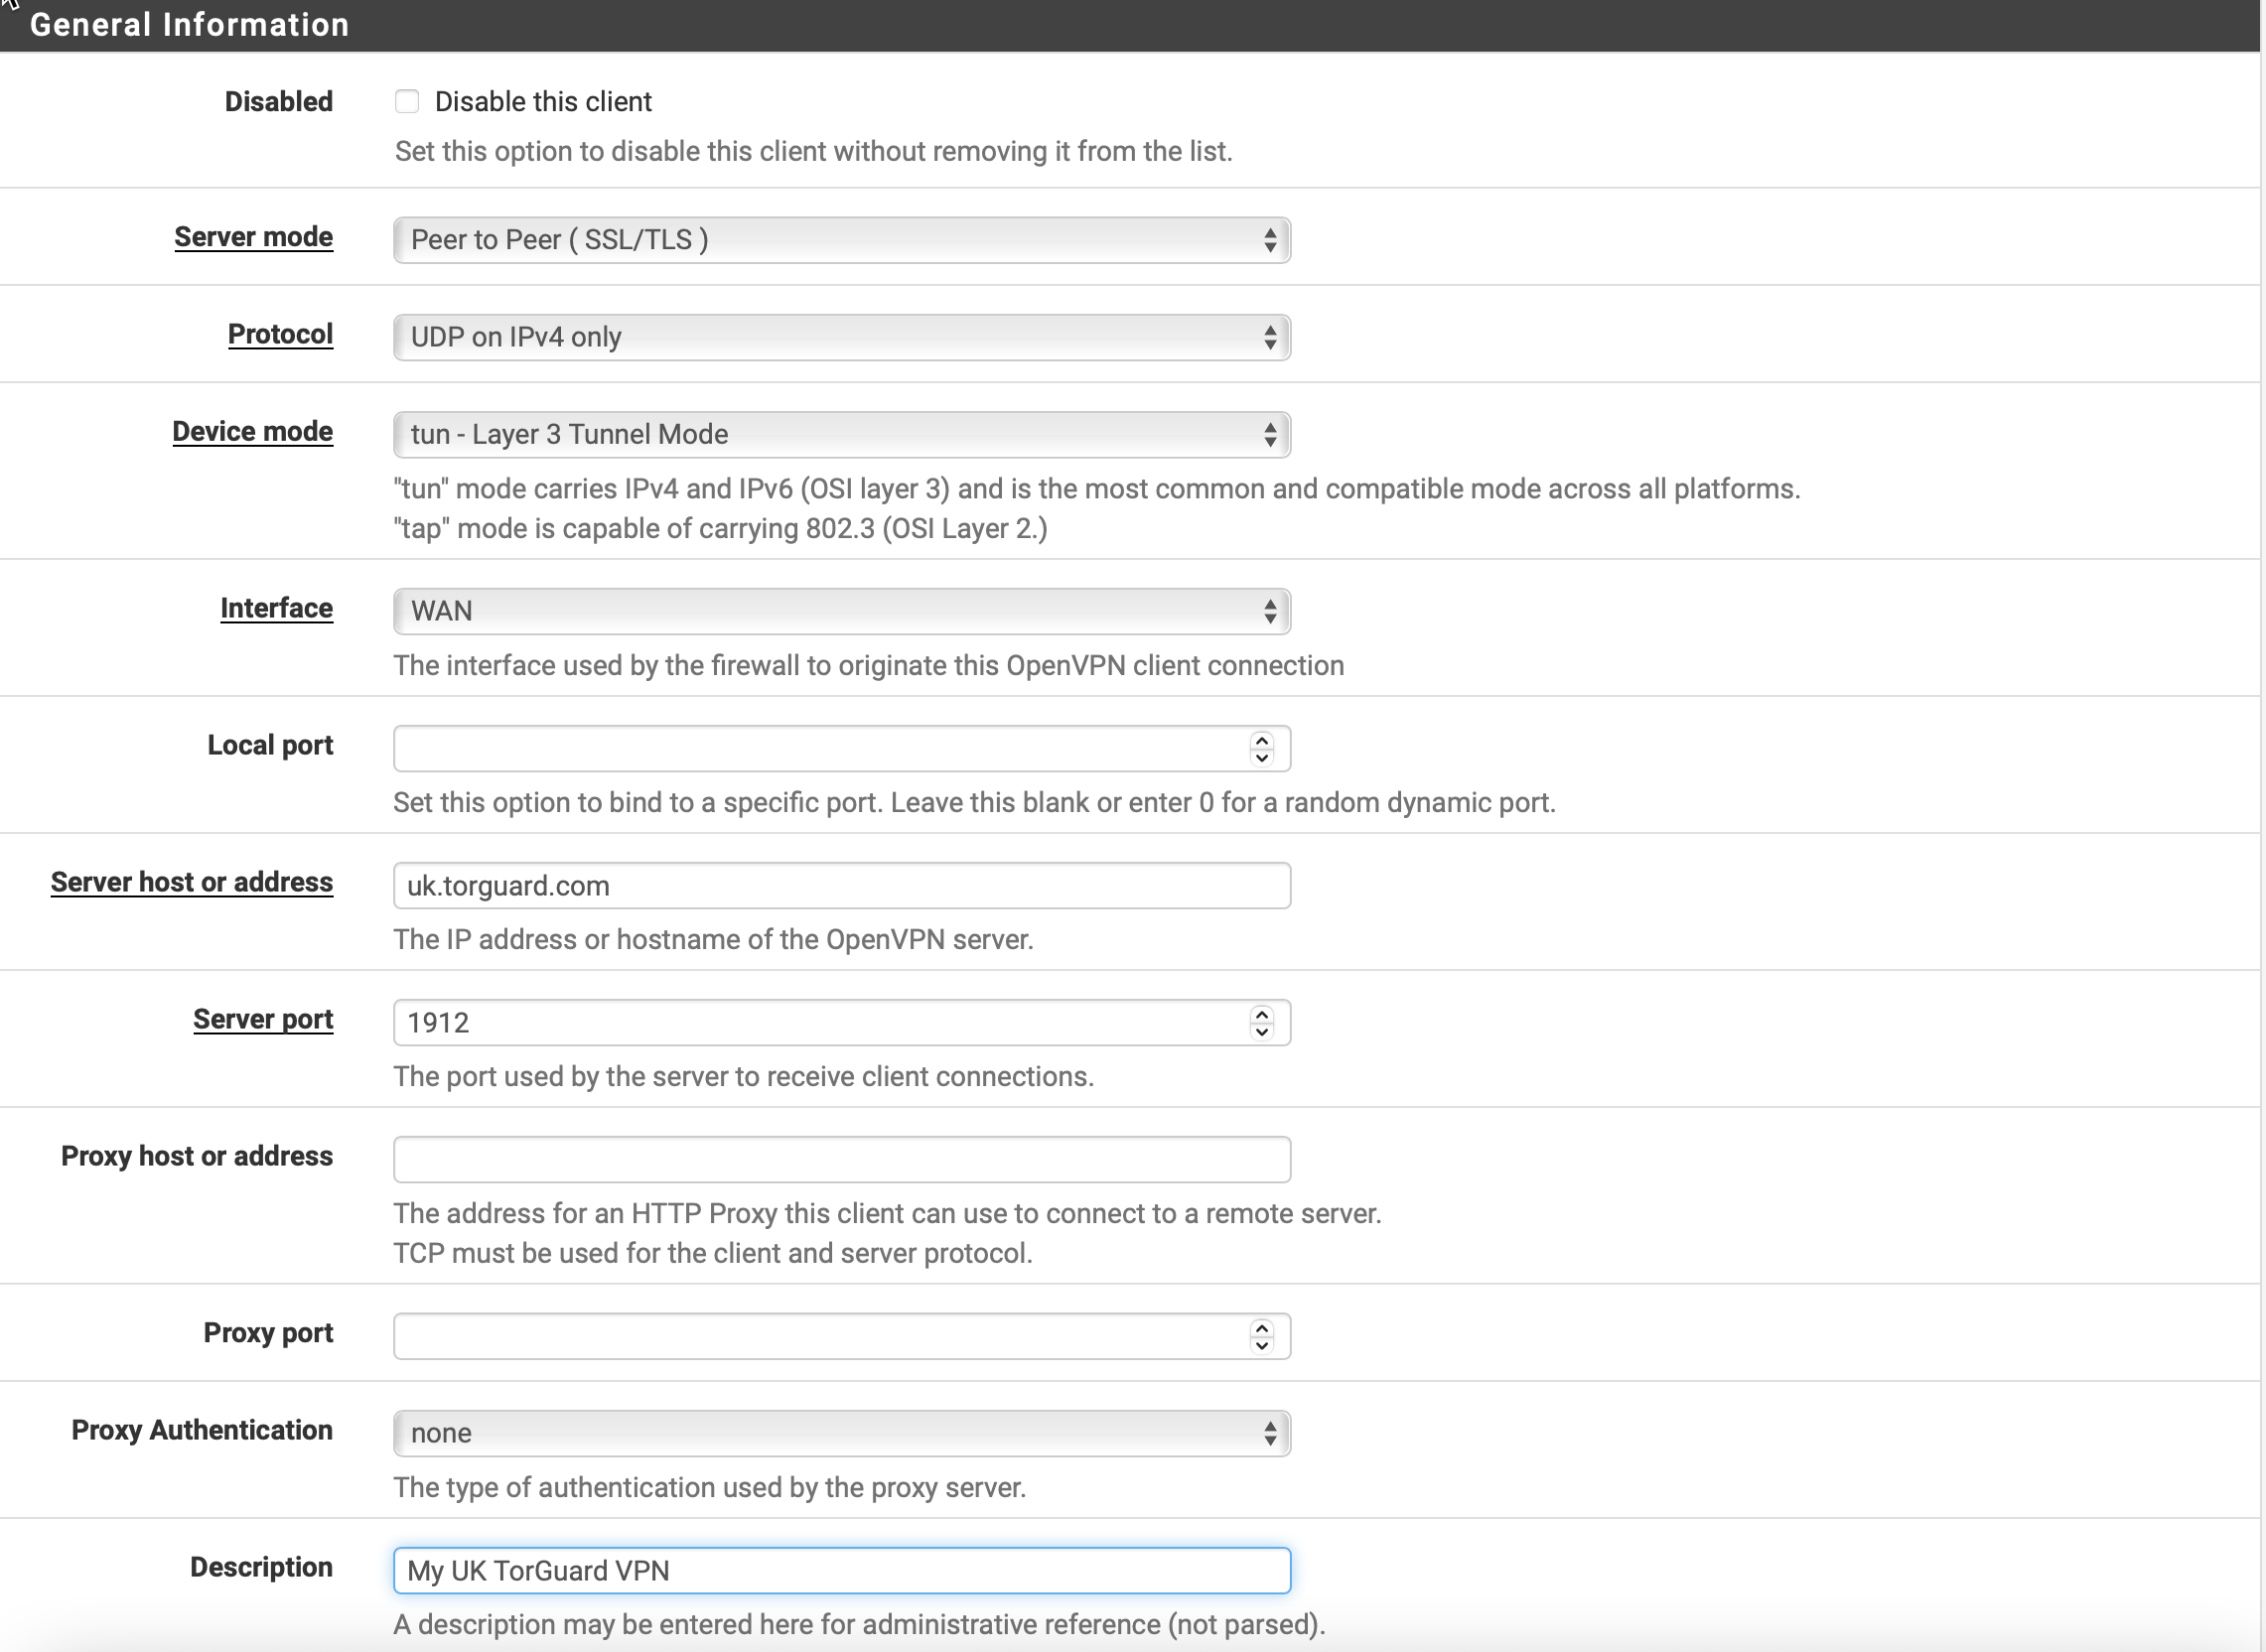
Click on the + button to add a new OpenVPN client connection. Use the following screenshot as a guide:
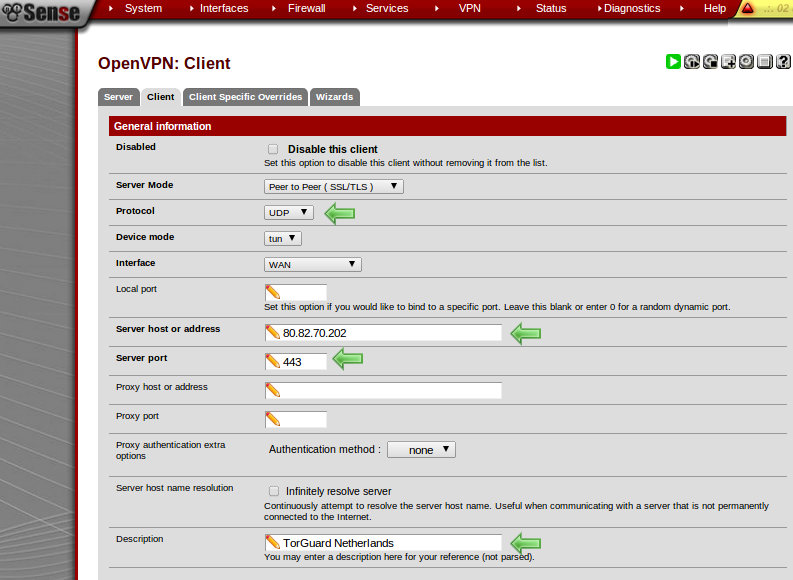
For protocol choose UDP or TCP (depending on server). For host, choose one of the IP’s from the bottom of the config file from step 2. Under Description, name the connection for your reference.
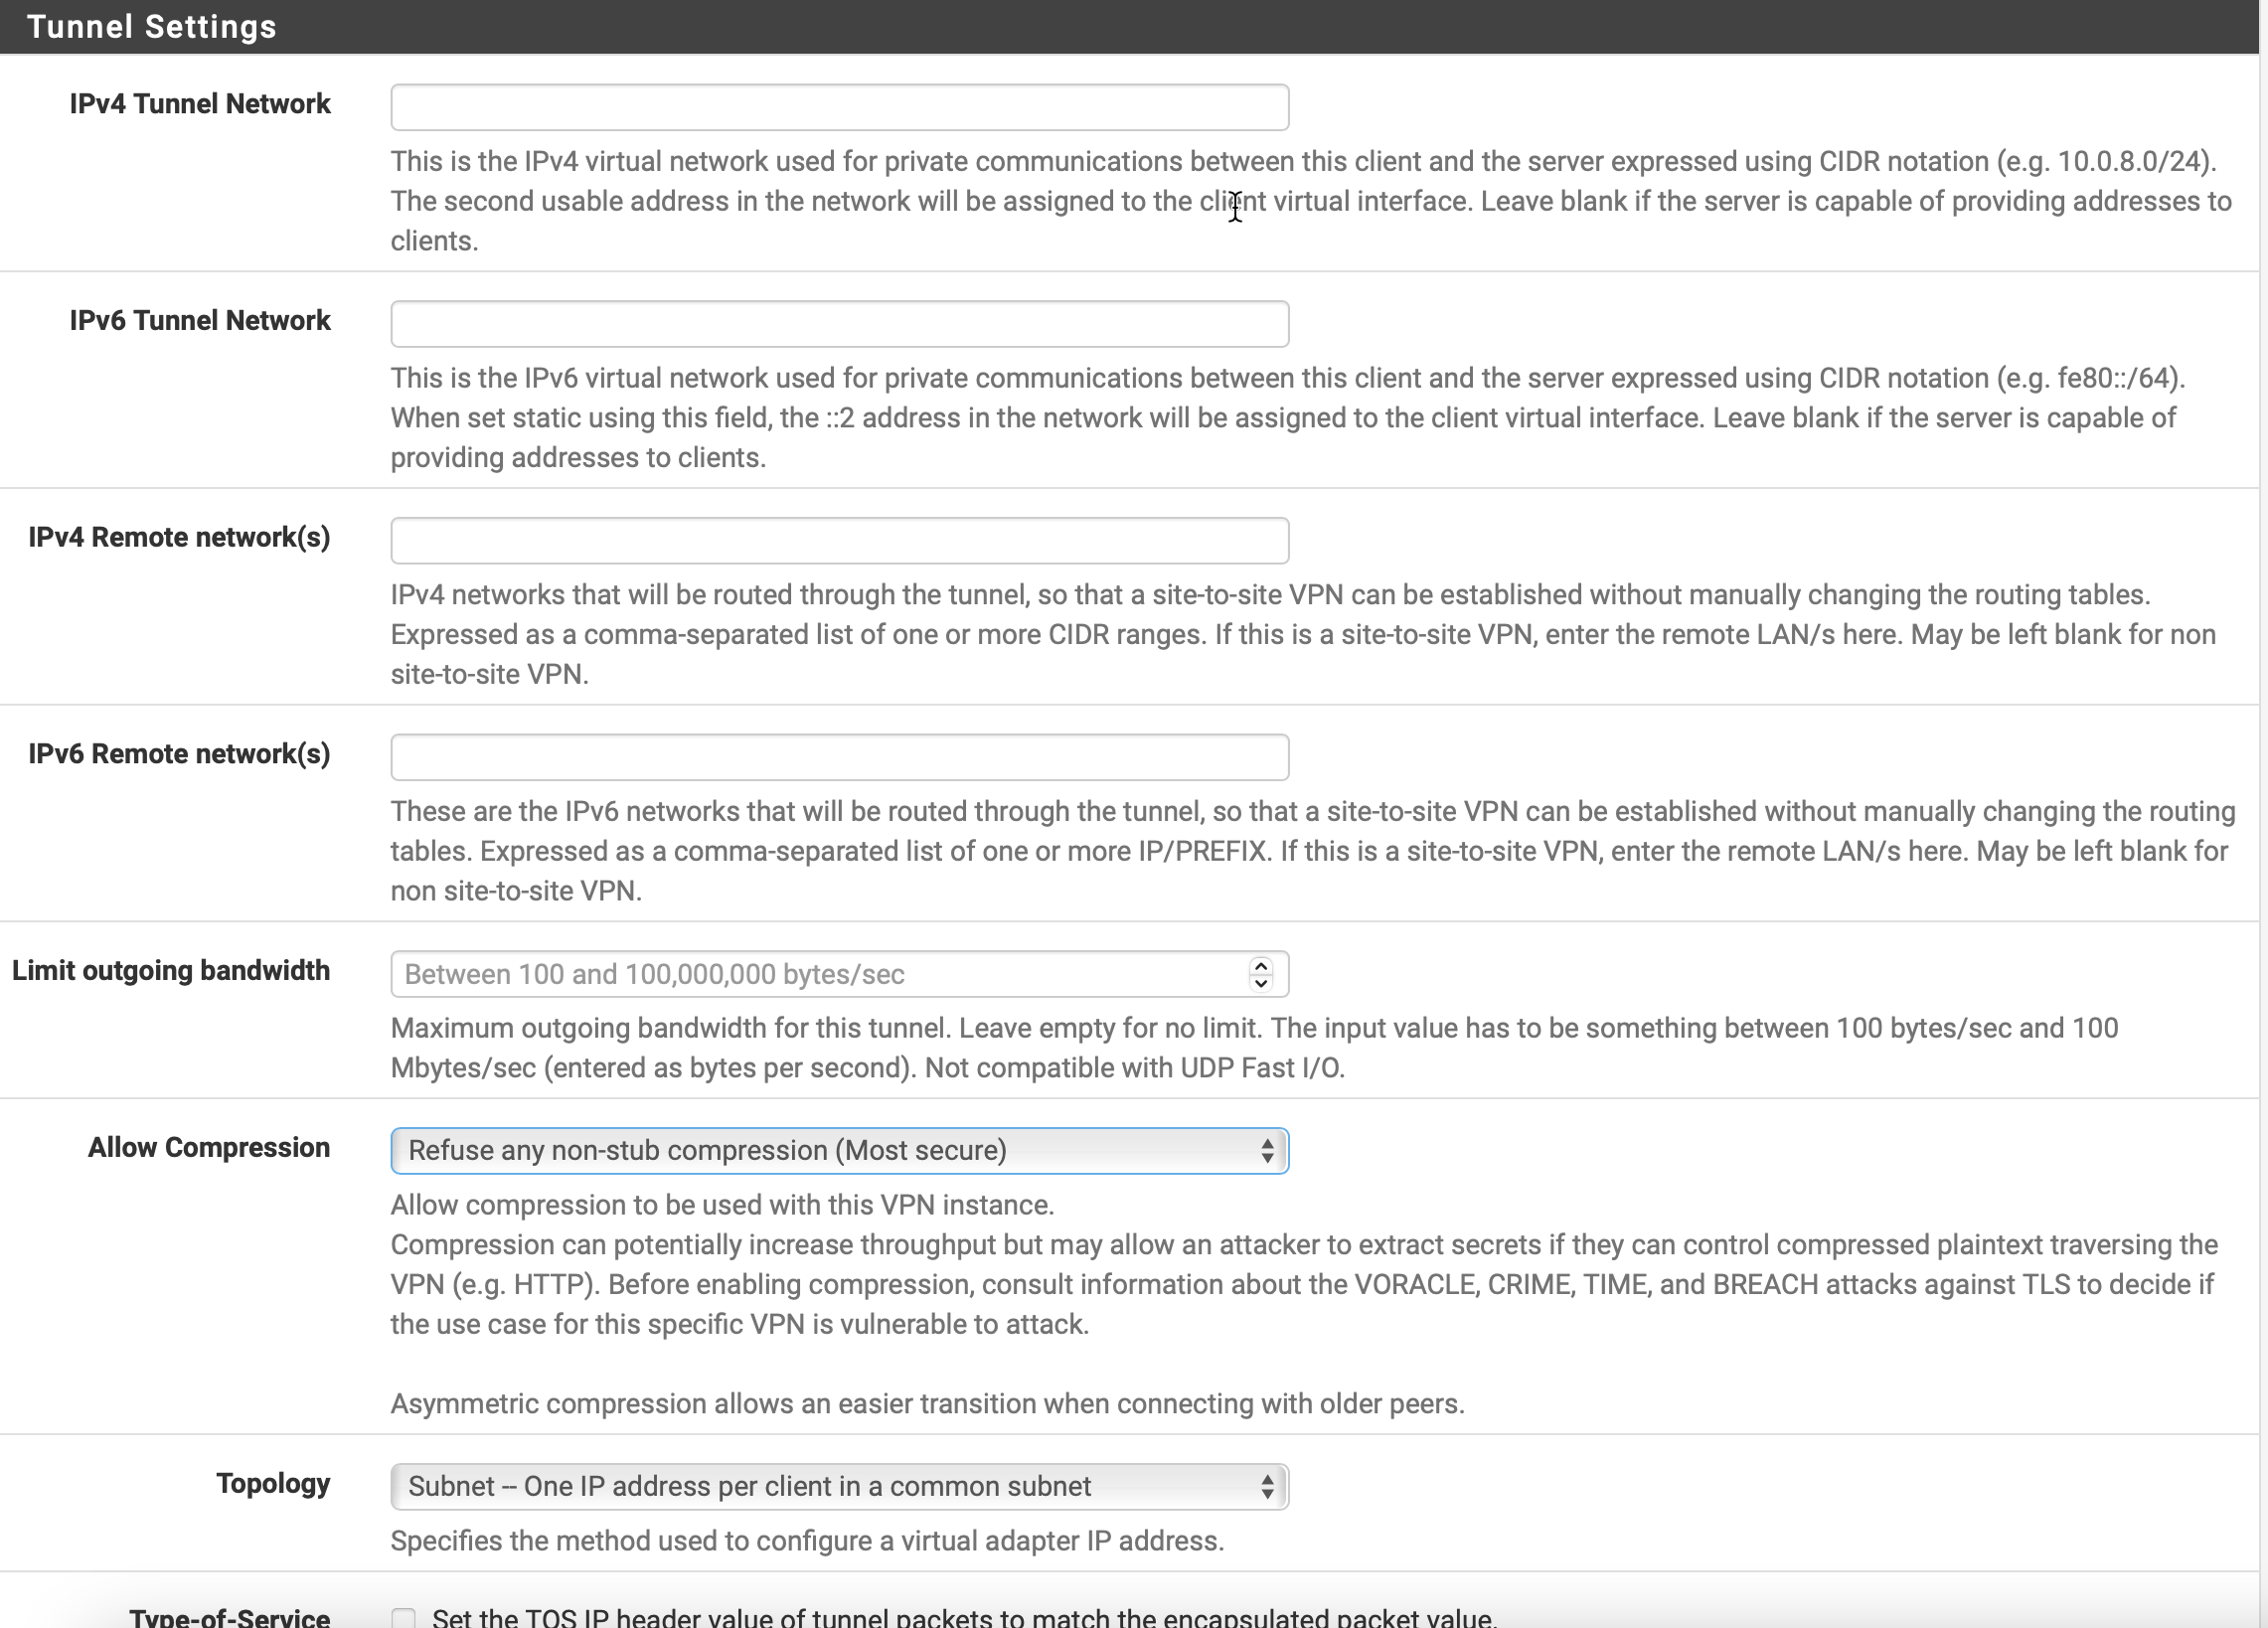
Next, choose the matching Peer Certificate Authority. (For this example – TorGuard Netherlands).
For Encryption algorithm choose BF-CBC 128bit and for Hardware crypto select BSD cryptodev.
Under Advanced Configuration paste the advanced config section from the file in step 2. (This can be found at the end of the config file)
Finally, scroll to the bottom and click save.
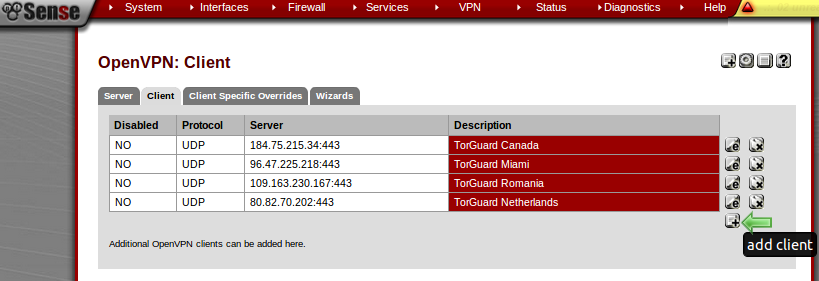
You should now see the new OpenVPN connection as follows:
5. Verify OpenVPN connection
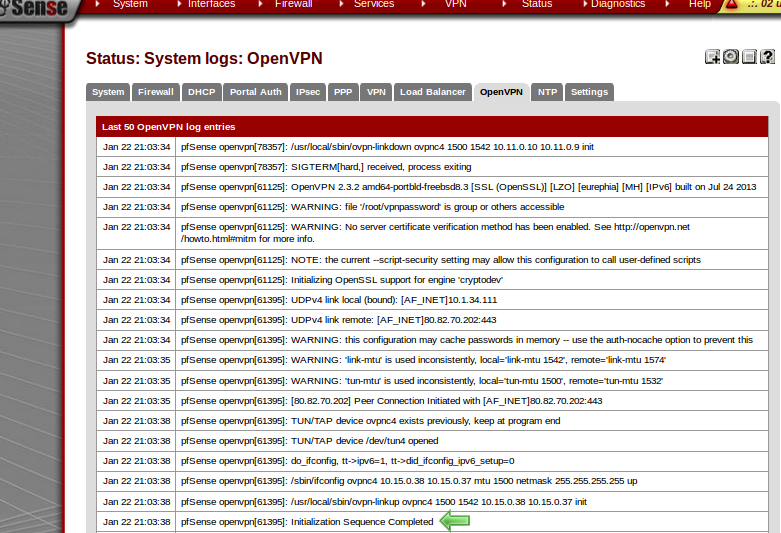
To verify that OpenVPN has connected, go to Status > System Log and choose the OpenVPN tab.
Check the OpenVPN log for the line: Initialization Sequence Completed as seen here:
6. Setup Interfaces
Go to Interface > Assign and click the + button and you will add a new interface OPT1 with a pull down box next to it.
Select TorGuard VPN connection and click Save.
Go to Interfaces and select the OPT1 connection.
Tick Enable Interface and change the description to TorGuardVPN
Tick Block private Networks and Block bogon networks.
Click Save.

7. Firewall
Next go to Firewall > NAT and choose the Outbound tab.
Tick Manual Outbound NAT rule generation (AON – Advanced Outbound NAT) and click save and apply changes.
You should now see a list of outbound rules generated as follows:
Next, go to Firewall > Rules and hit the + button under the LAN tab
Create the following rule:
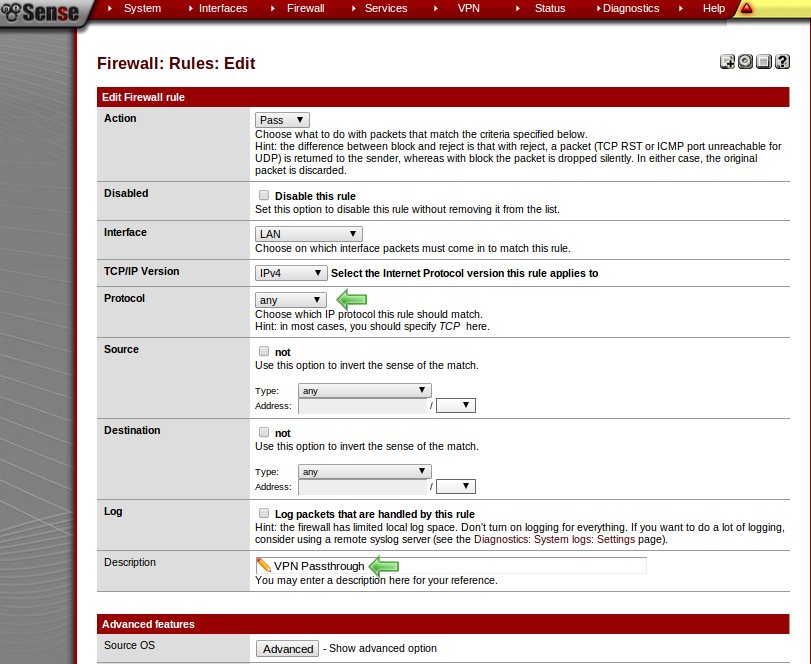
Under Advanced Features select Gateway and choose the TorGuard VPN connection.
Click Save and Apply changes. You should see the following firewall rule:
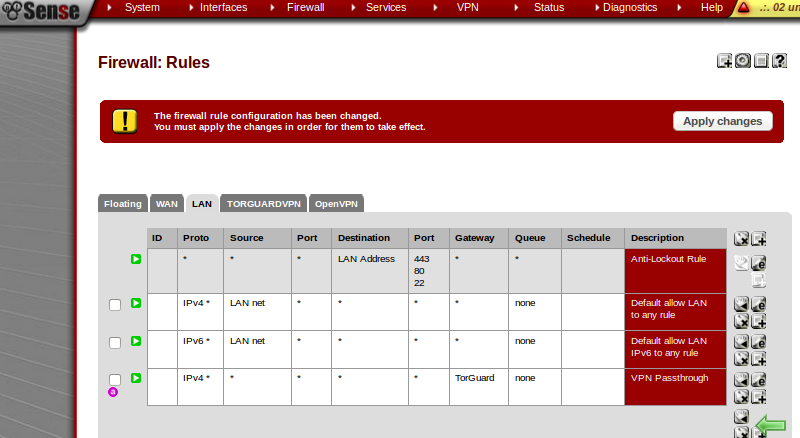
Next, click the TorGuardVPN tab and create the following rule by clicking the + button:
Enter protocol as ANY, enter the Description as “VPN Passthrough”.
Click Save and Apply Changes.
Next, go to System > Routing and choose the Gateways tab.
Hit the e button to edit the TorGuard VPN gateway.
For gateway, choose Dynamic. For Monitor IP, enter 8.8.8.8
Click Save and Apply settings.
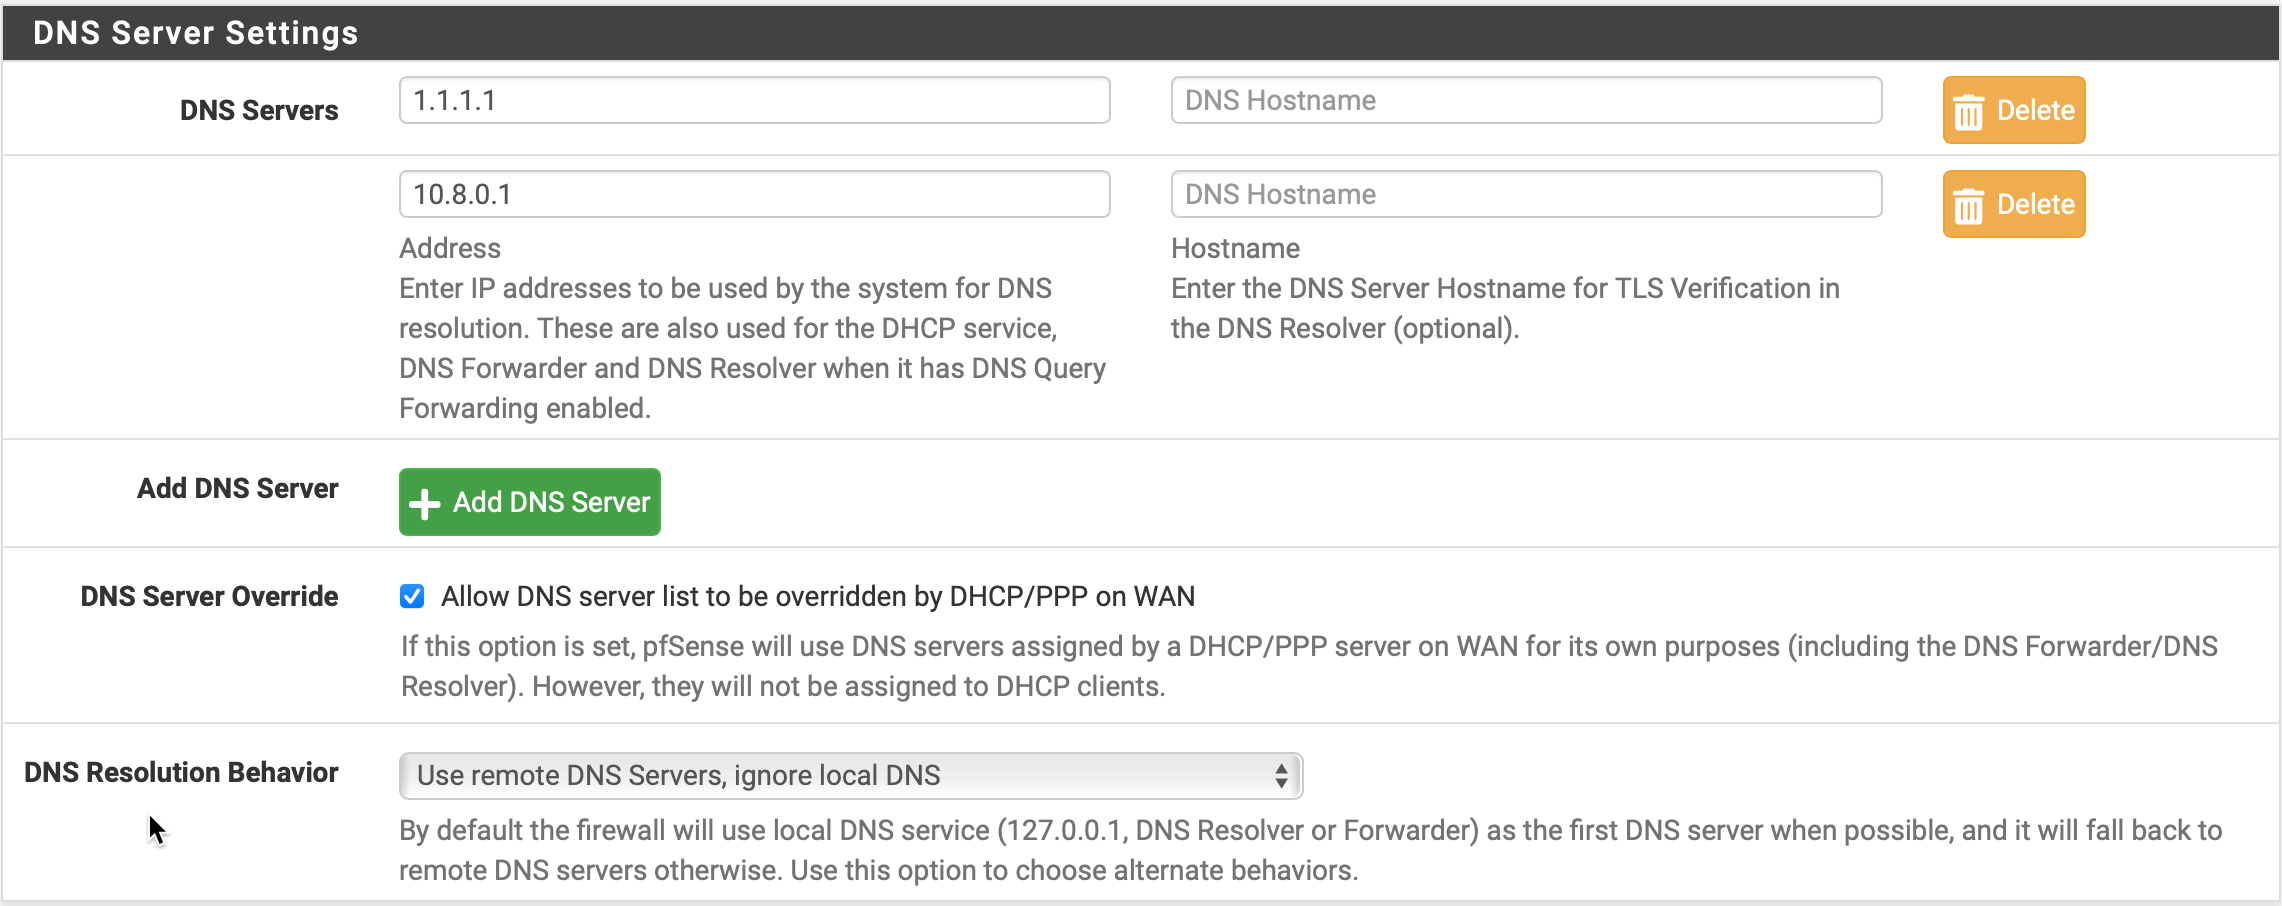
Finally, Go to General Setup. Choose WAN for gateway of all DNS servers. (We suggest using 8.8.8.8 and 8.8.4.4). Hit Save.
Done! At this point your OpenVPN connection has been setup on the pfsense box. You can now visit whatismyip.com to see the TorGuard VPN IP address and connection.
8. Start/Stop OpenVPN tunnel
You can now checkthe status of your OpenVPN tunnel by clicking Status > OpenVPN.
Here you can see all the VPN connection options and can start/stop each VPN connection using the play and stop buttons as seen here: