

Forwarding ports on your local router isn’t always a straightforward process. It often involves navigating complicated settings and, more importantly, it exposes your personal IP address to the internet—compromising your privacy and security. That’s why TorGuard offers instant port forwarding on any shared, dedicated, or residential IP in our network. With just a few clicks in the TorGuard member’s area, you can configure a port forward instantly.
In this guide, we’ll walk you through how easy it is to set up instant VPN port forwarding with TorGuard.
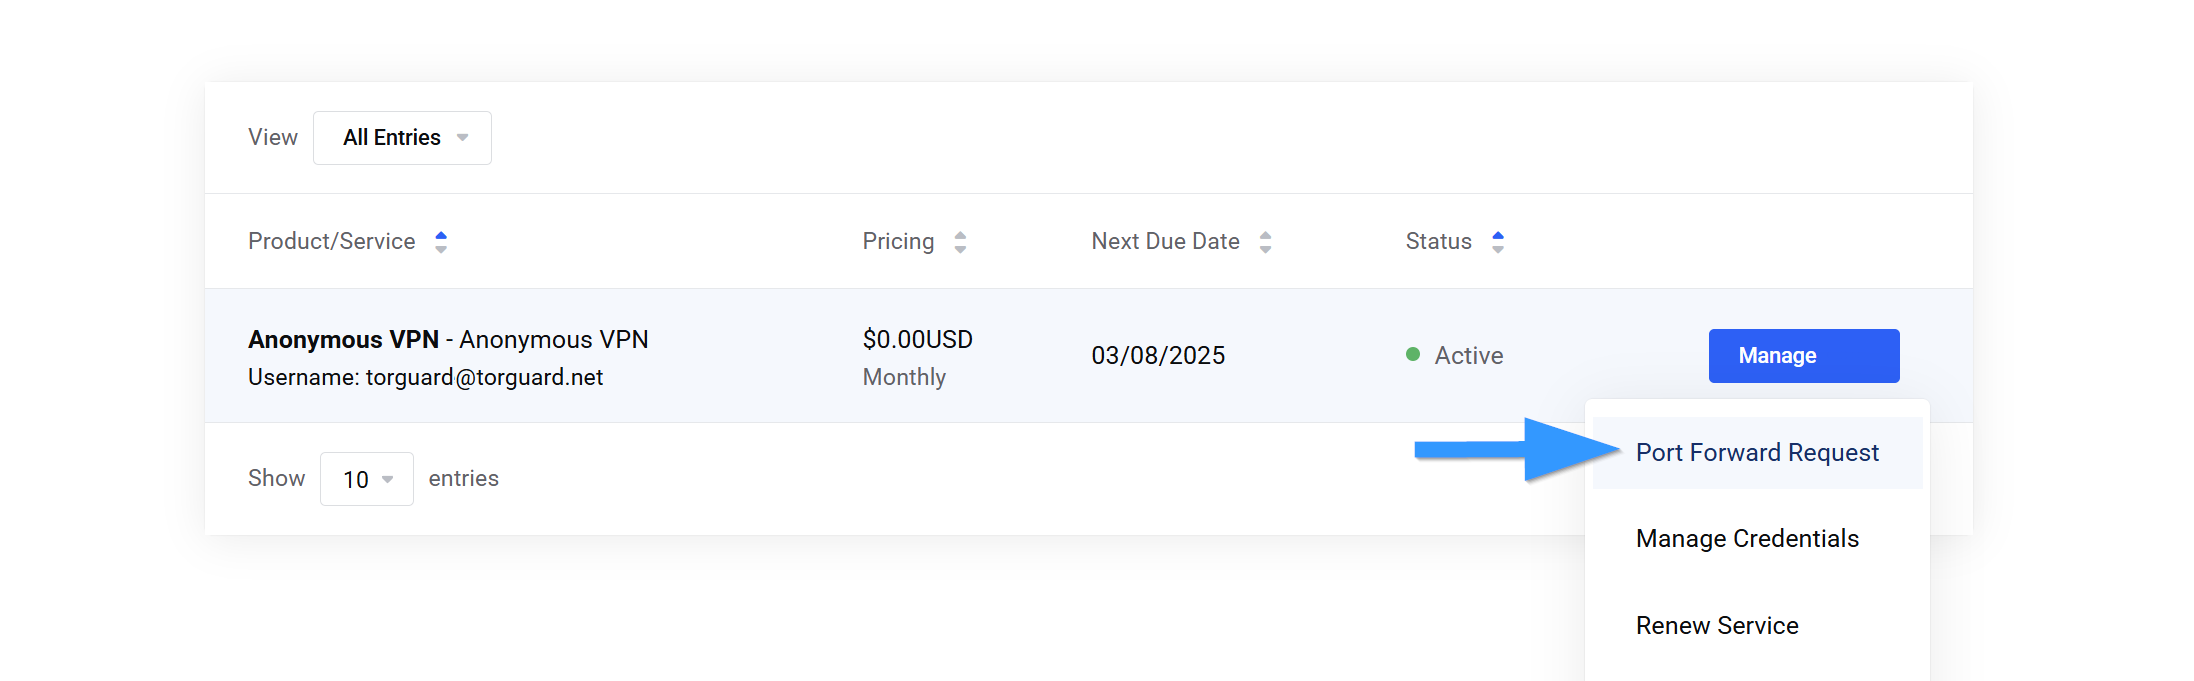
Step 1: Choose Your VPN IP for Port Forwarding
- Log into the TorGuard member’s area.
- Select your active VPN service.
- Click on “Port Forward Request” to proceed.
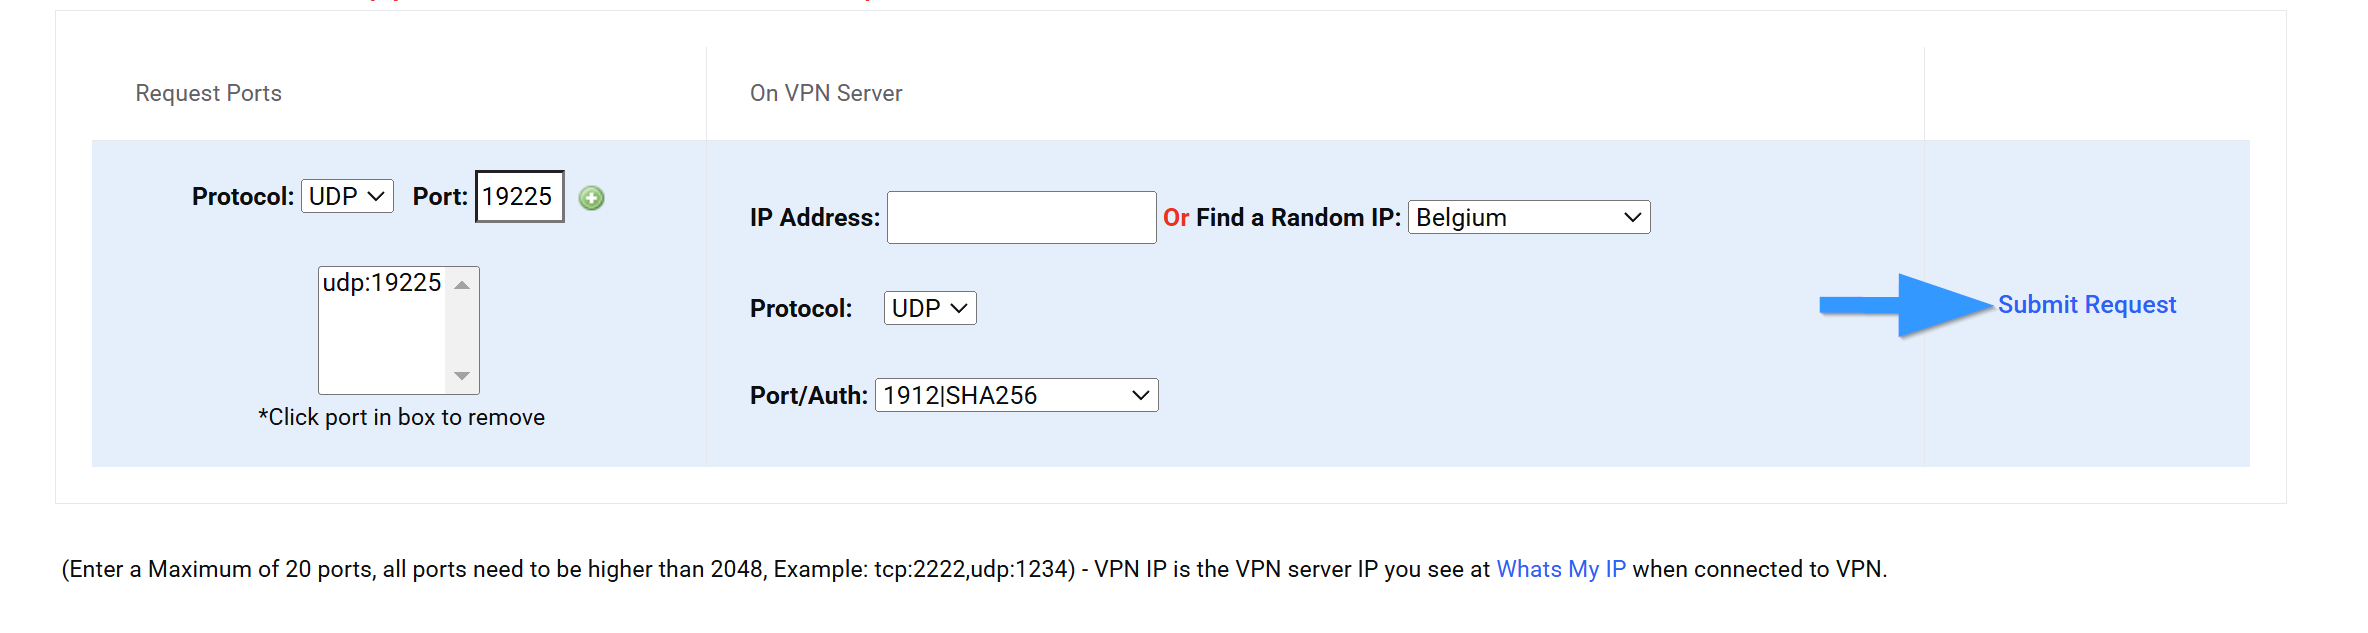
Step 2: Configure Your Port Forward Request
- In the Port Forward Manager, choose the port you want to forward (UDP or TCP).
- Click the + button to add the port.
- Enter the exact shared, dedicated, or residential VPN server IP, along with the protocol (UDP/TCP) and the port/auth you wish to assign.
- If you don’t have a specific IP in mind, you can select a country from the dropdown menu—TorGuard will randomly assign an IP from that region.
- Click “Submit Request” to deploy your port forward.
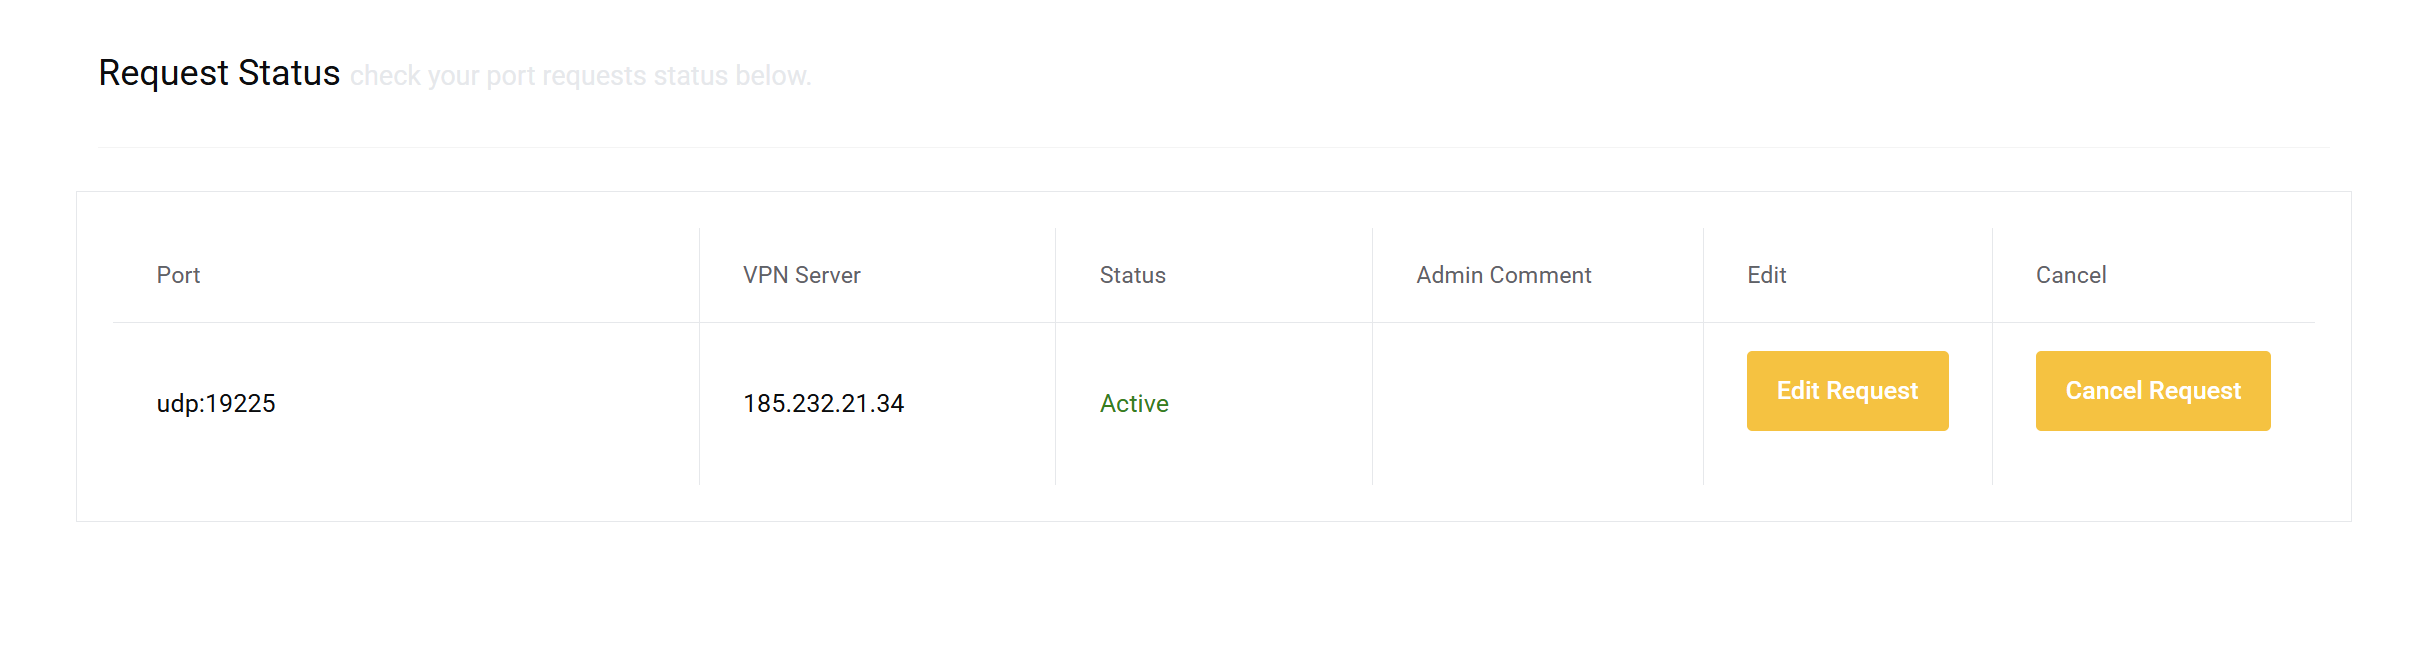
Once submitted, you will see your active port forward request displayed, with the option to edit or cancel if needed. Be sure to note the assigned IP address and port/protocol, as you’ll need this in the next step.
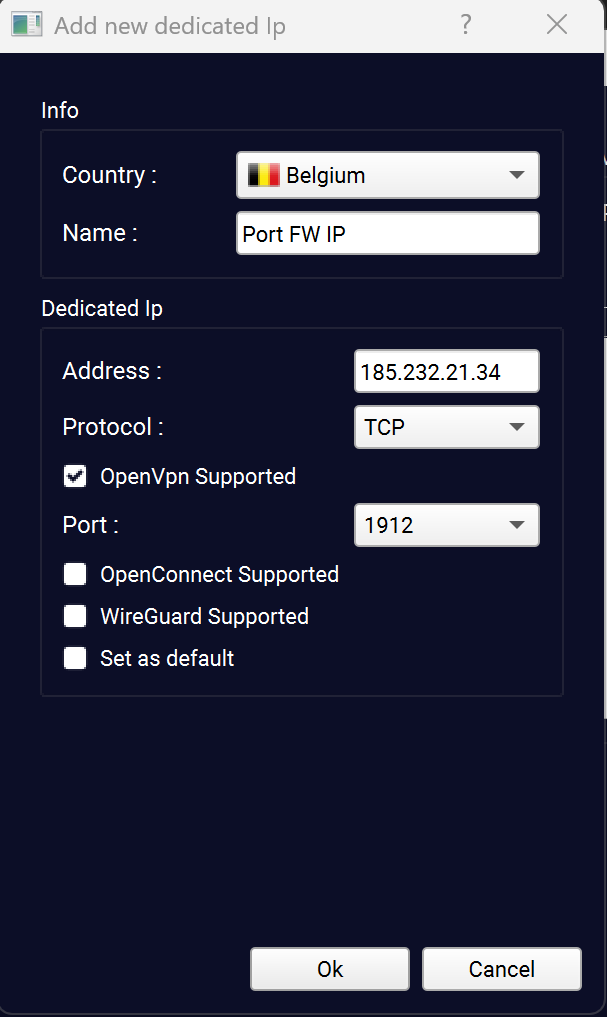
Step 3: Add Your Port Forward IP in the TorGuard VPN App
- Open the TorGuard VPN app.
- Navigate to Settings > Servers > Add.
- Select the country, enter a name for the server, and input the port forward IP address exactly as it appears in the request panel.
- Choose the protocol (UDP/TCP).
- Check the OpenVPN Supported checkbox.
- Enter the same Auth Port that you set in the forwarding panel.
- Click OK, then Save.
Your new port-forwarded VPN server should now appear in the server dropdown list.
Step 4: Connect and Use Your Port Forward
- Select your port-forwarded VPN server from the dropdown list.
- Click Connect.
- Set your application to listen on the forwarded port.
- For example, if your forwarded port is 19225, configure your application to listen on this port.
- Verify your port forwarding by visiting canyouseeme.org while connected to your VPN.
That’s it! Your port forward is now active, and your application can communicate through it securely over the VPN.
Why Use VPN Port Forwarding?
Port forwarding is essential for many online applications, including:
- P2P – Improve speeds and connectivity for peer-to-peer transfers.
- Hosting Game Servers – Allow friends or teammates to connect directly to your game server.
- Remote Access to Services – Securely access self-hosted applications from anywhere.
- Home Security & IoT Devices – Maintain remote access without exposing your public IP.
- VoIP & Communication Apps – Ensure stable connections for voice and video calls.
With TorGuard’s instant port forwarding, you can optimize your VPN experience while keeping your real IP address hidden and your network secure.
Ready to set up port forwarding? Log into TorGuard today and get started!
