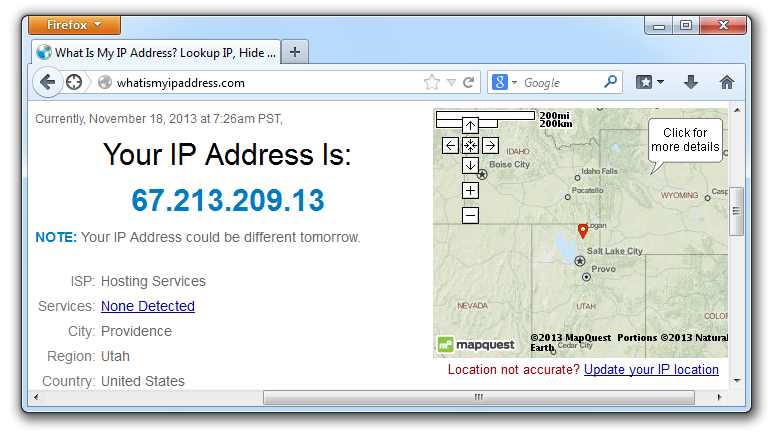

Setup a SSH tunnel with TorGuard & Bitvise:
This tutorial will show in a few steps how one can setup a secure ssh tunnel using Bitvise and TorGuard ssh tunnel service. To order ssh tunnel service just select this added feature during checkout, or contact our support team to have it added to your account. Adding a private SSH tunnel to your browsing session adds another valuable layer of anonymity, security, and encryption. SSH tunnels are also very effective at bypassing strict firewalls like those that are prevalent in China and Iran. Or, maybe your workplace has strict rules blocking all VPN access and you just want to get on facebook. Whatever the reason may be, ssh tunnels are a great way for stealth access to the open web. Follow these easy steps to enable Firefox web browser with windows SSH tunnel service:
1.) First, download and install Bitvise from this link:
http://dl.bitvise.com/BvSshClient-Inst.exe
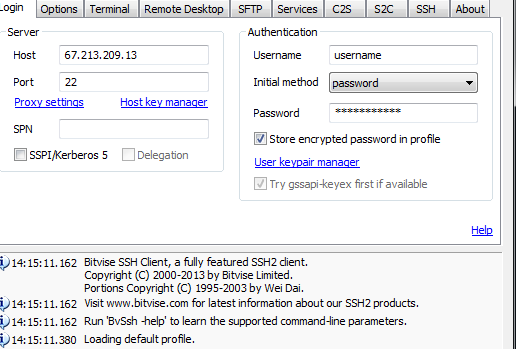
2.) Next, open bitvise and enter the following info under the “login” tab:
Host: Select this server IP from the “My Servers” page in the members area.
Port: 22
Username: TorGuard VPN/Proxy Username
Password: TorGuard VPN/Proxy Password
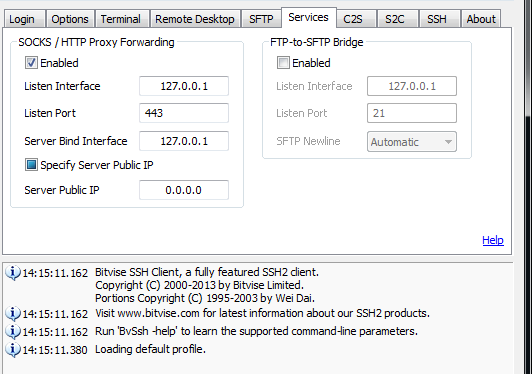
3.) Then click the “services” tab and enter the following info:
Socks/HTTP Proxy Forwarding: Check this box as “enabled”
Listen Interface: 127.0.0.1
Listen Port
: 443
Server Bind Interface: 127.0.0.1
Server Public IP : 0.0.0.0
4.) Finally, open firefox web browser. Select options from the top menu, click “advanced” and under the “Network” tab click the settings button as seen below:
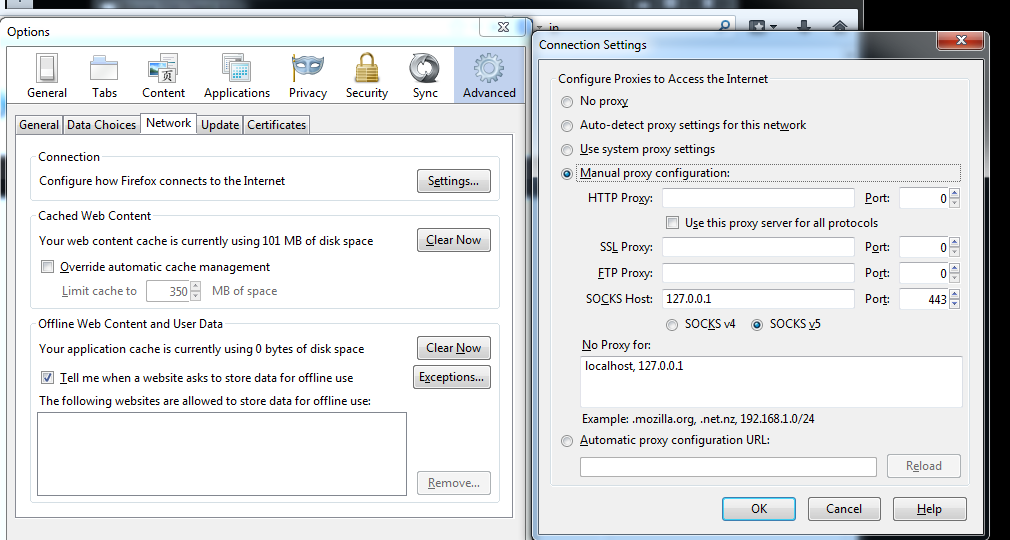
Then on the connection settings window select the following:
Select “Manual Proxy config..”: Check this radio button
Socks Host: 127.0.0.1
Port : 443
Click OK. You have now setup firefox to run through a secure SSH tunnel: