In today’s interconnected world, the sovereignty of your digital footprint is not just a luxury but a necessity. TorGuard’s Private Cloud WireGuard services helps users control their own data by offering the means to remotely access their router through a fortified VPN tunnel, providing a shielded avenue to a home or office domain. This capability is a game-changer, liberating users from the confines of physical location and providing the freedom to manage and monitor their digital space from anywhere in the world.
The evolution of this technology also heralds a shift away from reliance on third-party cloud storage security camera services. While platforms like Ring or Nest have set a high bar with their advanced AI image detection capabilities, discerning users are increasingly cognizant of the implications of storing sensitive footage on external cloud servers. In essence, the "cloud" is merely a term for someone else’s computer, so why not redirect the path to one's own?
Enter the era of self-sufficiency in home security: With a Raspberry Pi at the helm, running PrivateRouter OpenWRT, bolstered by TorGuard WireGuard VPN, enhanced with the Frigate NVR, and empowered by the AI prowess of a Google Coral device, it's entirely feasible to architect your own NVR camera security system. This stack not only matches the industry standards in AI image detection but also plants the seeds of privacy firmly in your own backyard. In this blog post, we will guide you through the seamless integration of these powerful components to create a robust, self-hosted security system that you control.
Your Hardware Checklist
Embarking on the journey to enhance your home security with a self-hosted AI NVR camera system begins with gathering the right hardware. For the fortunate ones who snagged a Raspberry Pi during our Black Friday giveaway, you’re already halfway there. Your prize package, packed with the essentials, is on its way. The cornerstone of your setup is a Raspberry Pi 4, equipped with a microSD card boasting a capacity of at least 250GB, pre-loaded with PrivateRouter OpenWRT. For those who prefer to craft their own kit, the PrivateRouter store offers a ready-to-go option. Alternatively, the tech enthusiasts reading this might opt to flash our specially curated rpi4 image from GitHub onto your microSD card. Remember, if you're going the DIY route, use the squashfs image, then carve out the remaining space as an ext4 partition and mount it within OpenWRT as /opt/docker2.
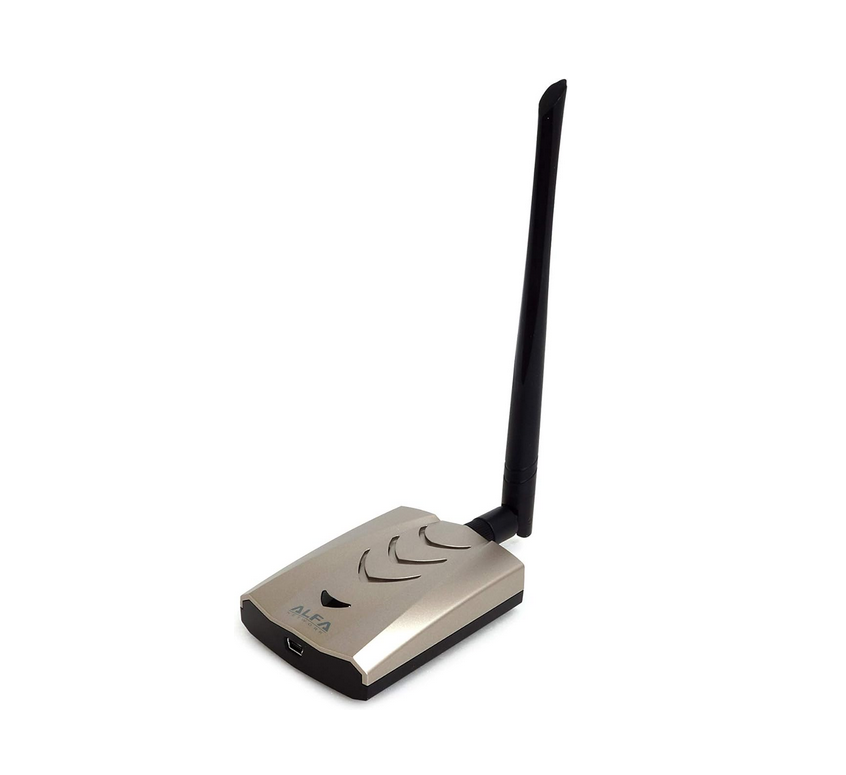
A robust WiFi connection is vital for seamless communication between your devices. To this end, your Raspberry Pi will require a competent WiFi USB adapter. We highly recommend the Alfa AWUS036ACHM for its mesh WiFi capabilities, ensuring coverage extends to every corner where your NVR cameras reside. This adapter doesn’t just connect; it excels by supporting our OpenWRT Mesh WiFi App, transforming your Raspberry Pi 4 into a dual-purpose powerhouse acting as both the WireGuard gateway and Mesh server for local DHCP. Simplified, this means your Pi will assign IP addresses to each NVR camera, facilitating access through a mesh WiFi node. For setting up the mesh network, follow this guide.
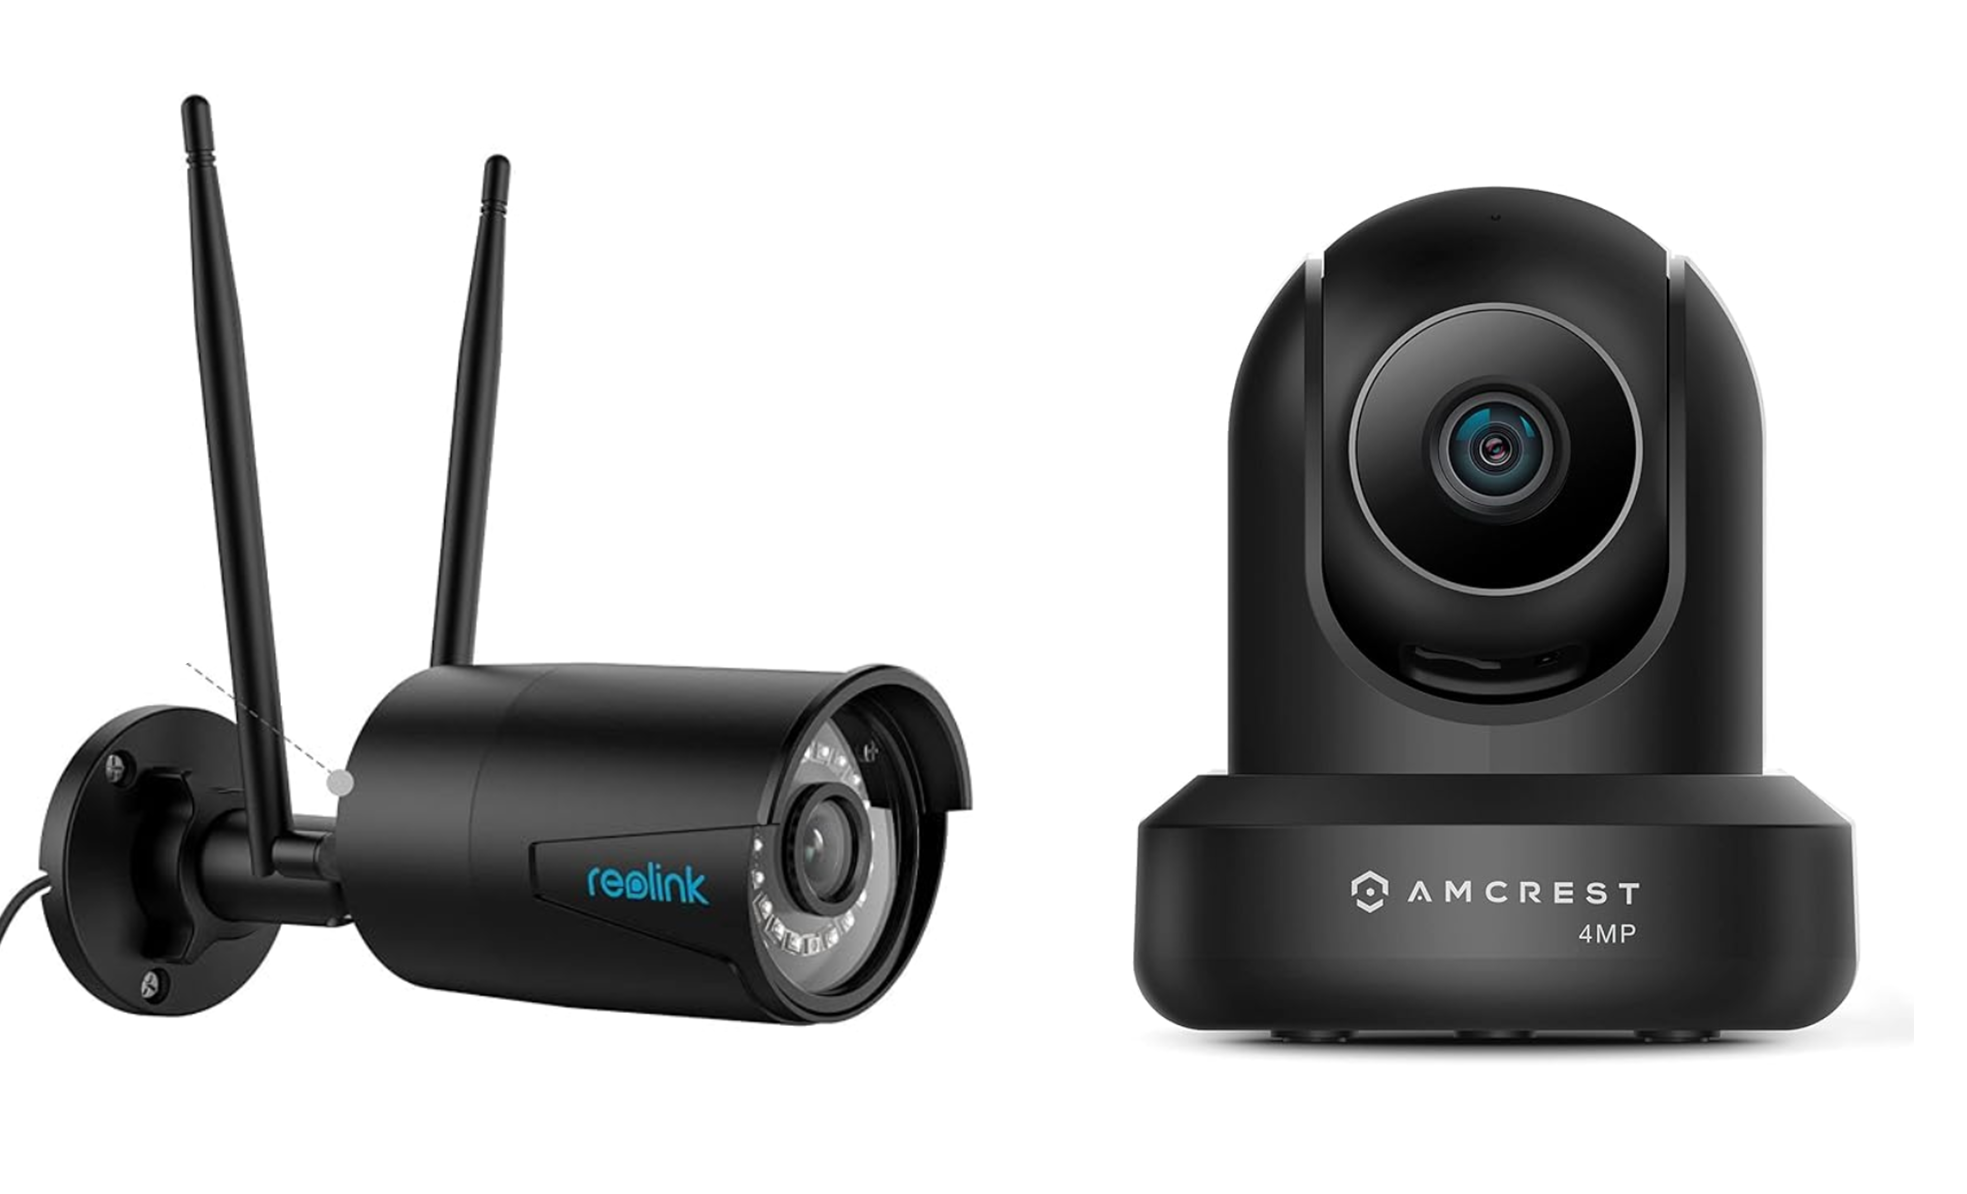
No security system is complete without the eyes of the network – the cameras. In an age where most cameras nudge you towards using proprietary apps and cloud services, we’ve scoured the market for the most autonomous and reliable options. For indoor monitoring, the Amcrest 4MP ProHD camera stands out, while the REOLINK Plug-in WiFi Outdoor Security Camera is our top pick for keeping an outdoor vigil. Both camera models allow direct access to the camera’s interface via IP, bypassing the need for manufacturer’s software and enabling the use of your chosen video recording solution.

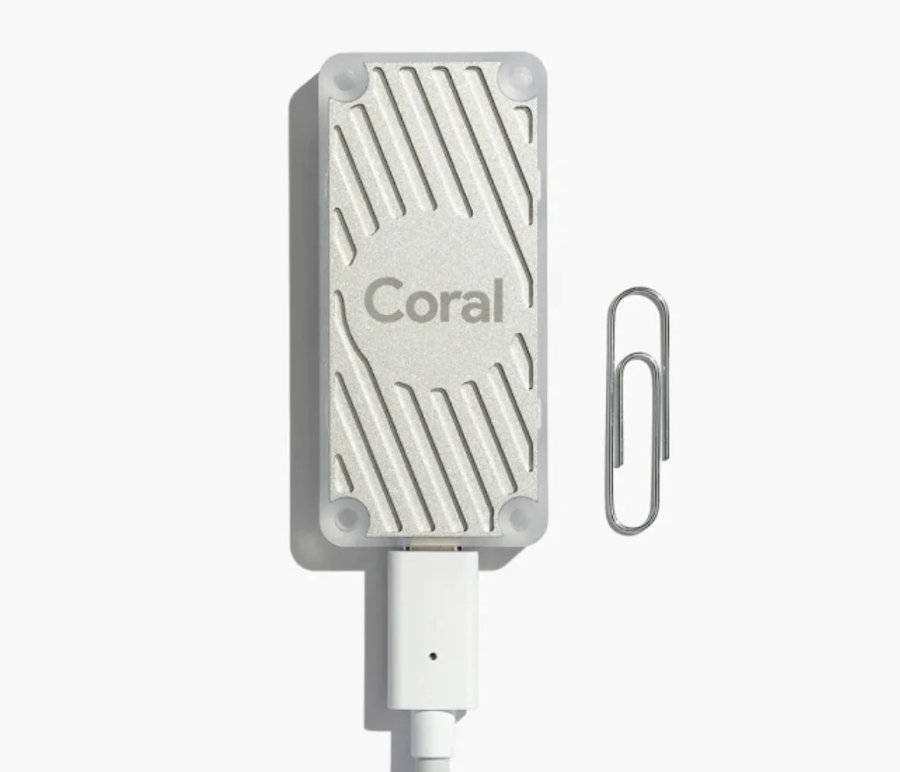
Finally, to infuse your system with cutting-edge AI capabilities, you’ll require a Google Coral USB Edge TPU Accelerator. This nifty device acts as a dedicated coprocessor, augmenting your Raspberry Pi’s brain with a local sliver of artificial intelligence – all while charmingly signaling its 'thought processes' with a glow. With these components in hand, you’re ready to move to the next step: bringing this ensemble of technology to life.
Setting up Remote VPN Access with TorGuard

If you want to access your NVR cams remotely, you’ll need an active TorGuard Private VPN Cloud account. Once you’ve secured this, the next steps involve generating a WireGuard configuration specifically for remote access. TorGuard has a detailed tutorial guiding you through this process. Once you have your Wireguard configuration file, it's a simple matter of copying and pasting the config into your Rpi4.
Navigate to the "VPN" section of your OpenWRT interface, and then to "TorGuard WireGuard". Paste your Wireguard configuration here. An important step during this setup is to ensure that you select 'LAN' from the firewall dropdown menu. This action is vital as it grants you access through Wireguard to the local IP range that your security cameras operate on, ensuring seamless connectivity.
With the configuration saved, you simply need to click the 'Start Wireguard' button to activate the VPN tunnel. Your Rpi4 is now a gateway fortified by the security and privacy of WireGuard.
But why stop at the Rpi4? The TorGuard management panel allows you to create additional WireGuard peer configurations. Whether it's for your laptop, mobile phone, or any other device, you can establish secure connections to your Rpi4 WireGuard gateway. This multi-peer setup means you can manage your security system from multiple devices, offering you the ultimate in convenience and control. Secure access, comprehensive coverage, and peace of mind are now at your fingertips, no matter where your travels might take you.
Configuring Frigate with Your NVR Camera
The next step in our security system odyssey is to install and configure Frigate on your PrivateRouter Pi4. But first, let’s demystify Frigate: it’s an open-source NVR (Network Video Recorder) that harnesses the power of real-time AI object detection. This means that instead of sending your camera feeds off to a distant cloud server for analysis, all the processing happens right on your own hardware, in the privacy of your home.
Traditional NVR systems rely on motion detection, which often leads to a deluge of false alarms and wasted storage space. Frigate, coupled with the Google Coral TPU, elevates your home security system to new heights by discerning whether the motion detected is by a person, a vehicle, or just a stray animal. This AI-driven approach means your modest hardware becomes a vigilant sentinel, providing accurate alerts without the need for constant fine-tuning.

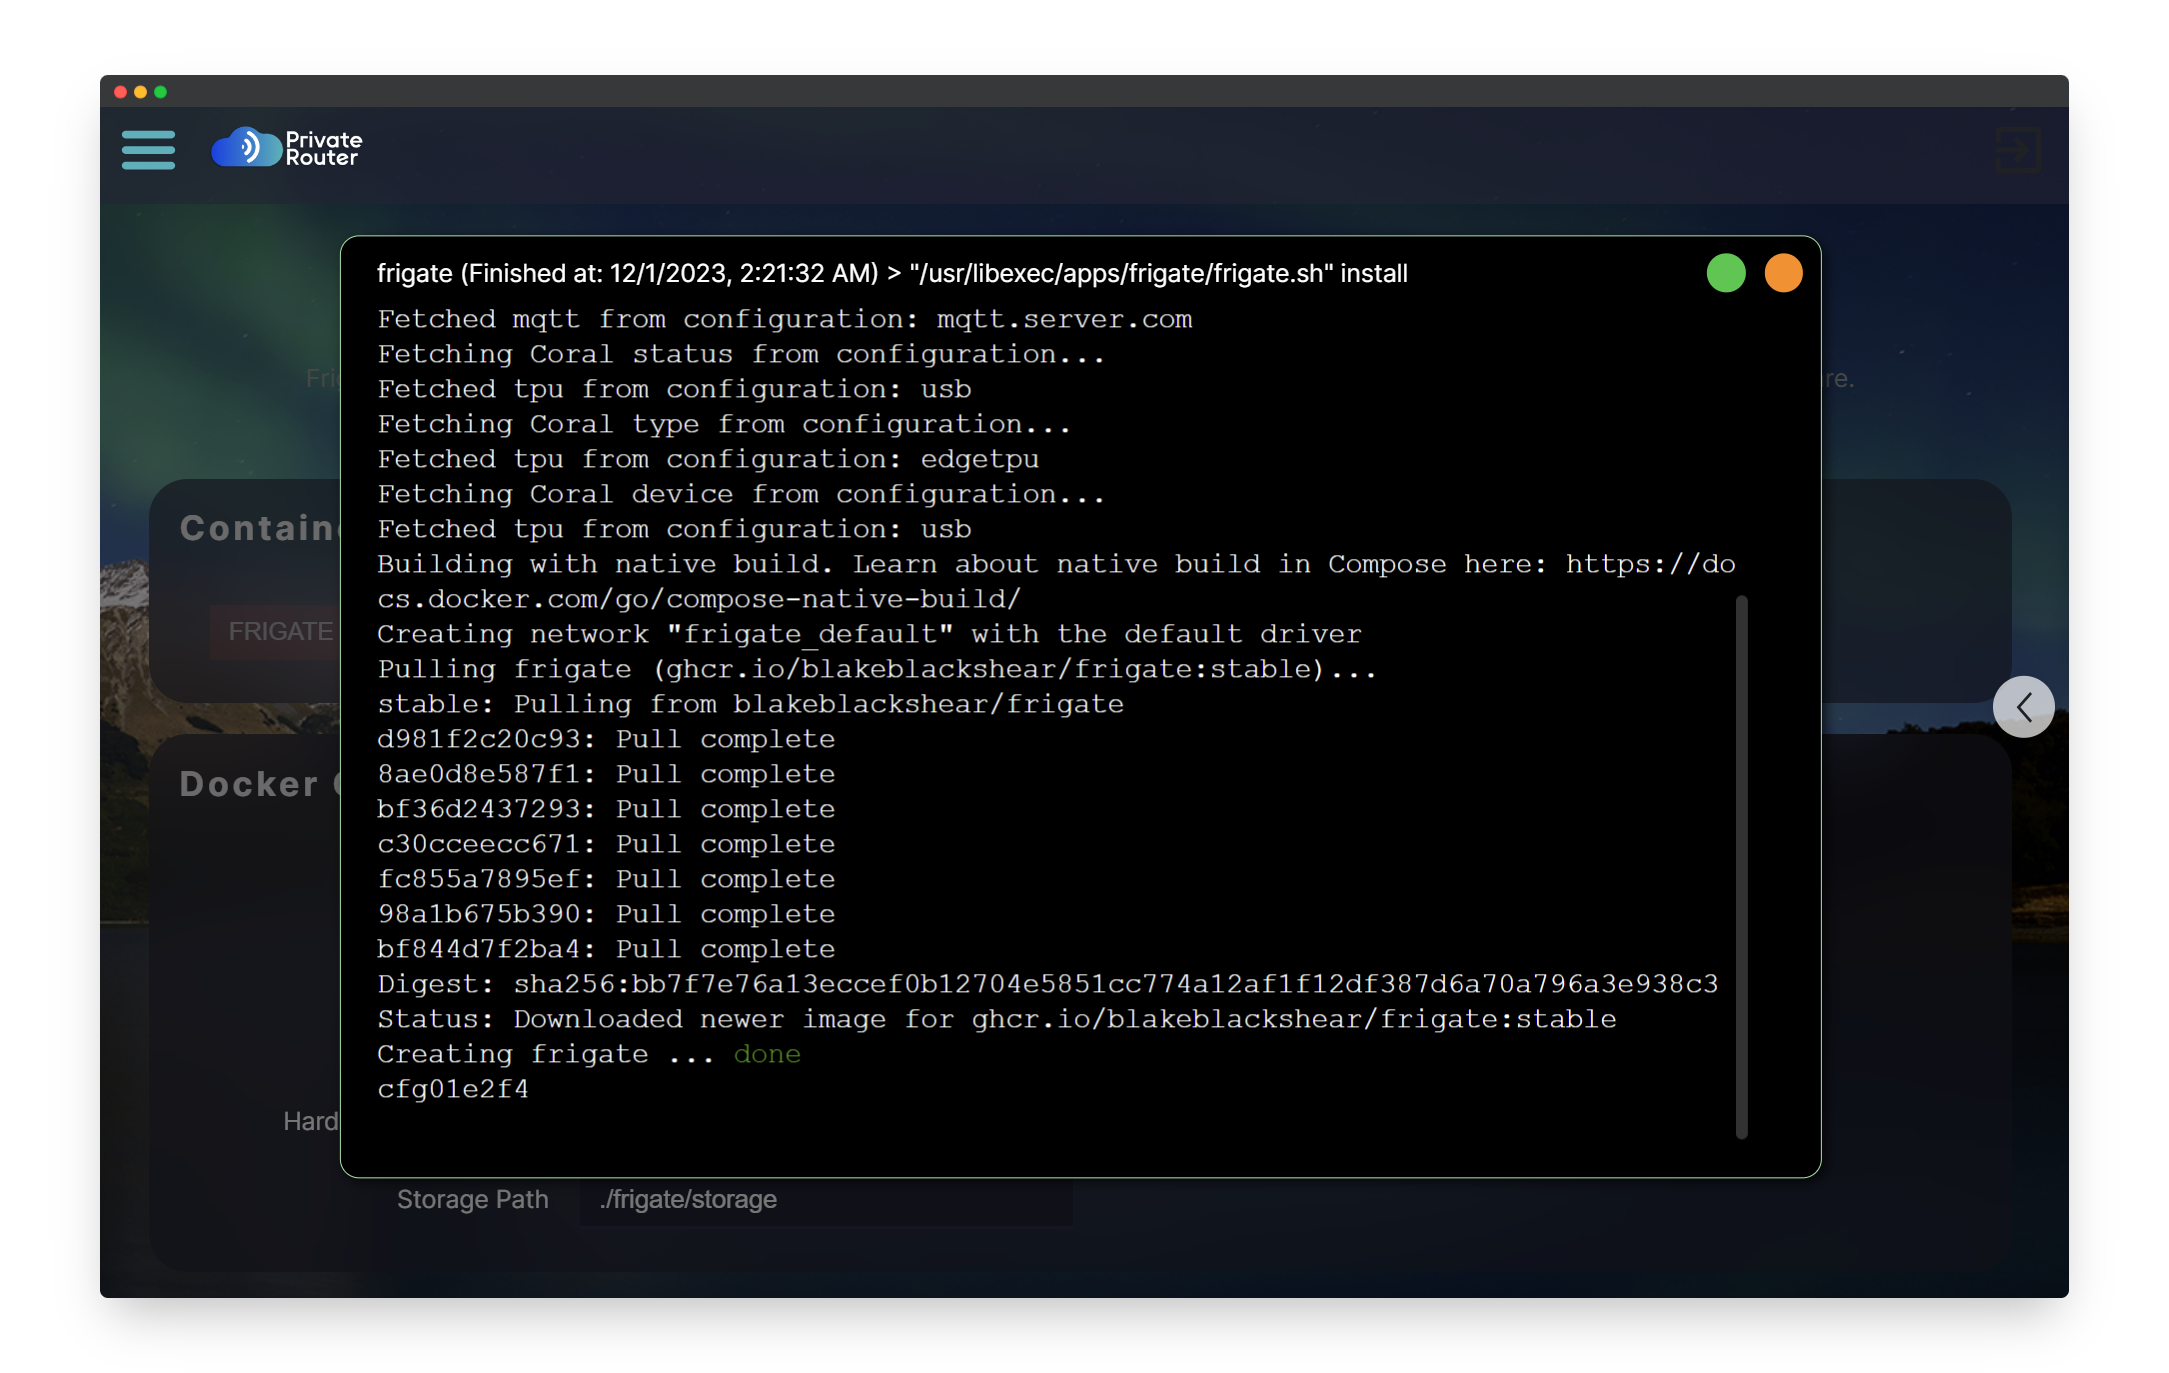
So, how do you get this futuristic technology up and running? It begins with navigating to the 'system' tab on your OpenWRT interface, selecting 'software', and then searching for “frigate”. Install the 'luci-app-frigate' and 'luci-lib-taskd' packages, which will integrate a user-friendly LuCi frontend into OpenWRT, making it a breeze to deploy Frigate in Docker and manage your camera settings.
With the apps installed, it’s time to fire up the Frigate Docker app. Plug your NVR camera into your Pi4 using a LAN cable. As it connects, you’ll see a new IP address pop up on the PrivateRouter dashboard – that’s your camera going online. Copy and paste this IP into your web browser to access the camera directly. It’s crucial at this stage to change the default username and password to secure your camera. Then, dive into the camera's WiFi settings and connect it to your Pi4's Mesh WiFi network.
Now, with anticipation mounting, plug in the Google Coral USB device. There’s no need for any driver installations; PrivateRouter OpenWRT is designed to automatically pass the USB connection through to the Frigate Docker container, which is already equipped with the necessary drivers.

Ready to add your camera? In the PrivateRouter’s Frigate app, click on “Enable Coral” within the TPU configuration section. Then, enter your camera's location name, such as 'Living Room' or 'Front Door', and update the default username, password, and IP address with the details of your newly secured camera. Add as many cameras as you like by clicking the 'Add' button, or if you’re ready, hit 'Save', then 'Save and Apply' to initiate your Frigate configuration.

Your NVR streams are now accessible through the 'Open Frigate' button. Each new camera added will prompt Frigate to update and display your growing security network. And should you ever need to halt or restart Frigate, simply navigate to the Docker / containers tab. Your system is now not just a security apparatus, but a smart, self-contained guardian of your peace of mind.

How to Access Recording and Snapshot Footage
Your new self-hosted Frigate stack simplifies home security into a seamless 'plug and play' experience. With your cameras dialed in and the Google Coral TPU connected to your Raspberry Pi 4, the system stands ready to diligently monitor your video streams. When a person is detected, Frigate leaps into action, automatically capturing snapshots and storing video footage directly on your Raspberry Pi's local storage.
But how do you access the video footage? The web-based Frigate interface provides a straightforward gateway to stream your snapshots and review recordings. For more hands-on control and the ability to download the raw snapshot footage, the FileBrowser app becomes your window into the system's repository. Installable under Docker Templates menu option, FileBrowser offers an intuitive file management system accessible via your web browser.

Once within FileBrowser, navigate to the Frigate directory. Here, you'll find the 'clips' and 'recordings' folders – these are the vaults where your visual data is cataloged. If your preference leans towards command-line interactions, then simply cd to the path '/opt/docker2/compose/frigate/frigate/storage', where your video files are constantly saved.
With these tools at your disposal, accessing and managing your security footage becomes a task of ease. Whether it's for a quick review or an in-depth analysis, your recordings and snapshots are always a few clicks away, safeguarded on your own hardware, under your control.