

WireGuard is an excellent VPN protocol to run on a WiFi router due to its high efficiency and speed, often delivering up to ten times the performance of traditional VPN protocols like OpenVPN. However, many users face challenges when setting up a VPN WiFi network, as running it on a single router may not provide adequate coverage, leading to dead spots.
If you have multiple OpenWRT-capable routers, you can extend your main VPN WiFi router running WireGuard using a mesh WiFi network with Batman-adv. This setup enables a hybrid mesh network that seamlessly integrates with your local network while maintaining a secure WireGuard VPN tunnel. This approach is particularly beneficial for users who need to:
- Eliminate dead spots and improve VPN WiFi coverage.
- Ensure fast VPN speeds for IoT devices such as security cameras.
- Connect homelab devices to a WireGuard mesh network.
- Connect unlimited devices to a residential IP VPN.
- Provide wired VPN access via mesh node LAN ports.
- Enable easy remote access to the entire DHCP network.
How the WireGuard Mesh Works
A central OpenWRT router serves as both the WireGuard VPN server and mesh controller, acting as the primary DHCP server. Mesh nodes route WiFi traffic through the most efficient path back to the main VPN router, ensuring optimal performance.
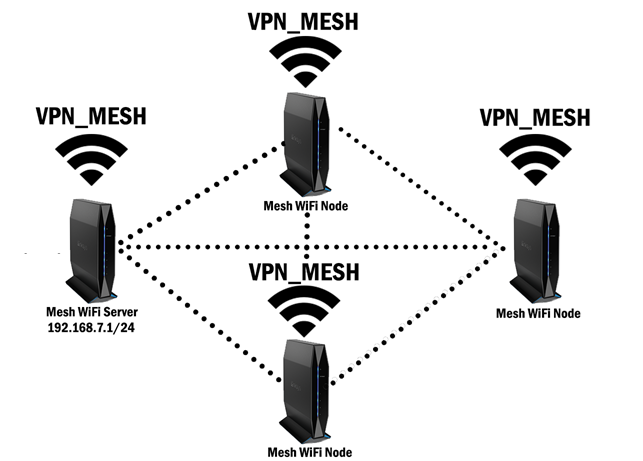
To set up this system, you will need multiple OpenWRT-compatible routers with WiFi radios that support mesh networking.
TorGuard Apps for Easy Setup
For WireGuard, you can use TorGuard’s custom configuration generator or the built-in OpenWRT app to select any server on the network. Additionally, the TorGuard Mesh app simplifies running WireGuard over a WiFi mesh network. These apps support any OpenWRT router, and while manual configuration is possible, using our OpenWRT LuCI apps saves time and reduces errors when deploying across multiple devices.
If you haven't installed these apps, you can access them from our GitHub release section:
Setting Up a WireGuard Mesh WiFi Network
Step 1: Configure the Mesh Server
- Disable/Delete any active wireless networks in OpenWRT: Go to Network → Wireless.
- Navigate to Network → EasyMesh.
- Select "Server" for Mesh Mode.
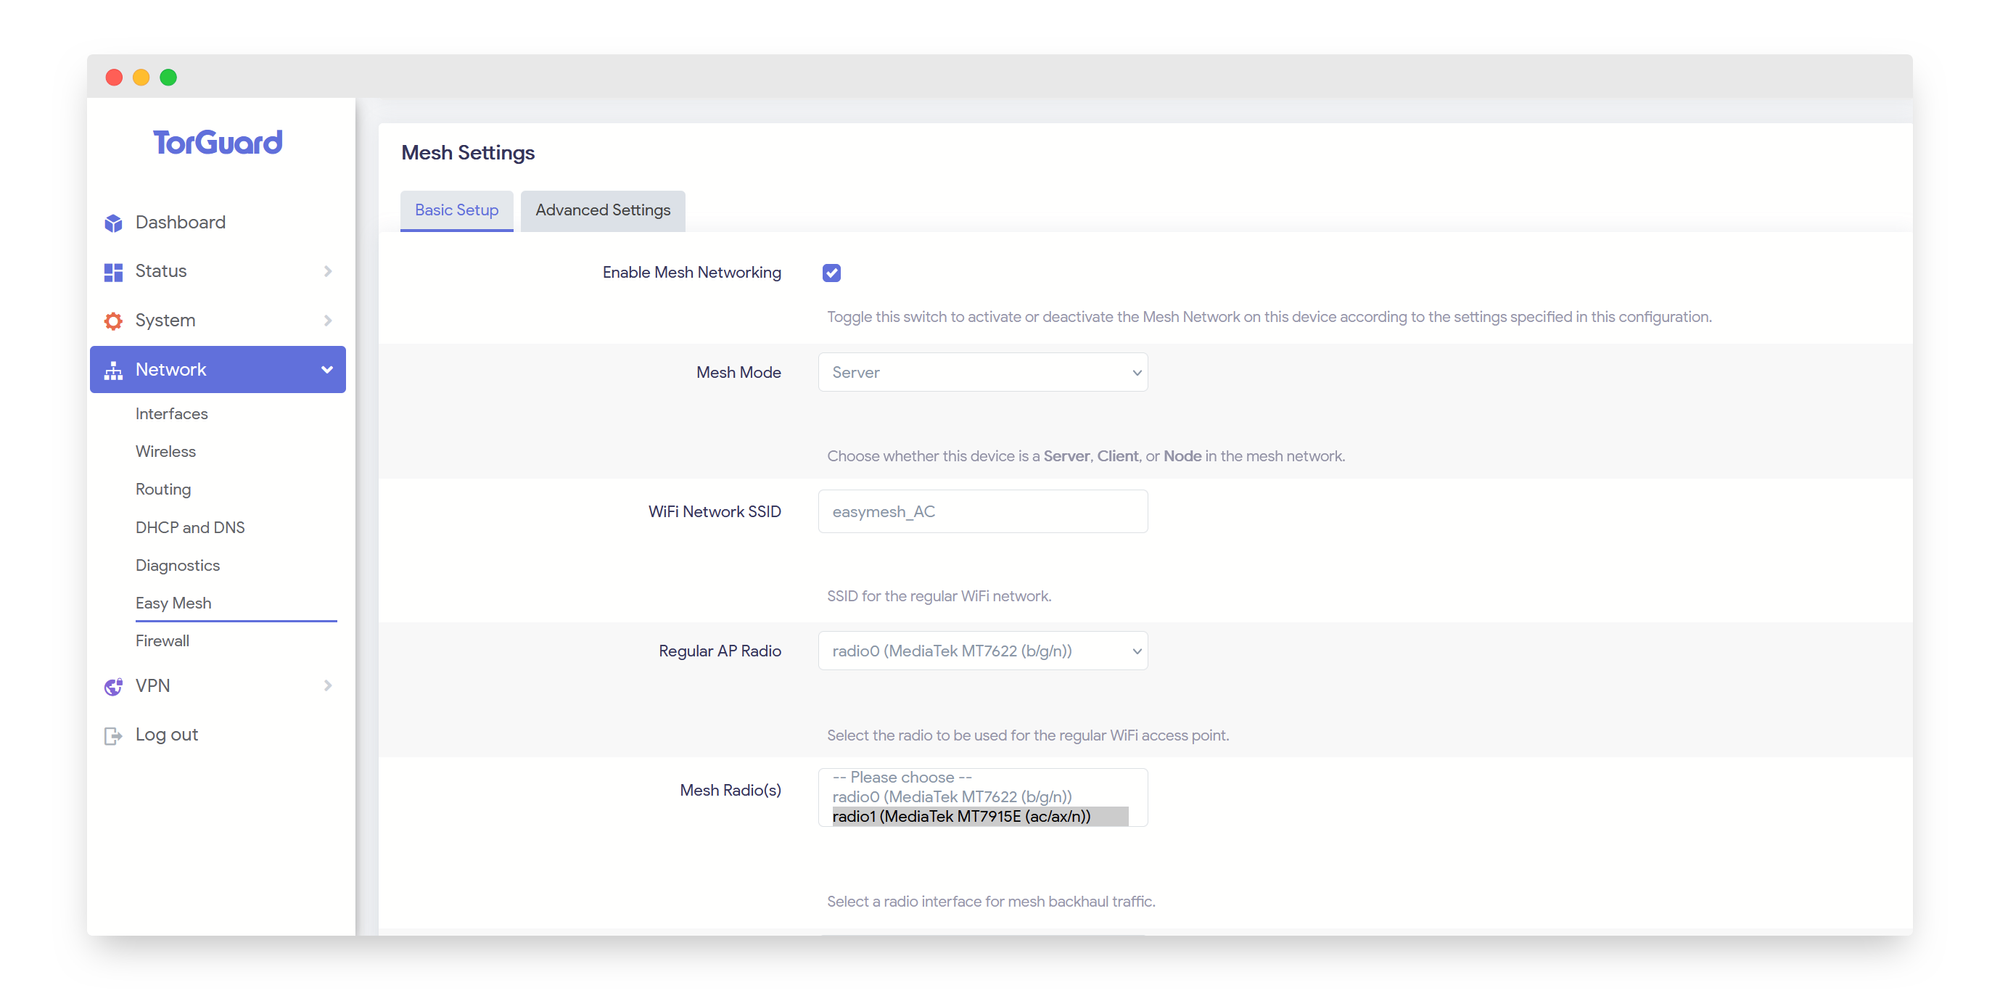
- Enter your WiFi SSID (this is the main network that all devices will connect to).
- Choose the WiFi radio for the regular AP (Tip: Use a different radio for the mesh backhaul for better performance).
- Select the Mesh Radio and enter a separate SSID (EasyMesh app will automatically append "-mesh" to the SSID).
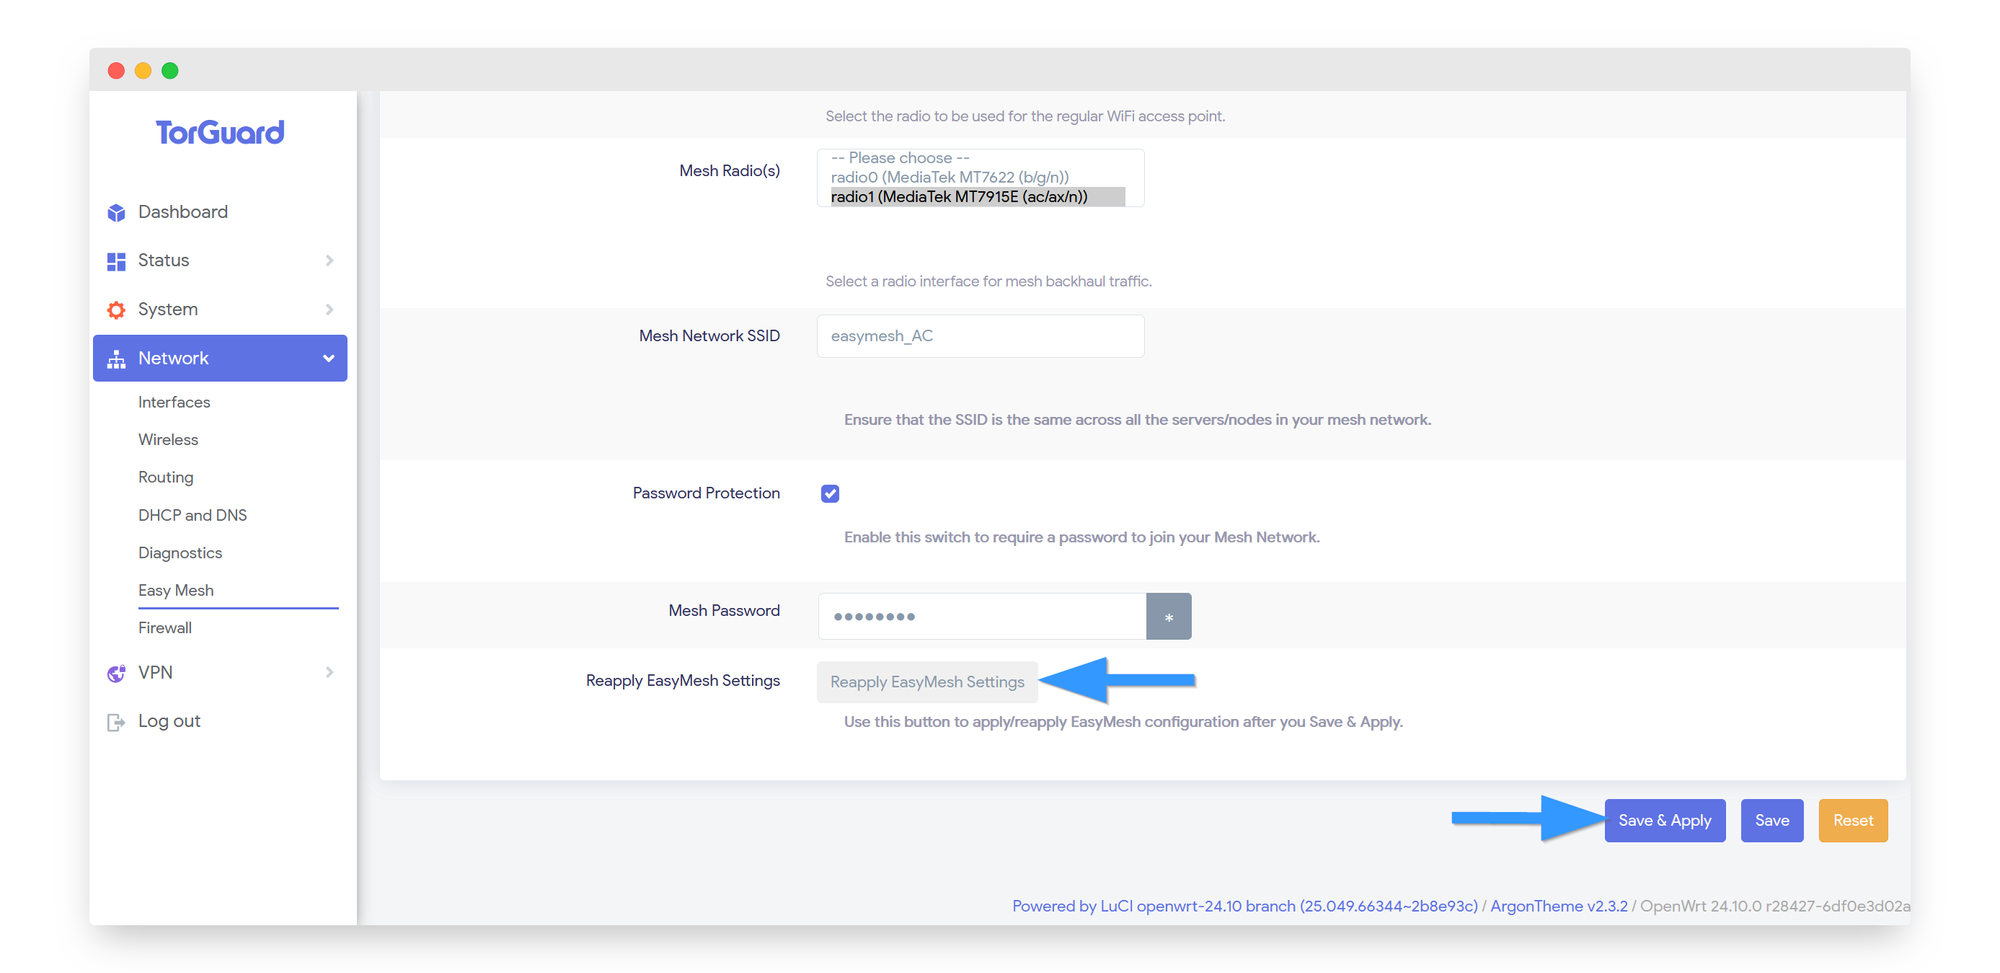
- Enable Password Protection, enter a Mesh Password, and click Save & Apply.
- Click "Reapply EasyMesh Settings" to deploy the APs and activate mesh networking.
🔹 Verification Steps:
- Go to Network → Wireless and confirm the WiFi networks were added.
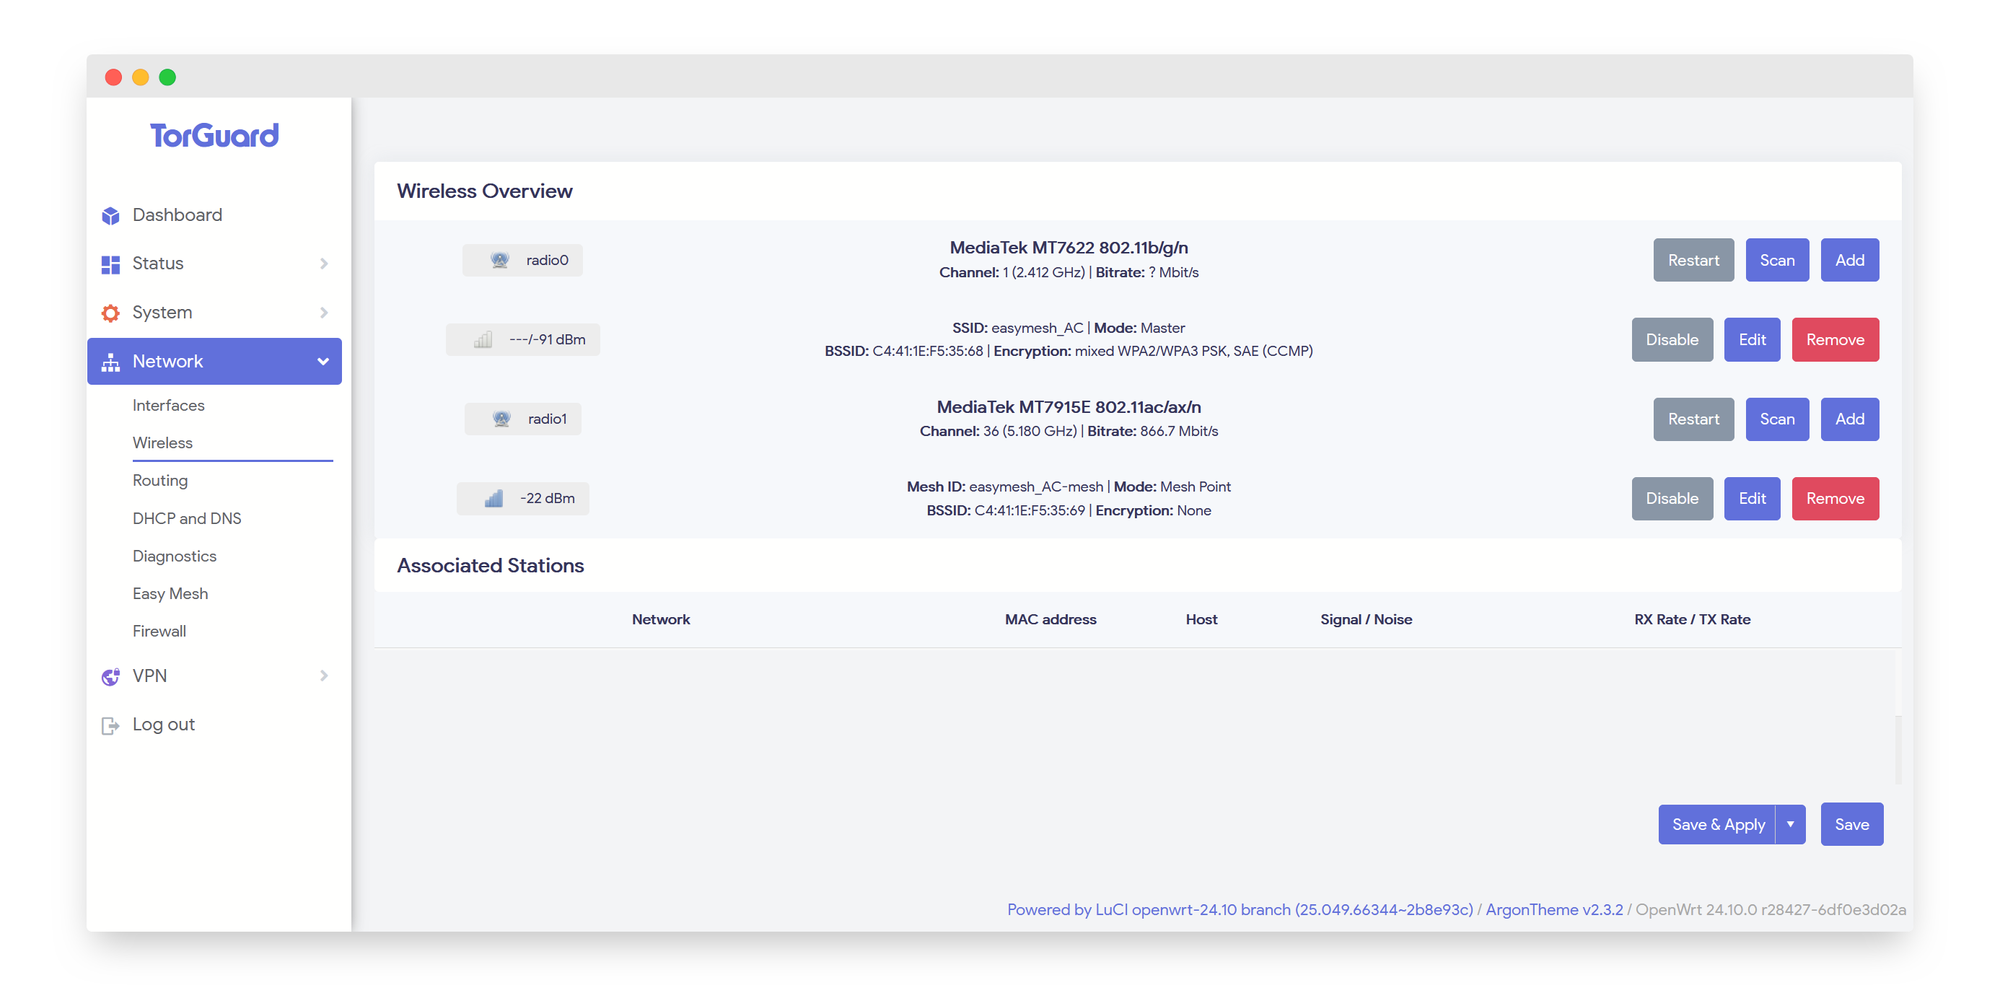
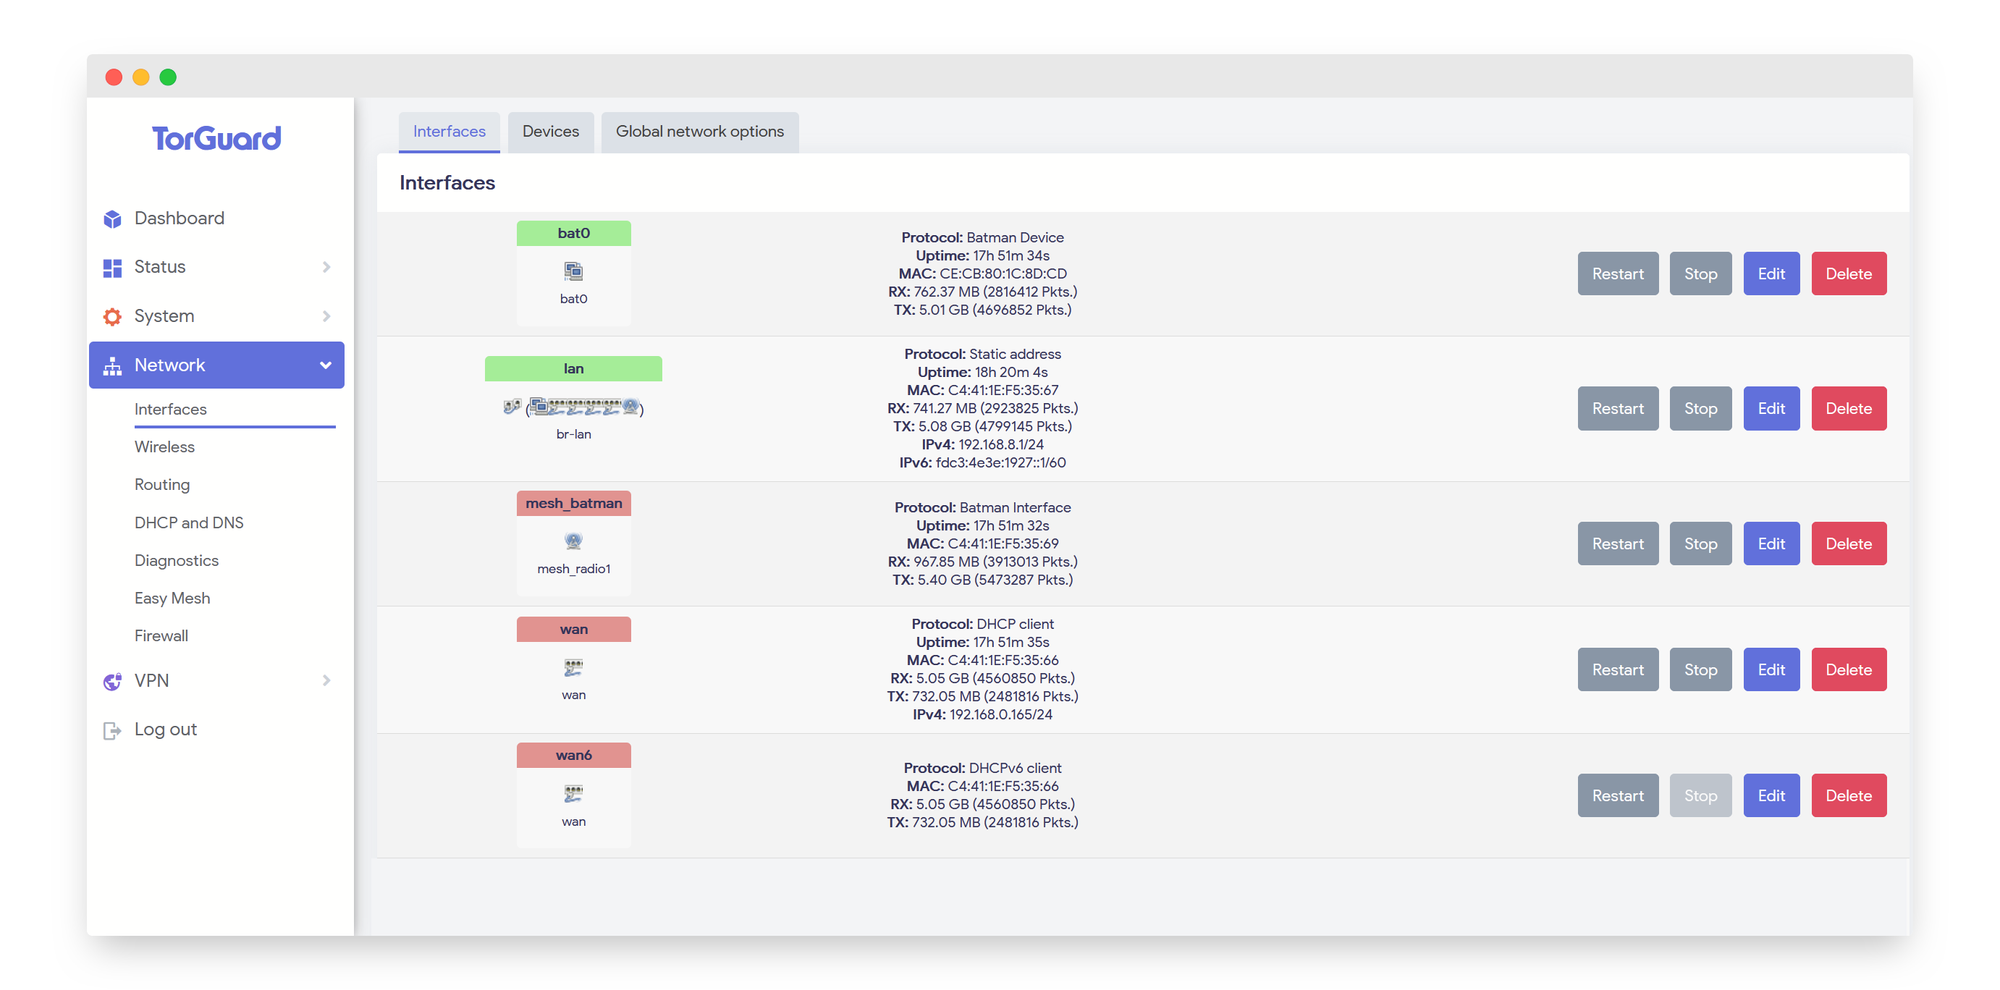
- Navigate to Network → Interfaces and verify that the Batman (bat0) device and mesh_batman interface were created.
Step 2: Set Up a Mesh Node
- On the second router, go to Network → EasyMesh.
- Select "Client" for Mesh Mode.
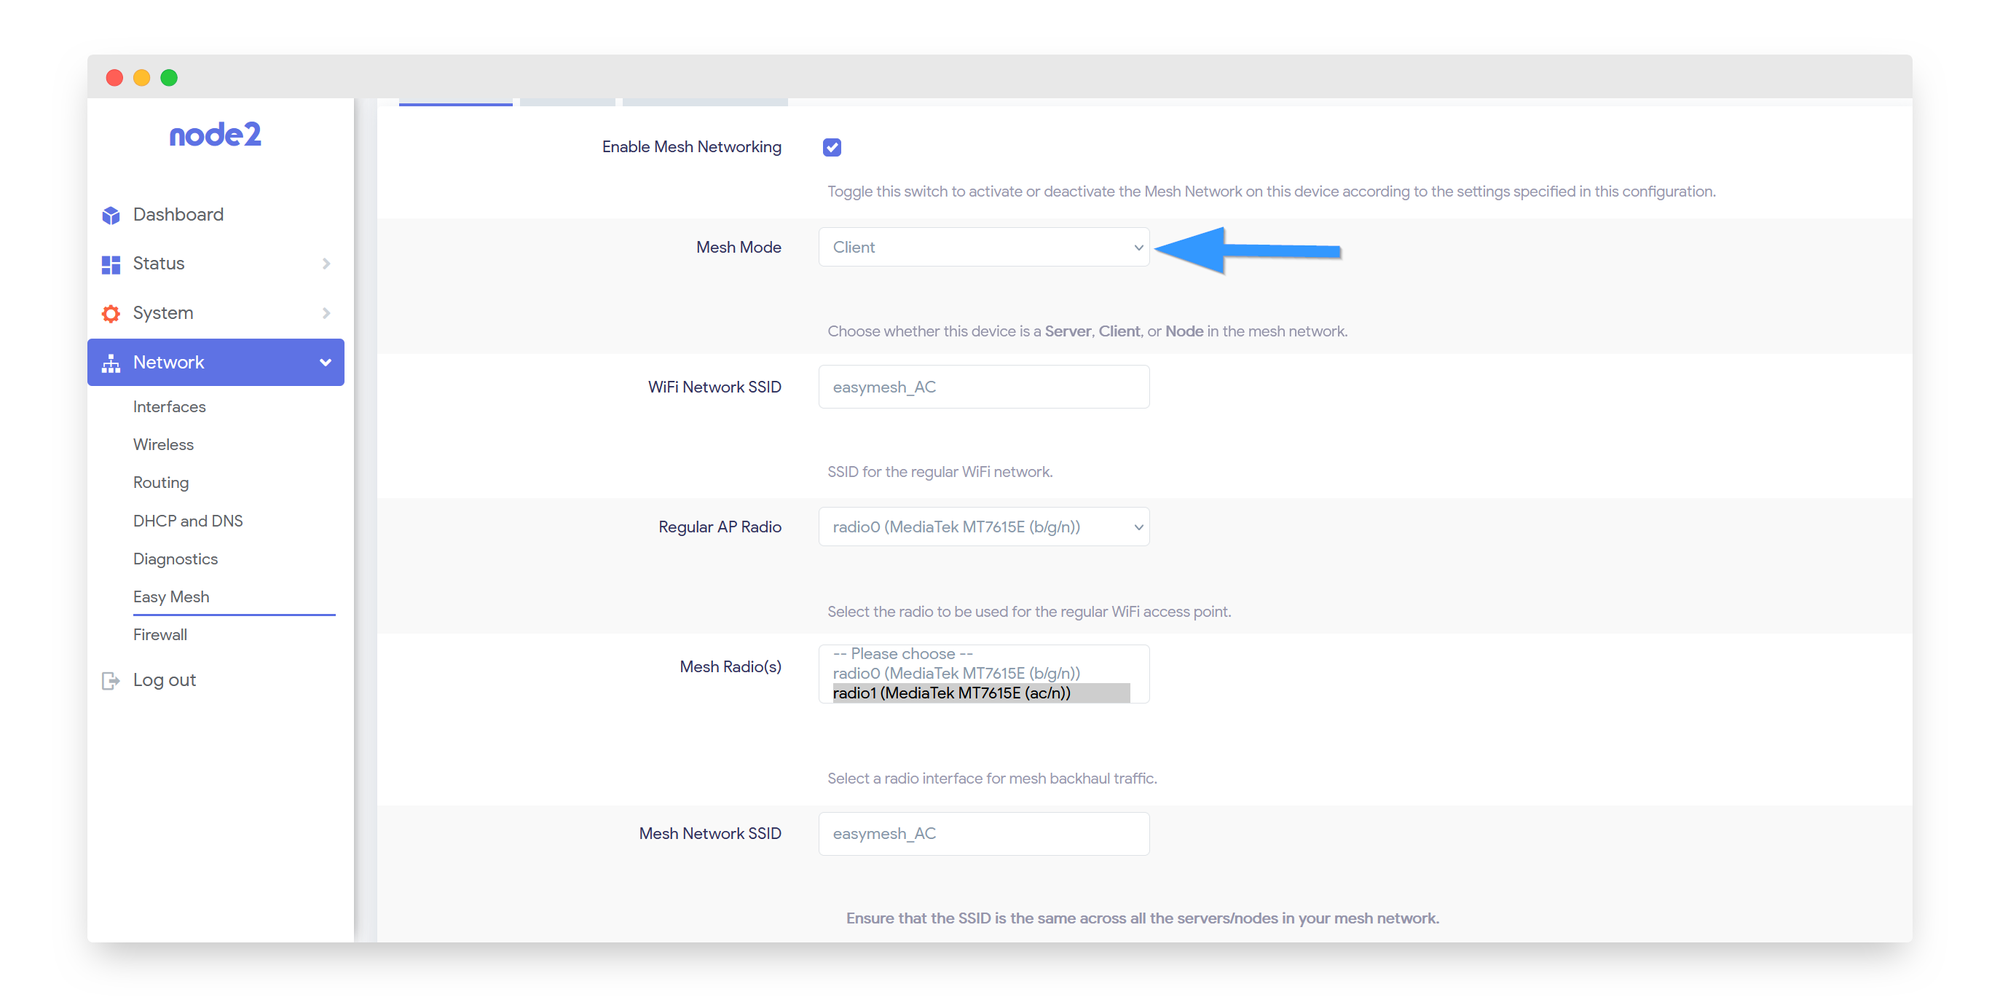
- Enter the same WiFi SSID, Mesh SSID, and Password as the Mesh Server.
- Ensure you choose the same WiFi radio type (AX, AC, b/g/n) for both SSIDs.
- Click Save & Apply, then click "Reapply EasyMesh Settings".
- In the AP Mode tab, set a hostname (e.g.,
node2,node3, etc.). - Choose DHCP (recommended for Dumb AP nodes) or configure a Static IP within the range of your Mesh Server.
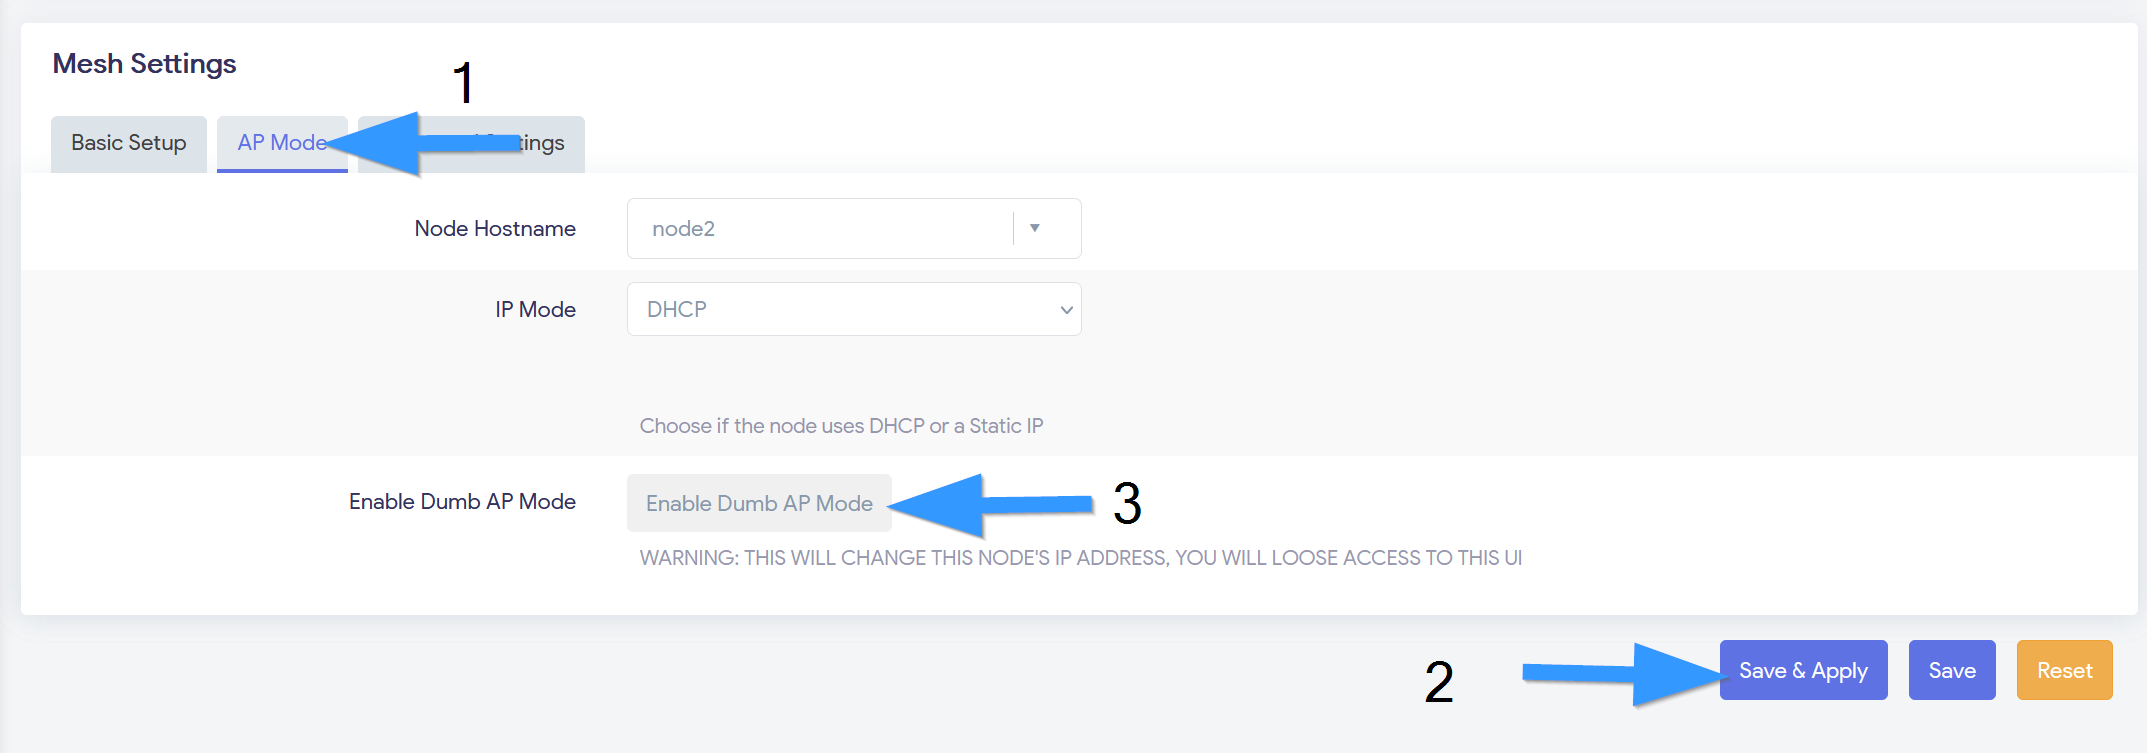
- Click Save & Apply, then Enable Dumb AP Mode.
Step 3: Add Additional Mesh Nodes
- Use the same WiFi SSID, Mesh SSID, and Password for all nodes.
- Ensure that all nodes use the same WiFi radio type (AX, AC, b/g/n).
Step 4: Verify Mesh Node Connectivity
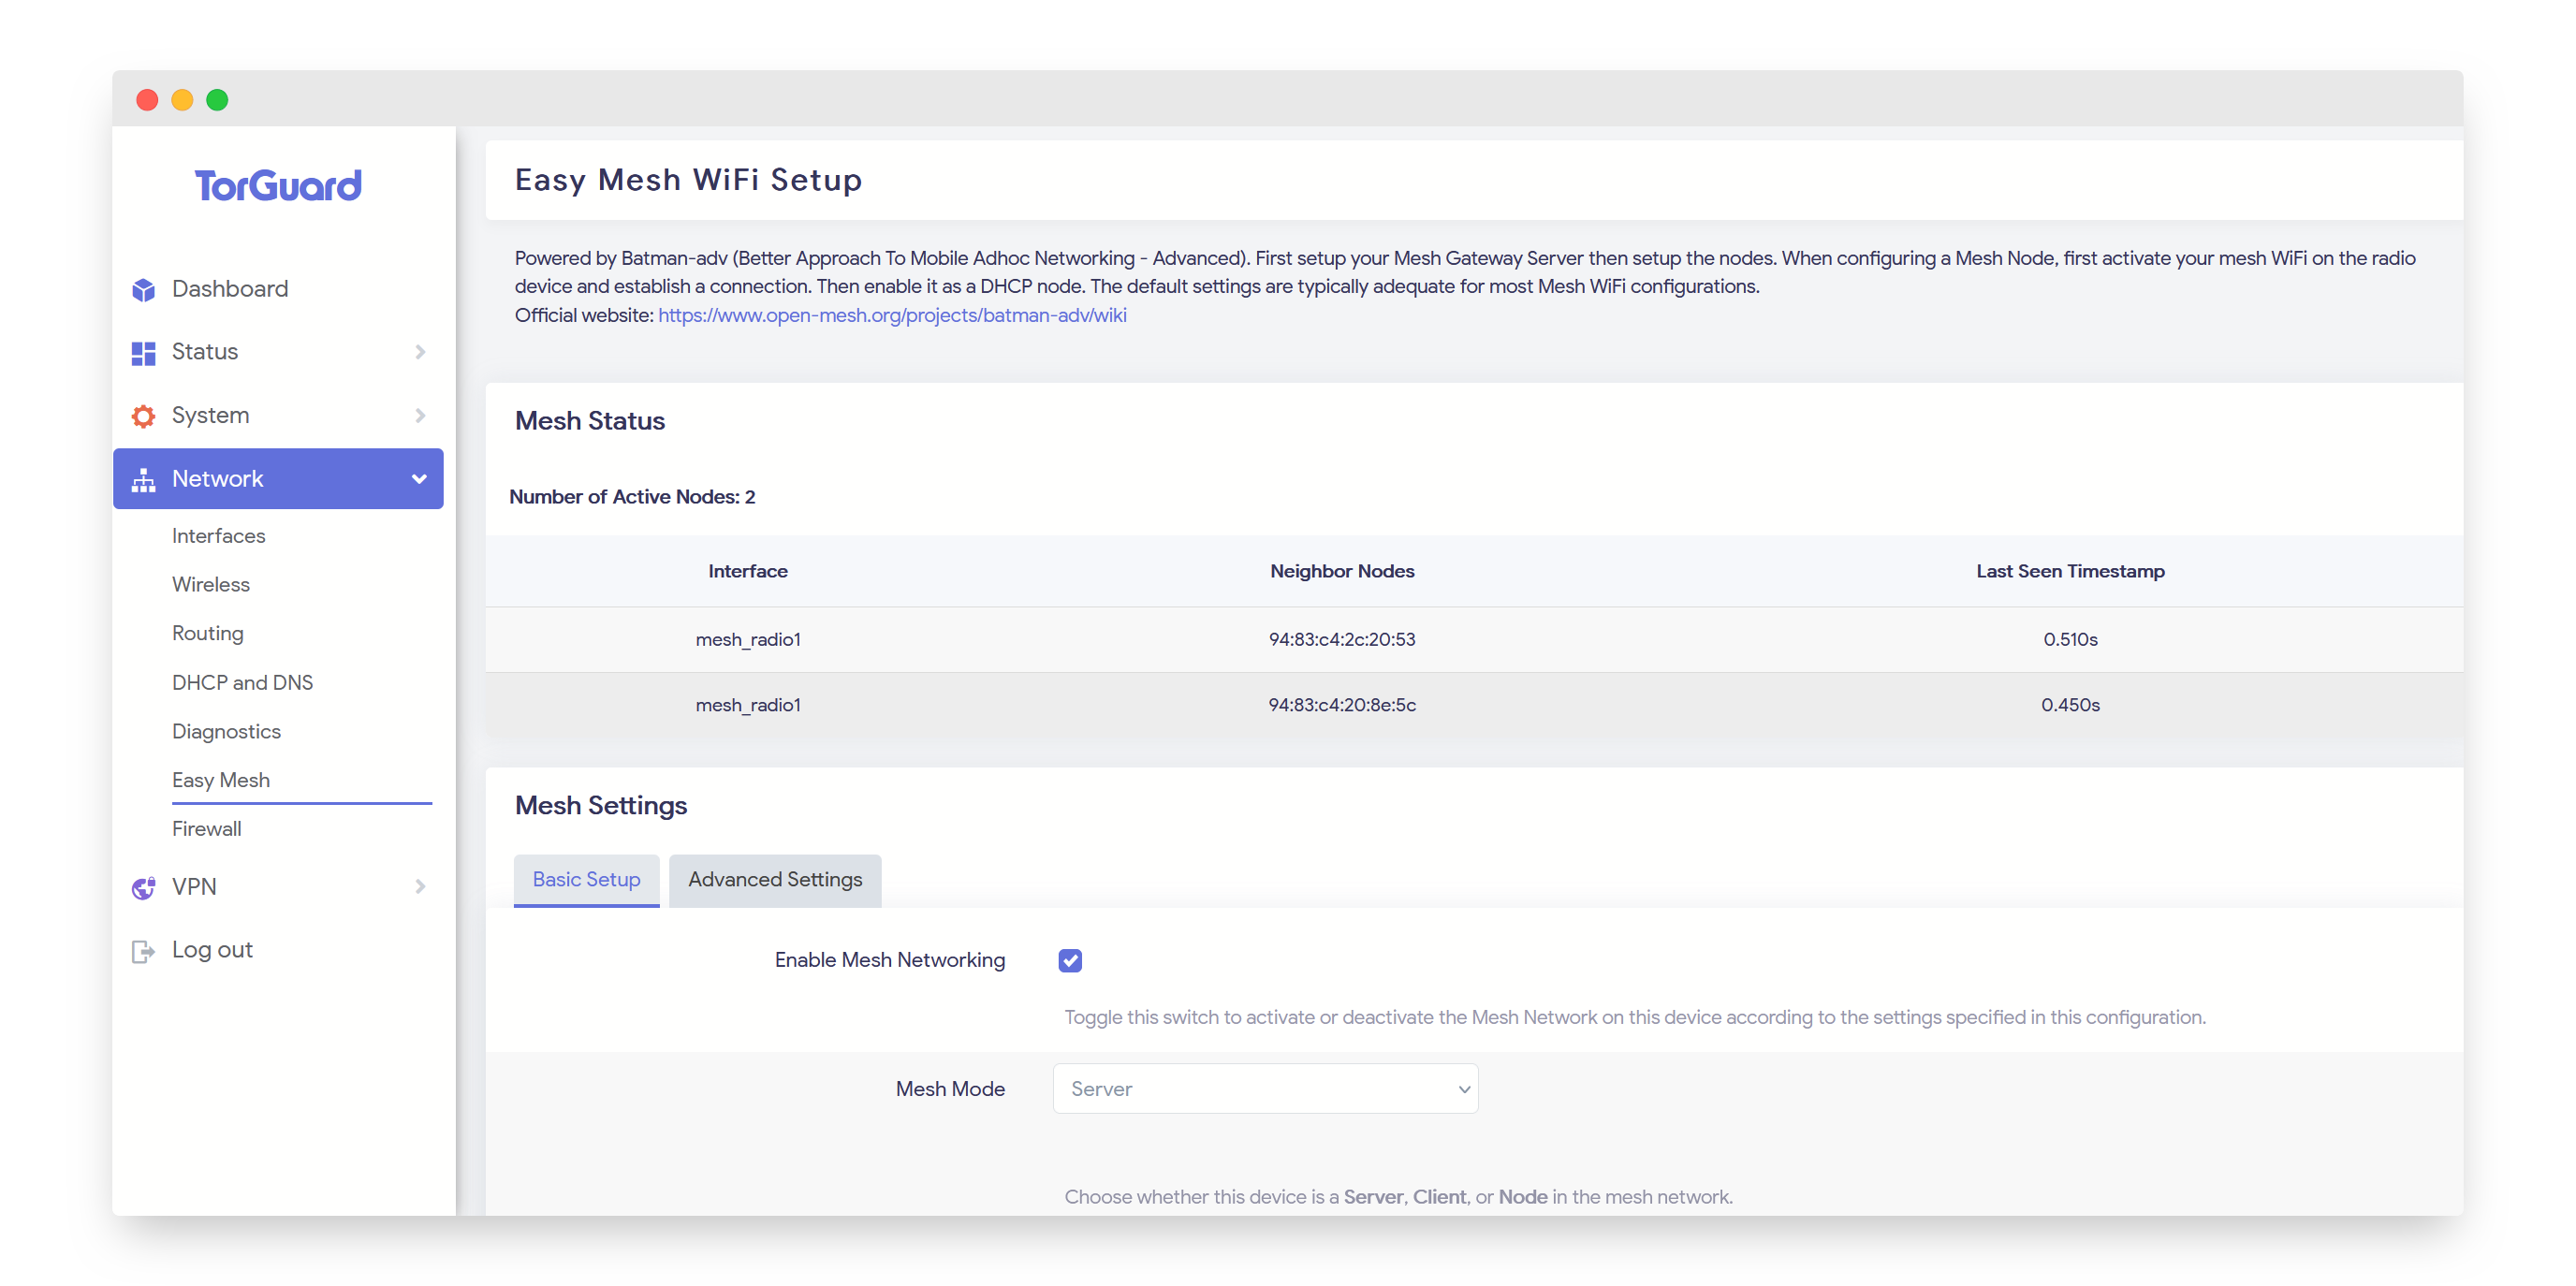
- On the Mesh Server, navigate to Network → EasyMesh.
- Check that all nearby nodes are listed under Mesh Status.
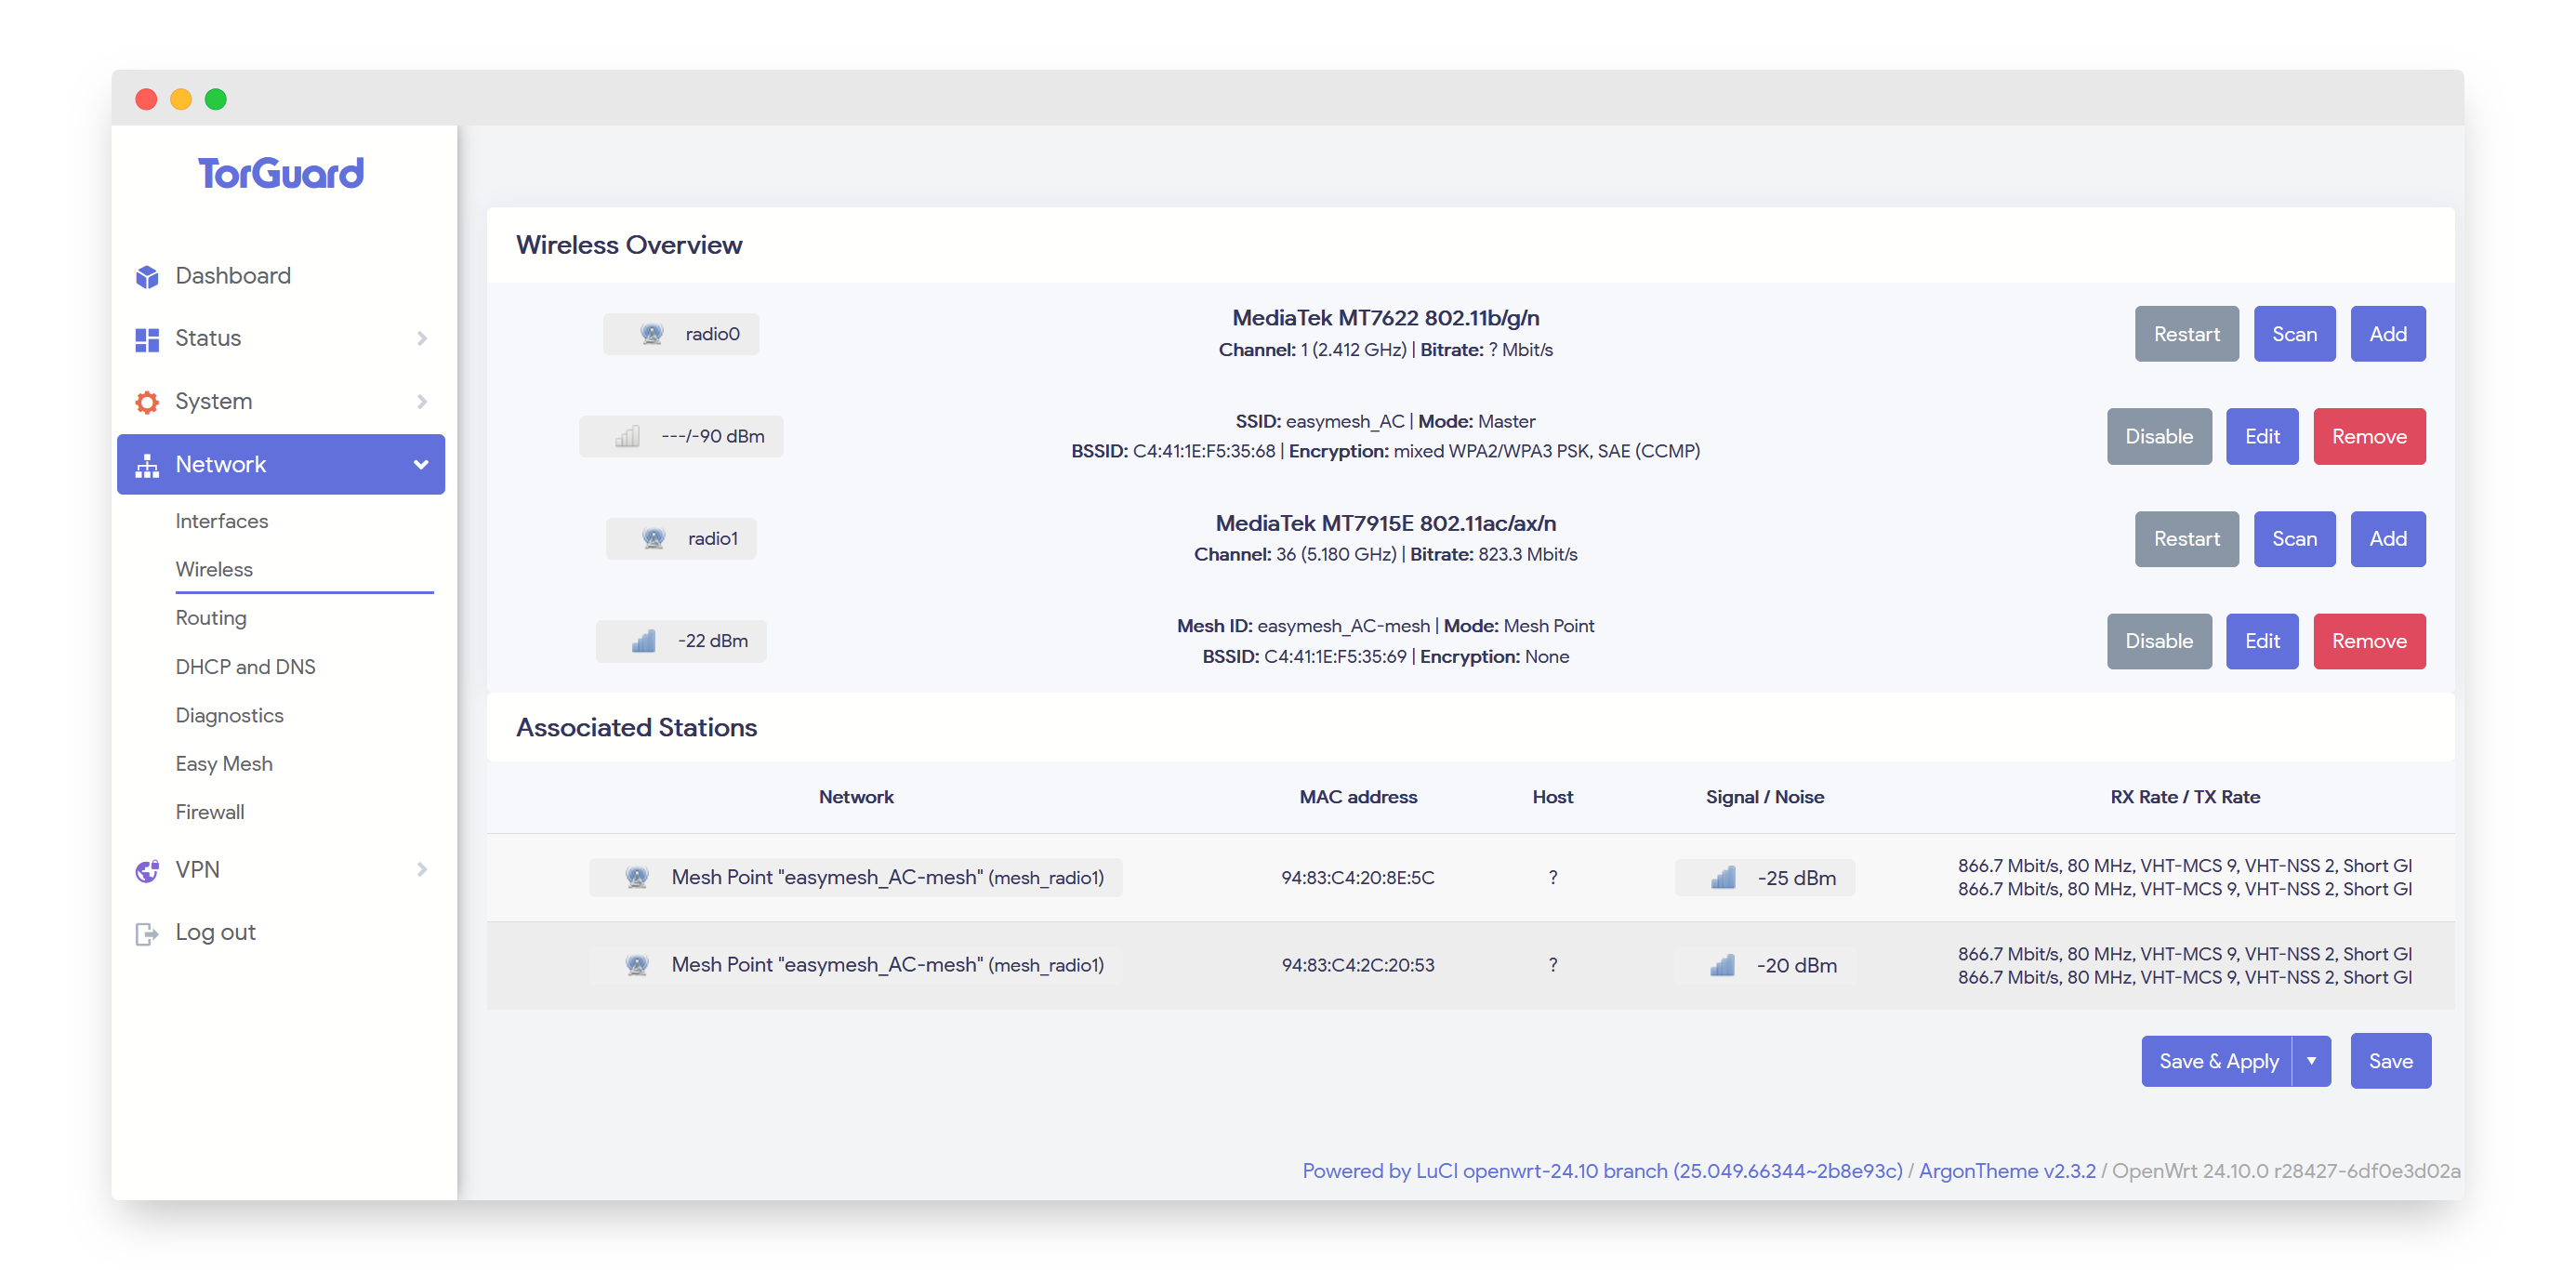
Go to Network → Wireless and confirm that Mesh Backhaul Networks are communicating.
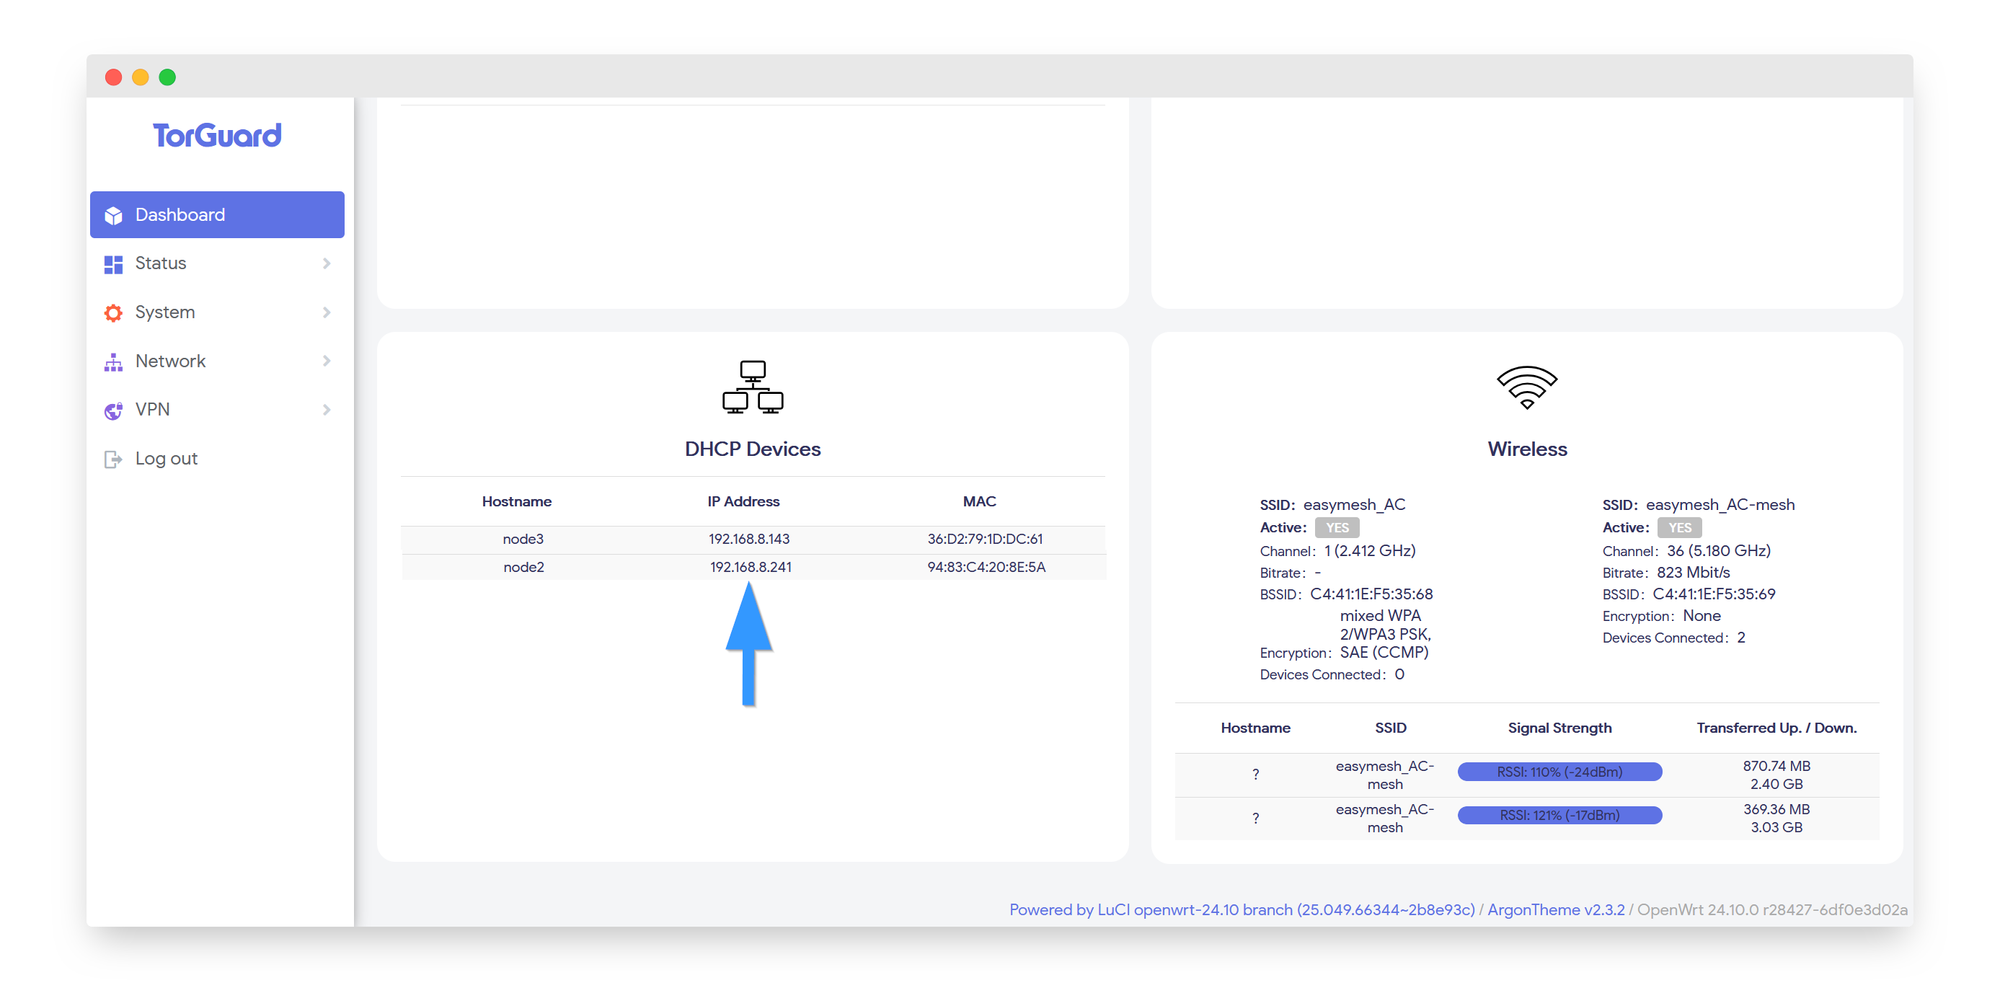
Find Mesh Node IPs under Status → Overview → DHCP Devices.
Test connectivity by entering a node’s IP in a web browser.
Step 5: Enable TorGuard WireGuard VPN
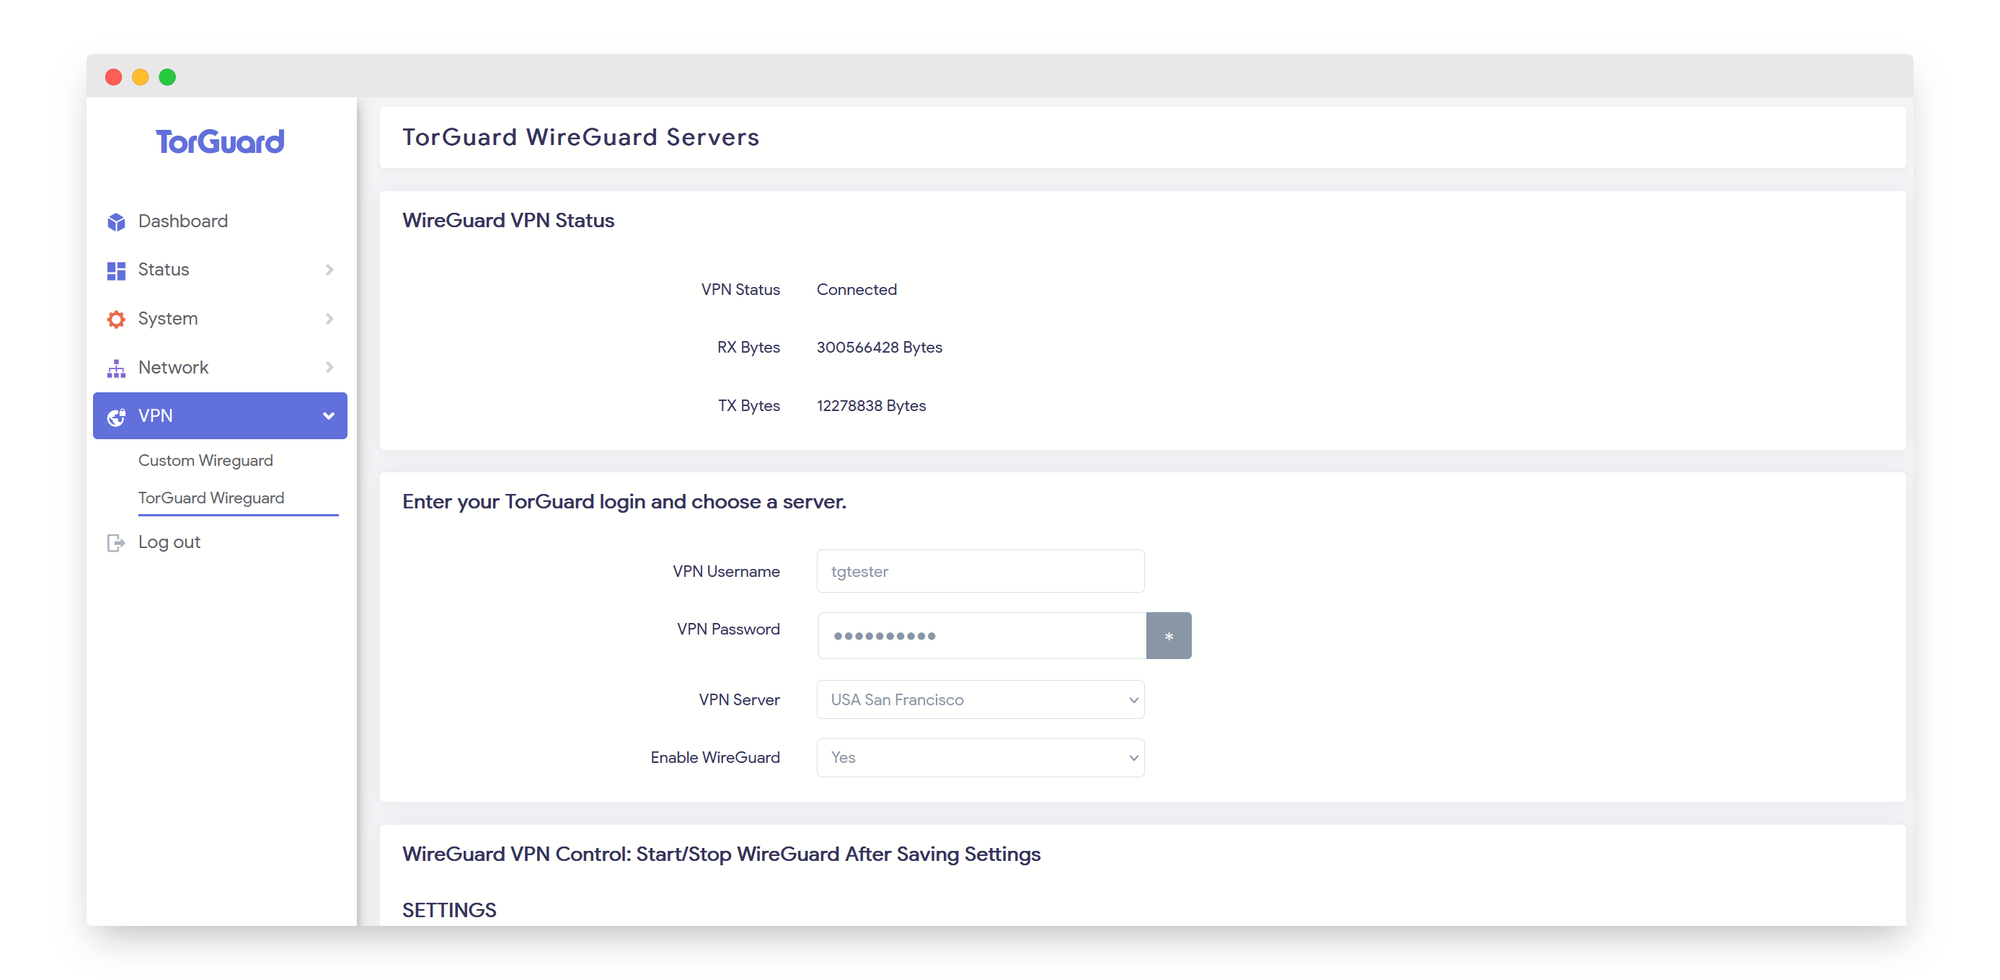
- Go to Network → TorGuard WireGuard.
- Enter your WireGuard Username & Password.
- Select your preferred WireGuard server location.
- Enable WireGuard and click Save & Apply.
- Click "Start WireGuard" to tunnel all mesh network traffic through the VPN.
Conclusion
By integrating WireGuard with a mesh WiFi network, you gain seamless VPN connectivity across multiple routers without sacrificing speed. This setup ensures secure, high-performance internet access for IoT devices, homelabs, and any number of connected devices. With TorGuard’s OpenWRT apps, setting up and managing your WireGuard Mesh WiFi network is easier than ever.
If you need a dedicated IP VPN with unlimited device connections, TorGuard is the best choice for privacy and security.