

Software engineers aren't going anywhere, but new tools like Cursor AI have ushered in a new era of "vibe" coding, allowing people with limited coding skills to achieve more than ever before. Whether this is a good or bad thing is still up for debate, but if you're in this niche, you probably have accounts with ChatGPT, Claude, Replit, Supabase, and a variety of other development tools. However, if you have an old mini PC, Raspberry Pi 4, or laptop lying around, you might not realize you can self-host your projects instead of paying for cloud hosting—especially during development.
In this tutorial, we're putting Cursor AI to the test by instructing it to build a simple and fun WebRTC game. Then, we'll see how easy it is to self-host it on an $80 mini PC running Ubuntu Server, using TorGuard’s dedicated WireGuard service for external internet access.
What You’ll Need
- A PC running Ubuntu Server
- A Cursor AI account
- TorGuard Dedicated WireGuard
Step 1: Make the Game
First, you’ll need a Cursor AI account. Start by connecting it to your local Ubuntu server. Open the chat window, provide your prompt, and let the AI assist—or even take full control—to code the website you want. For this tutorial, we’re creating a multiplayer WebRTC game to demonstrate the self-hosting process. Here is the AI prompt we used to create the game:
Objective:
Create a web-based multiplayer game called MeowCraft, where players control a cat in a randomly generated world similar to Minecraft, using Three.js and other frameworks as needed.
Game Mechanics & Features:
- Login Screen: Players enter their name and select one of three cat avatars: Orange Cat, Black Cat, or Purple Cat. The game assigns a random spawn point in the world.
- Gameplay:
- Movement: WASD keys move the cat in a 3D voxel-style world, and the spacebar allows jumping.
- Attacking: Left-click or tap to perform a paw bonk attack, reducing another player’s or mouse’s health.
- Eating: Press spacebar to eat mice and restore health.
- Mice AI: Mice randomly spawn and run around, providing a food source.
- Health System: Players lose health when attacked and can restore it by eating mice. Players can also engage in PvP battles.
- Random World Generation: A voxel-based world includes houses, trees, and grass.
- Multiplayer Support: Uses WebSockets or Socket.io for real-time multiplayer synchronization.
- Technical Stack:
- Frontend: Three.js (3D rendering), Cannon.js (physics), Socket.io (real-time multiplayer), and standard web technologies (HTML/CSS/JavaScript).
- Backend: Node.js + Express, MongoDB or PostgreSQL (optional), and WebSockets for multiplayer interactions.
- Game Assets: Includes voxel-style models for cats, mice, and environmental elements.
After about 45 minutes, our game is running. While it has a few bugs, going from concept to completion this quickly is impressive. Now, it's time to install WireGuard on our Ubuntu server to test the game over a public domain.
Step 2: Install WireGuard
Log in to your Ubuntu server and run the following commands to install WireGuard:
sudo apt update && sudo apt upgrade -y
sudo apt install wireguard resolvconf curl -y
Next, generate your WireGuard configuration file for your local Ubuntu server. We’re hosting our game behind a domain name, but you can alternatively run it through remote VPN access only. For this guide, we’re using TorGuard’s Dedicated WireGuard service (Private VPN Cloud) to self-host our AI-generated game.
Setting Up WireGuard
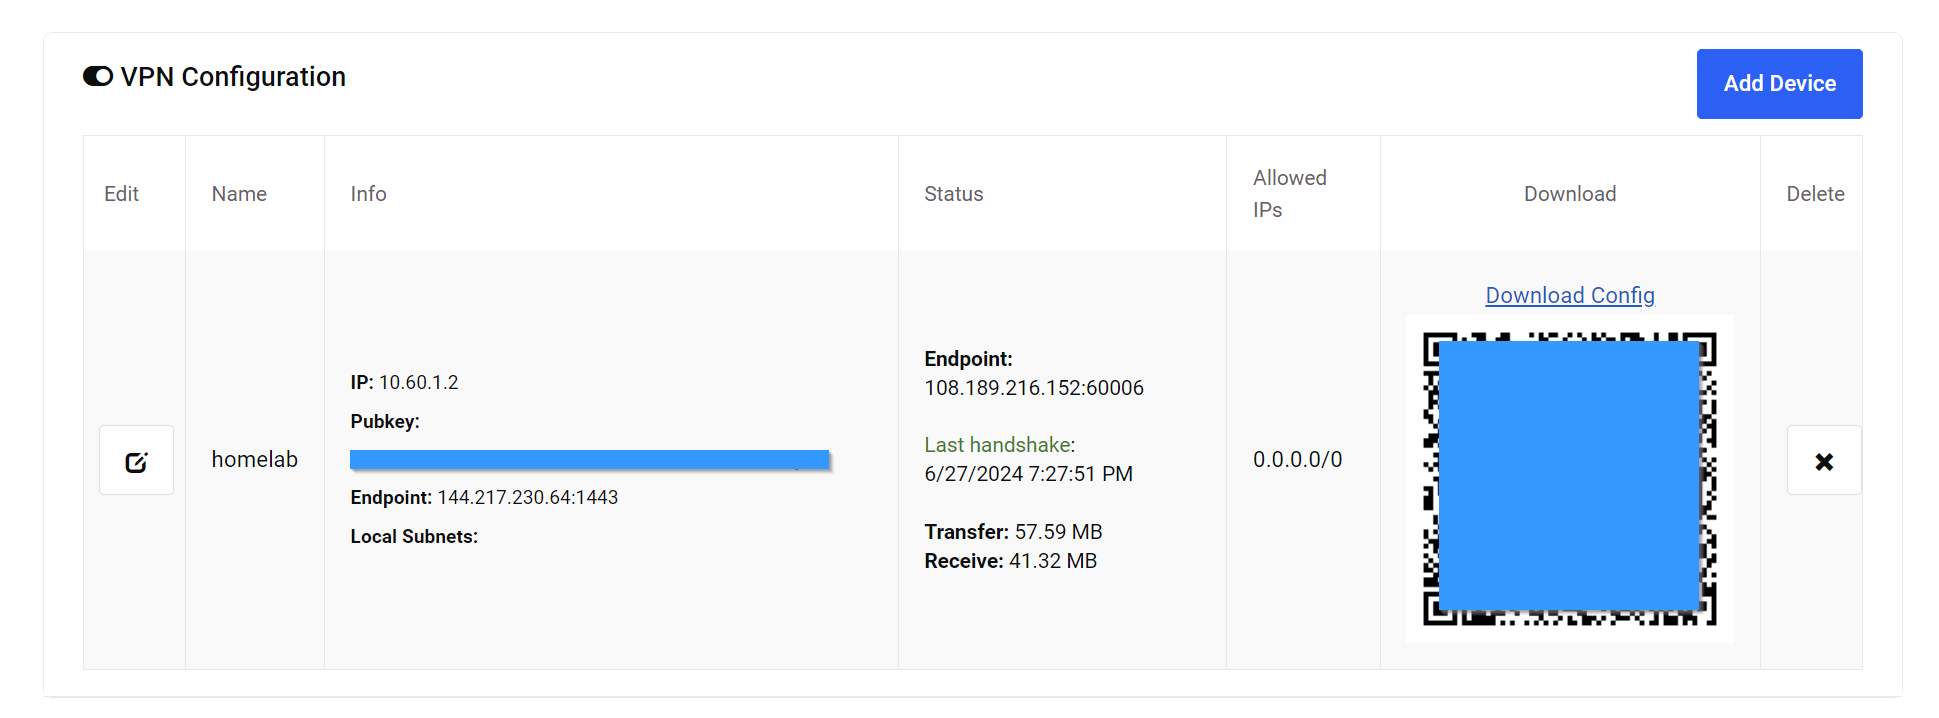
- Navigate to the TorGuard member's area, select Private VPN Cloud, and click Add Device.
- Download the WireGuard configuration file.
- Open the WireGuard config file and note the VPN IP:
- External VPN server endpoint IP (e.g., 144.217.230.64)
- Open the nano editor and paste the WireGuard configuration:
sudo nano /etc/wireguard/wg0.conf
Save and exit nano (CTRL + O, Enter, CTRL + X). Then, start WireGuard and ensure it starts on boot:
sudo systemctl enable [email protected]
sudo systemctl daemon-reload
sudo systemctl start wg-quick@wg0
sudo systemctl status wg-quick@wg0
Step 3: Point Your Domain
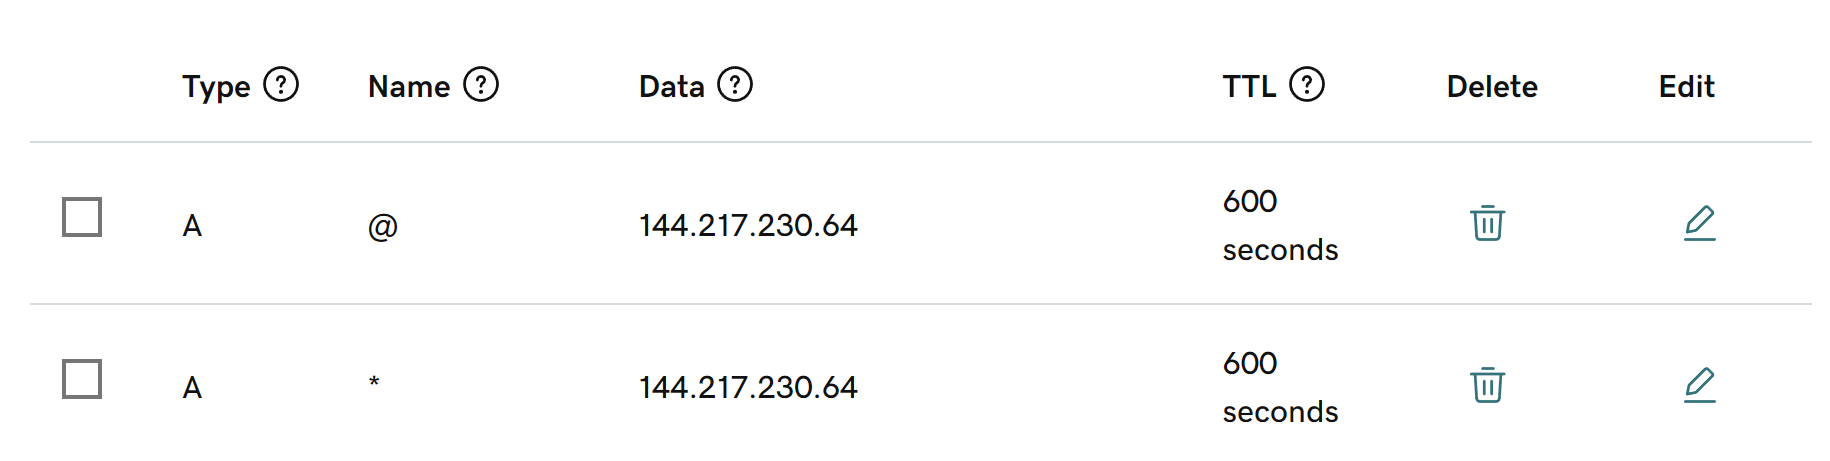
With WireGuard running, update your domain’s A record to point to your external VPN server endpoint IP. This process varies by registrar, but typically involves:
- Adding an A record for your root domain (
@). - Adding a wildcard record (
*).
Both should point to your external VPN IP.
Step 4: Forward WireGuard Ports
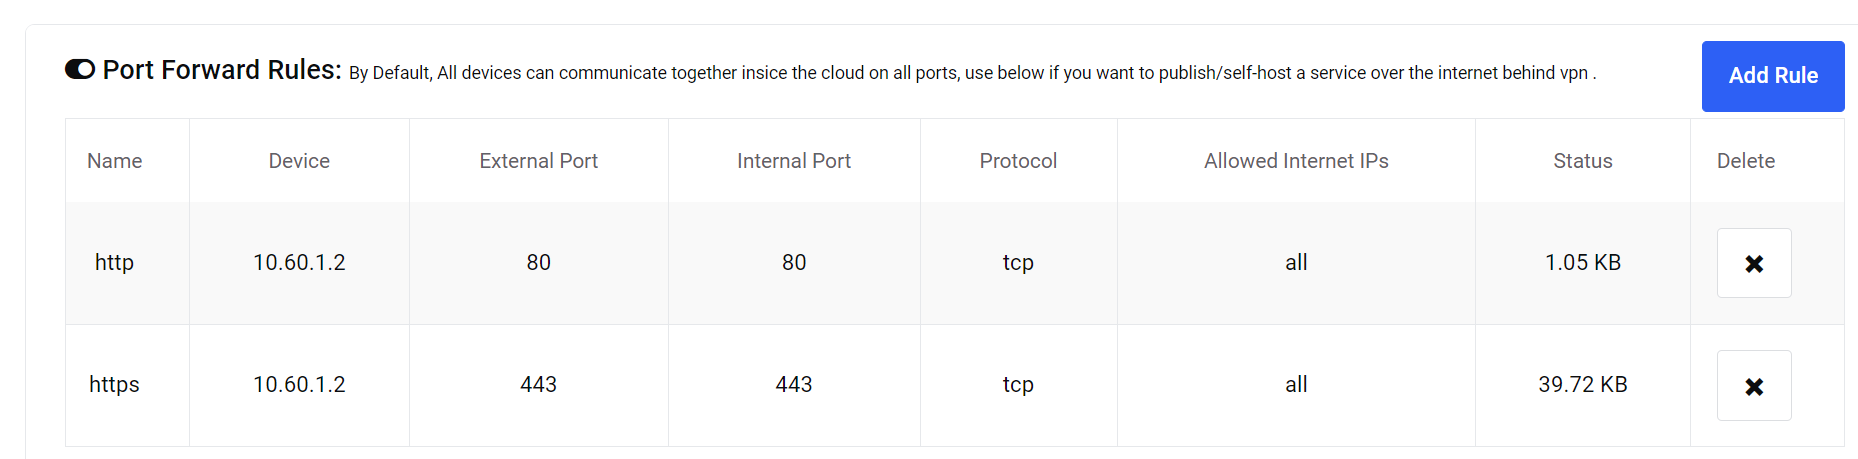
Since we’re hosting a game, we need to forward ports 80 and 443. With TorGuard’s dedicated WireGuard service, you have full firewall access. To forward ports:
- Log into the TorGuard member’s area.
- Select your VPN server and navigate to Port Forwarding.
- Click Add Rule and create entries for port 80 and port 443.
Step 5: Install Nginx Proxy Manager
To route web traffic to our game’s backend, install Nginx Proxy Manager using Docker:
- If Docker isn't installed, run:
curl -fsSL https://get.docker.com -o get-docker.sh
sudo sh get-docker.sh
- Create a directory for Nginx Proxy Manager and set up a
docker-compose.ymlfile:
mkdir ~/nginx && cd ~/nginx
nano docker-compose.yml
Paste the following:
version: '3.8'
services:
  app:
    image: 'jc21/nginx-proxy-manager:latest'
    restart: unless-stopped
    ports:
      - '80:80'
      - '443:443'
      - '81:81'
    volumes:
      - ./data:/data
      - ./letsencrypt:/etc/letsencrypt
- Start the service:
docker-compose up -d
- Open your browser and go to
https://your_VPN_IP:81. The default credentials are[email protected]/changeme. Change your password immediately.
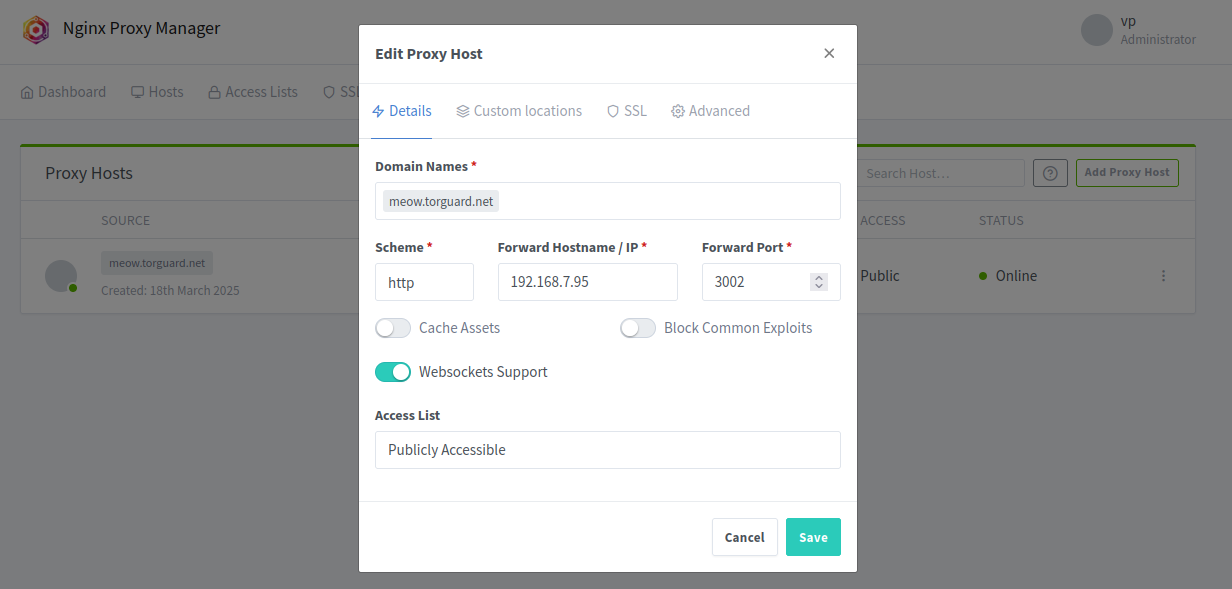
- Add a Proxy Host, pointing to your game server’s internal IP and port 3002. Enable WebSockets support.
- Request an SSL certificate through Let’s Encrypt, and enable Force SSL, HSTS, and HTTP/2.
Now, your self-hosted AI-generated game is live at your domain!
Final Thoughts
Self-hosting with WireGuard is an underrated but powerful approach for developers. By leveraging an old mini PC, Raspberry Pi, or laptop, you can significantly cut down on cloud costs while gaining full control over your development environment.