


Self-hosting a homelab can be immensely rewarding but time-consuming. For those who want the benefits of hosting locally, providing remote VPN access, or securely managing services behind WireGuard, Tipi offers an unparalleled solution. This project streamlines the self-hosting process, making it accessible and efficient for everyone, from beginners to seasoned docker users. With Tipi, home server management becomes incredibly easy, allowing users to focus on utilizing their applications, not configuring them. In this article, we will show you step-by-step how easy it is to host your homelab behind a domain using Tipi.
Benefits of Using Tipi for Self-Hosting Your Homelab
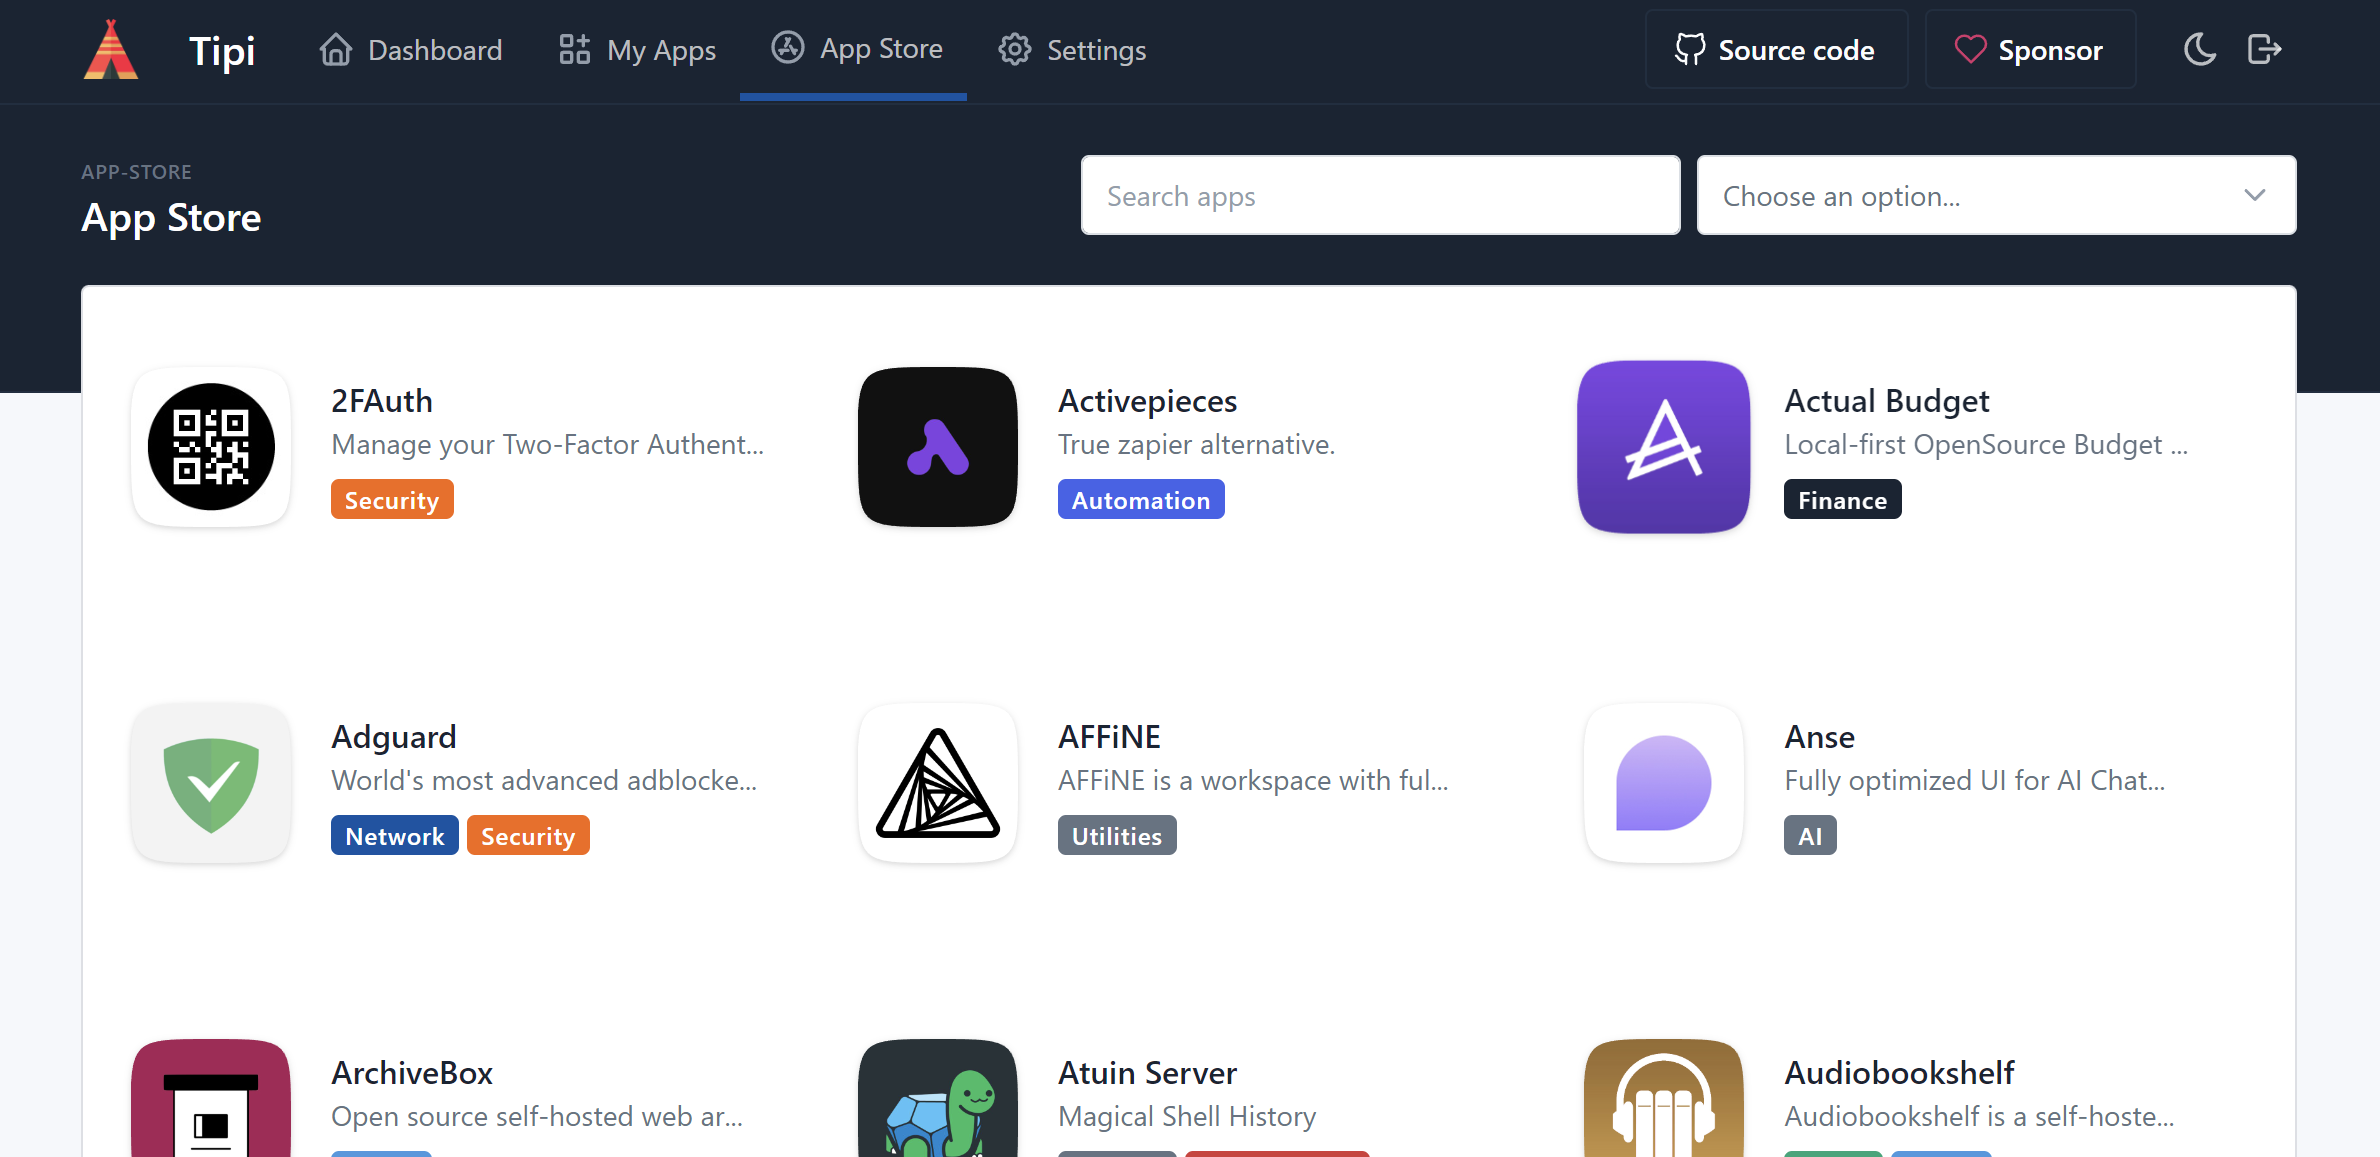
Tipi is free and open-source, providing a hassle-free way to install all your favorite self-hosted apps. With more than 200 popular apps available for one-click installs and updates, Tipi eliminates the tedious process of configuring and managing each service individually. Imagine deploying your homelab in minutes, starting from scratch and choosing any app from the Tipi app store that comes pre-configured to work seamlessly. This platform ensures that you can get started immediately, with everything customizable to meet your specific needs.
The Tipi dashboard is designed with simplicity in mind, featuring one-click installs that require no configuration or Docker knowledge. SSL certificates are managed automatically with Let's Encrypt, allowing you to expose your apps to the world securely and effortlessly. Updates and configurations are equally straightforward, with a single click updating your apps and a user-friendly web UI making customizations a breeze. Each app comes in a pre-configured state that works out of the box, yet offers the flexibility to be tailored to fit your precise requirements.
For anyone looking to simplify their self-hosting experience, Tipi is a game-changer. It takes the complexity out of the process, making it easy to deploy, manage, and update your homelab. With Tipi, you can enjoy the benefits of self-hosting without the associated headaches, allowing you to focus on using your apps rather than configuring them.
Step 1: Install Ubuntu Server and WireGuard
To get started, you'll need an x86 mini PC or an Rpi4 to install Ubuntu Server (Ubuntu 18.04 LTS or higher is recommended). Generally speaking, the following specs are ideal:
- A modern multi-core processor
- 8GB of RAM or more
- 20GB free SSD disk space
Supported Architectures:
- x86_64/amd64
- arm64
Step 2: Install WireGuard
Log in to your Ubuntu server box and run the following commands to install WireGuard:
sudo apt update
sudo apt upgrade
sudo apt install wireguard resolvconf curl
Next, generate your WireGuard config to add to your local Ubuntu server. We will host Tipi behind a domain name, but you can alternatively run your homelab through a remote VPN gateway or access local-only through a standard TorGuard WireGuard server. For this article, we will use TorGuard's Dedicated WireGuard service (Private VPN Cloud) to self-host Tipi. Navigate to the TorGuard member's area, select your Private VPN Cloud service, and click "Add Device."
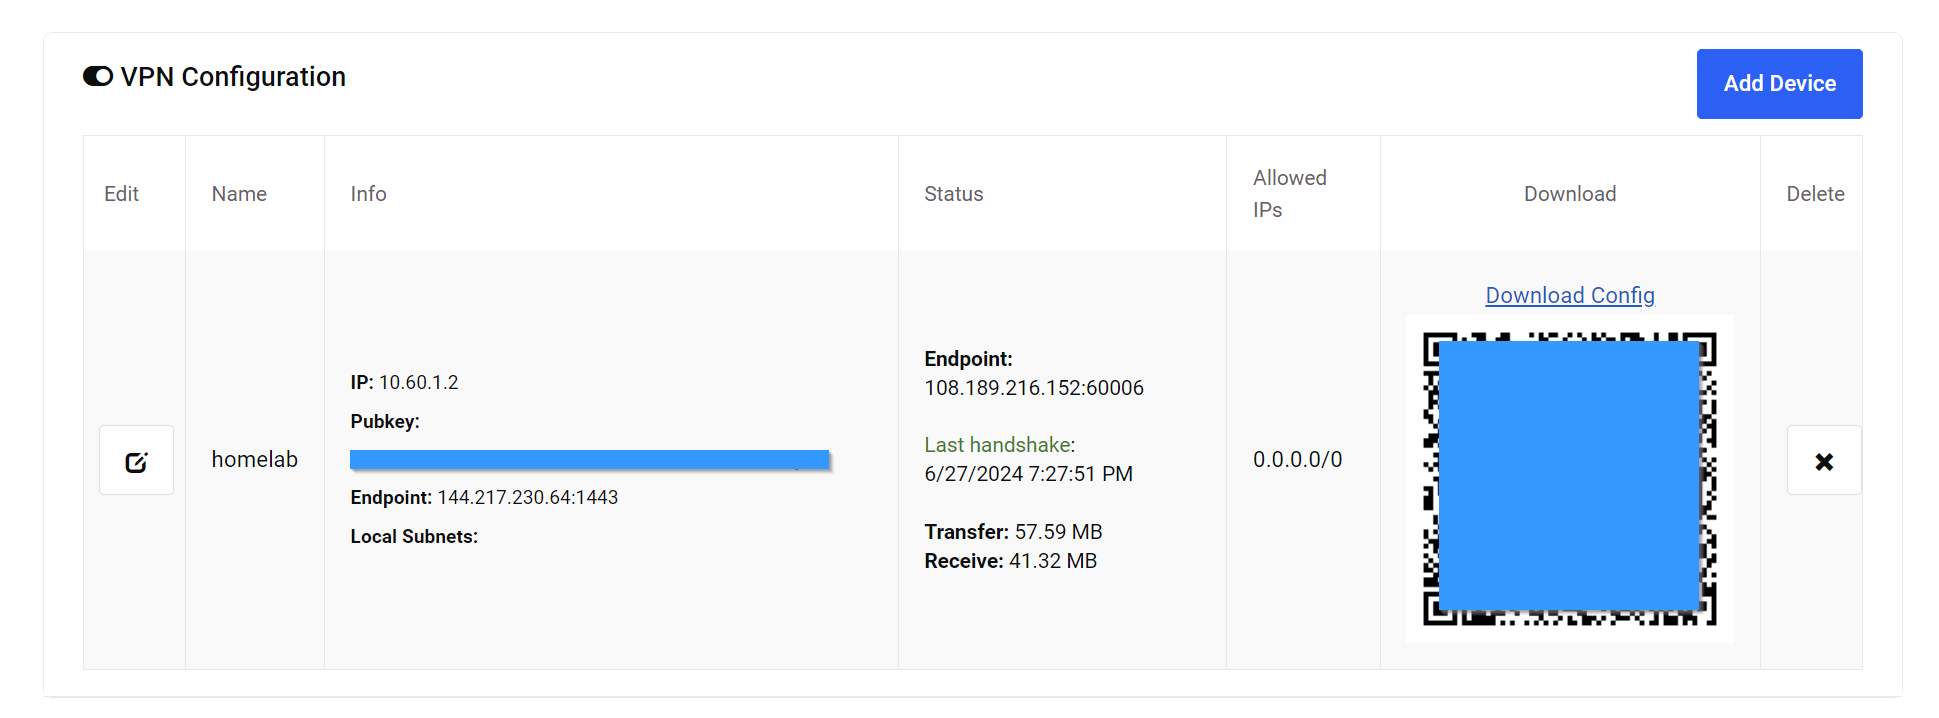
Download the WireGuard config file for the next step. Note two different IPs: In our example the external VPN server endpoint IP (e.g., 144.217.230.64) and your internal WireGuard IP (e.g., 10.60.1.2).
Now that we have our WireGuard config, use the following command to open the nano editor and copy and paste your WireGuard configuration:
sudo nano /etc/wireguard/wg0.conf
After pasting, save the file by pressing CTRL + O and then CTRL + X to exit nano.
Next, enter the following commands to start WireGuard and ensure it automatically starts at boot:
sudo systemctl enable [email protected]
sudo systemctl daemon-reload
sudo systemctl start wg-quick@wg0
sudo systemctl status wg-quick@wg0
Step 3: Point Your Domain
Before installing Tipi, point the domain name's A record to the external VPN server endpoint IP.
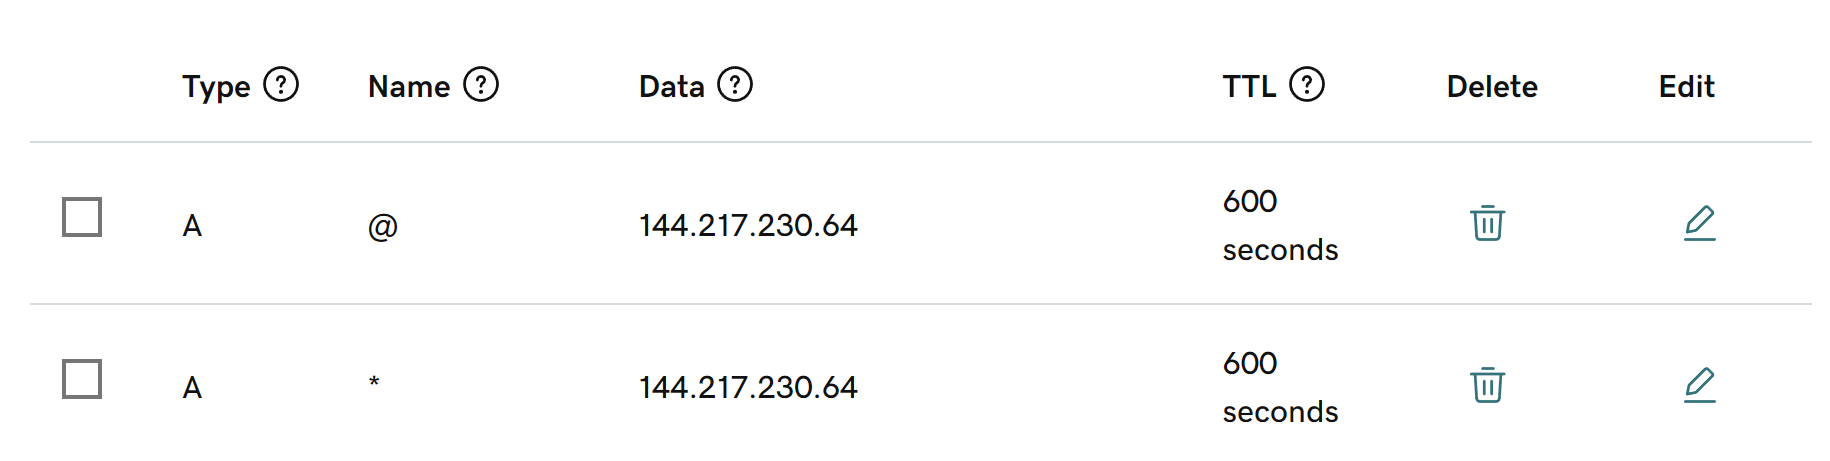
The process is similar for all domain registrars, but in this example, we are using GoDaddy. Locate your domain, click the "Add DNS record" button, and enter two records: an @ "A record" and a * wildcard record (so you can use subdomains). Enter your external VPN server IP for each:
Step 4: Forward Your WireGuard Ports
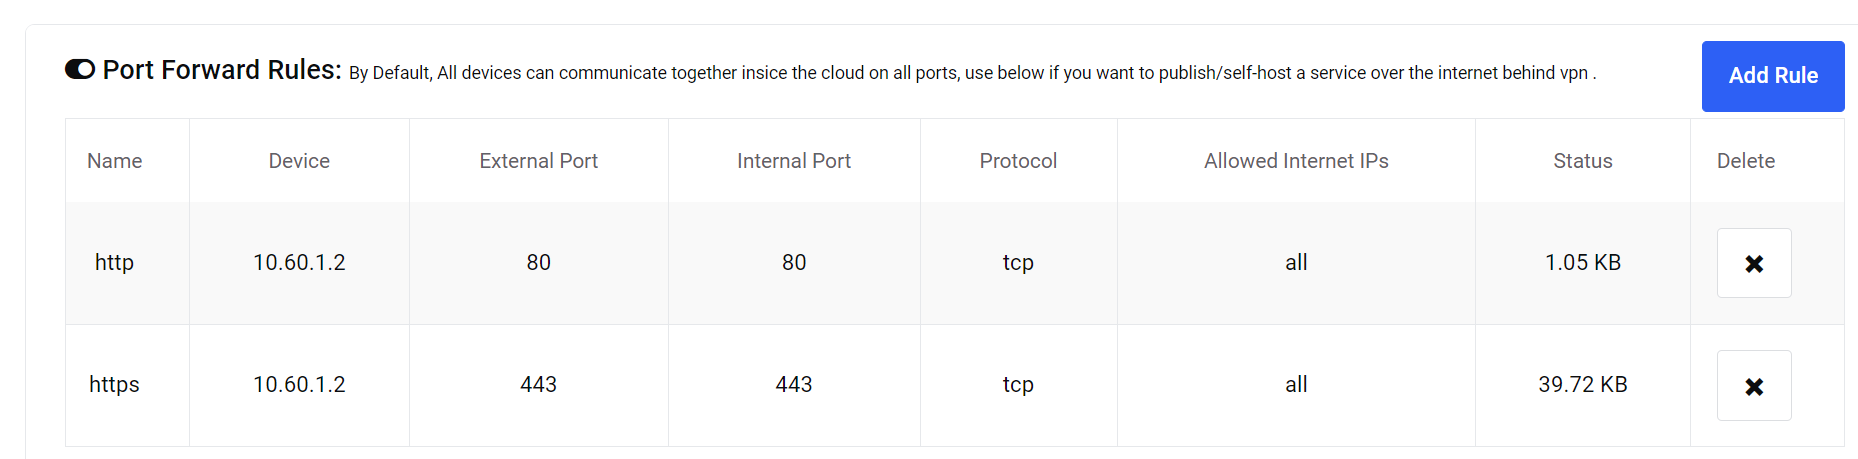
Now that your domain is pointing to your WireGuard server, forward port 80 and 443. With TorGuard's dedicated WireGuard service, you get full firewall access, which is ideal when hosting a homelab. Back in the TorGuard member's area, access your VPN server and click "Add rule" under Port Forward rules. Add one record for external/internal port 80 and another for port 443. Your port forward rules should look like this:
Step 5: Install Tipi
Now comes the fun part. We have the equivalent of a web server running on our Ubuntu mini PC. It's time to install Tipi, so access your command line on your server and run the following command:
curl -L https://setup.runtipi.io | bashThis will download the install script for Tipi, install Docker, and Docker Compose, and get your system up and running. Once complete, you'll see this message:
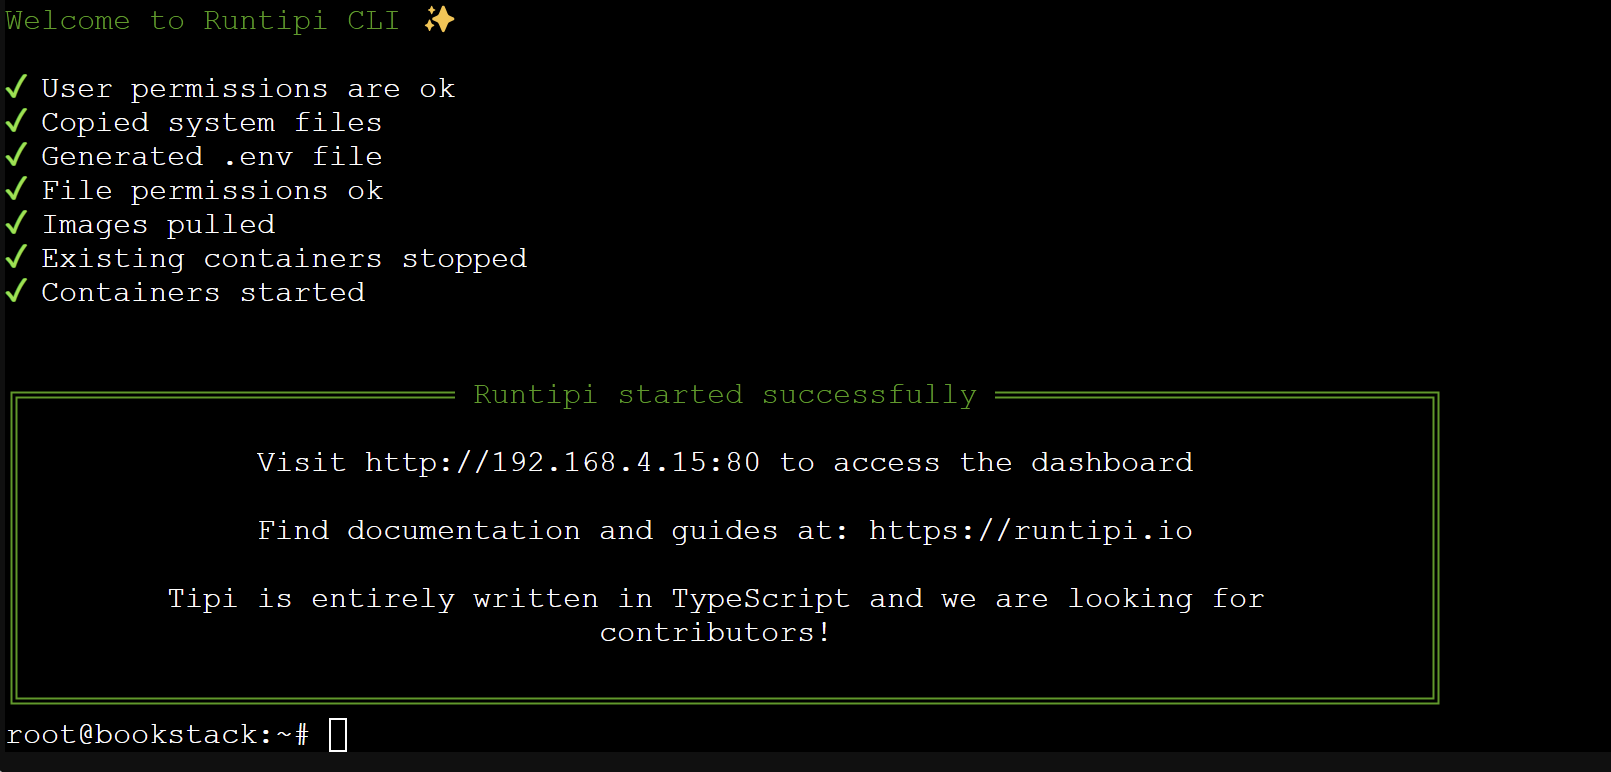
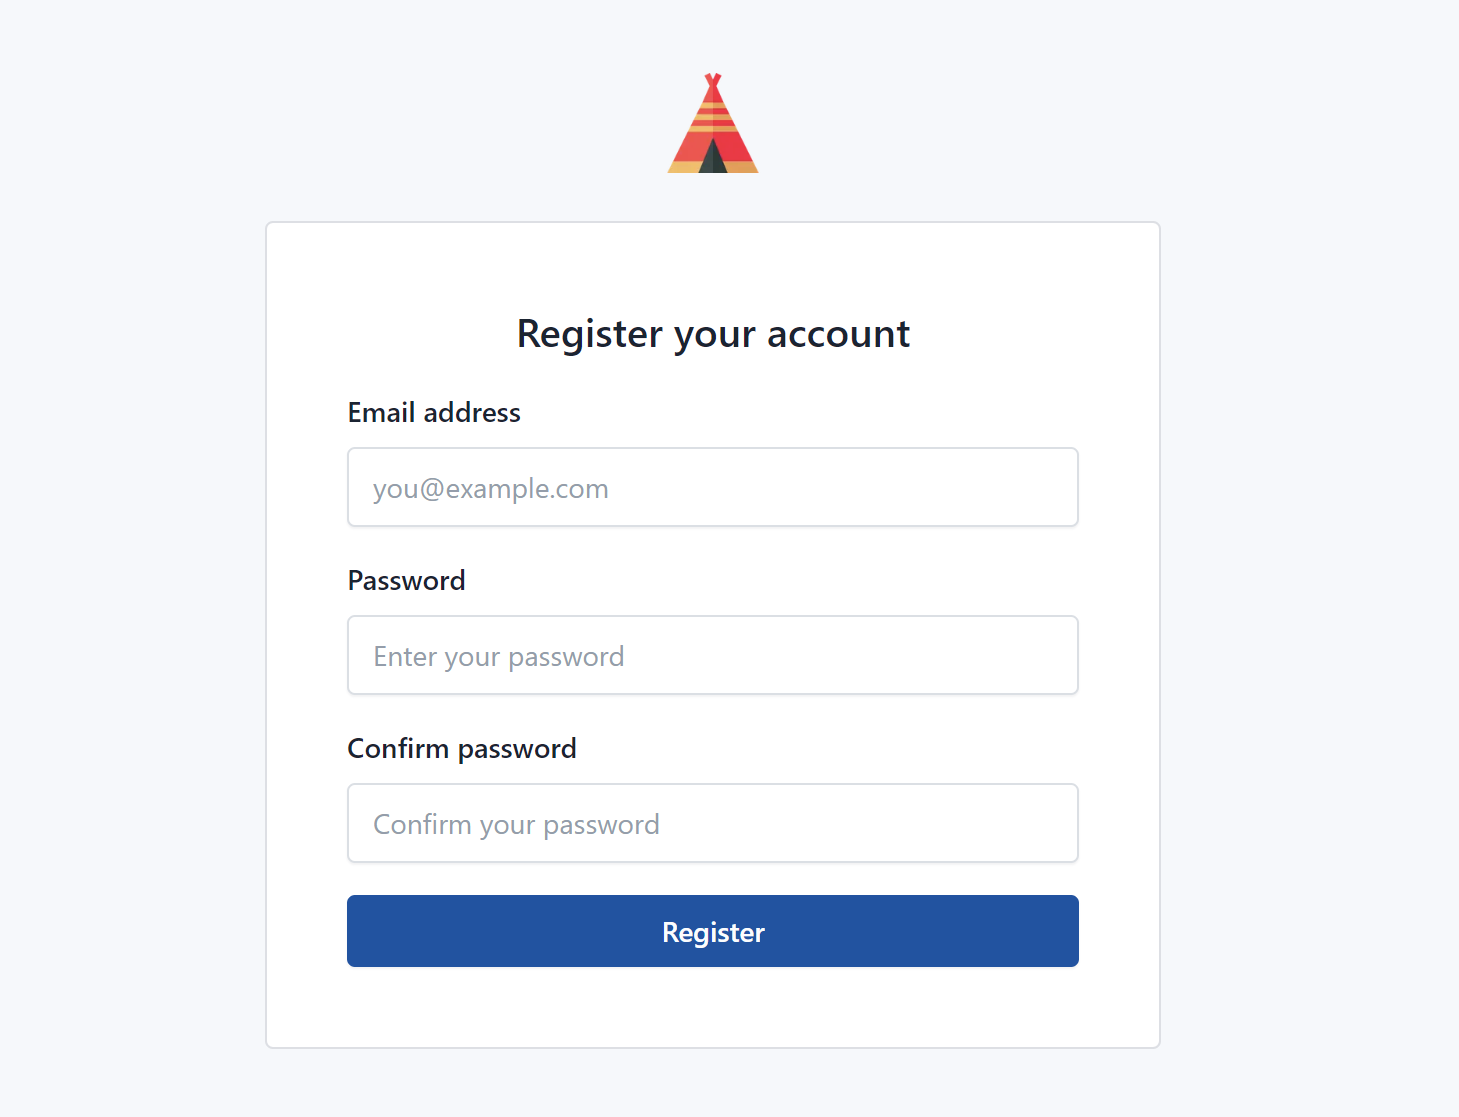
Tipi is now running, and you can open a web browser to access Tipi on http://localhost_ip:80 or http://external_vpn_ip:80. Enter your email address and a strong password for your main Tipi login:
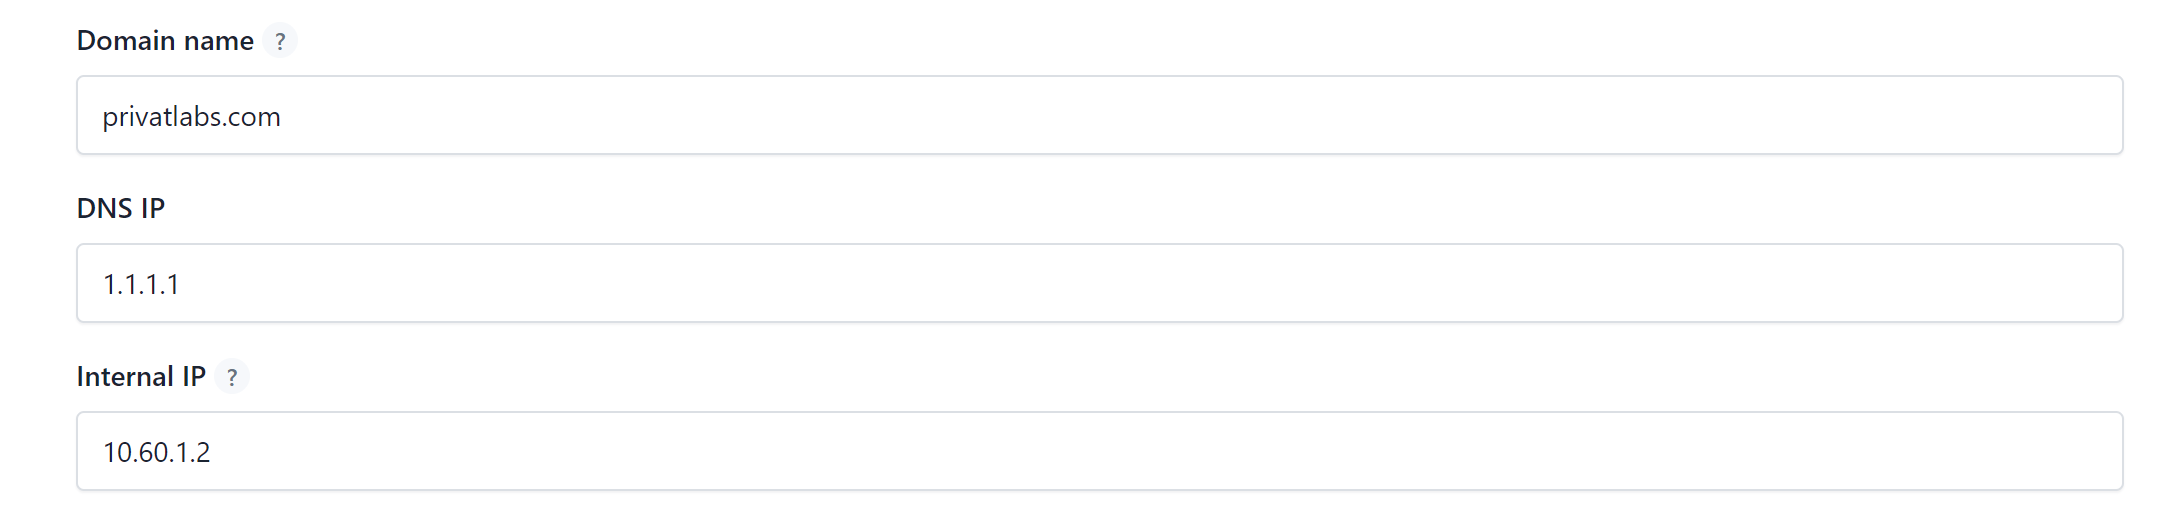
Next, access the settings tab in Tipi and enter your public root domain, the DNS IP, and most importantly, the WireGuard internal IP (e.g., 10.60.1.2). Make sure to enter your internal WireGuard IP address here and not the external one, then click the update settings button:
Back on your Ubuntu server, restart Tipi for the settings to take effect:
cd runtipi
sudo ./runtipi-cli restart
After a few moments, open a new web browser window (you might have to clear the cache for the new SSL cert) and navigate to your root domain and log in.
Next, let's install our first app. Under the hood, Tipi uses Docker Compose, but the online Web UI makes it easy to install over 200 different apps without having to get your fingers dirty with YAML.
We picked Nextcloud. Click the install button, enter a secure username/password, and toggle the reverse proxy option to on. Enter your root domain with a subdomain name:
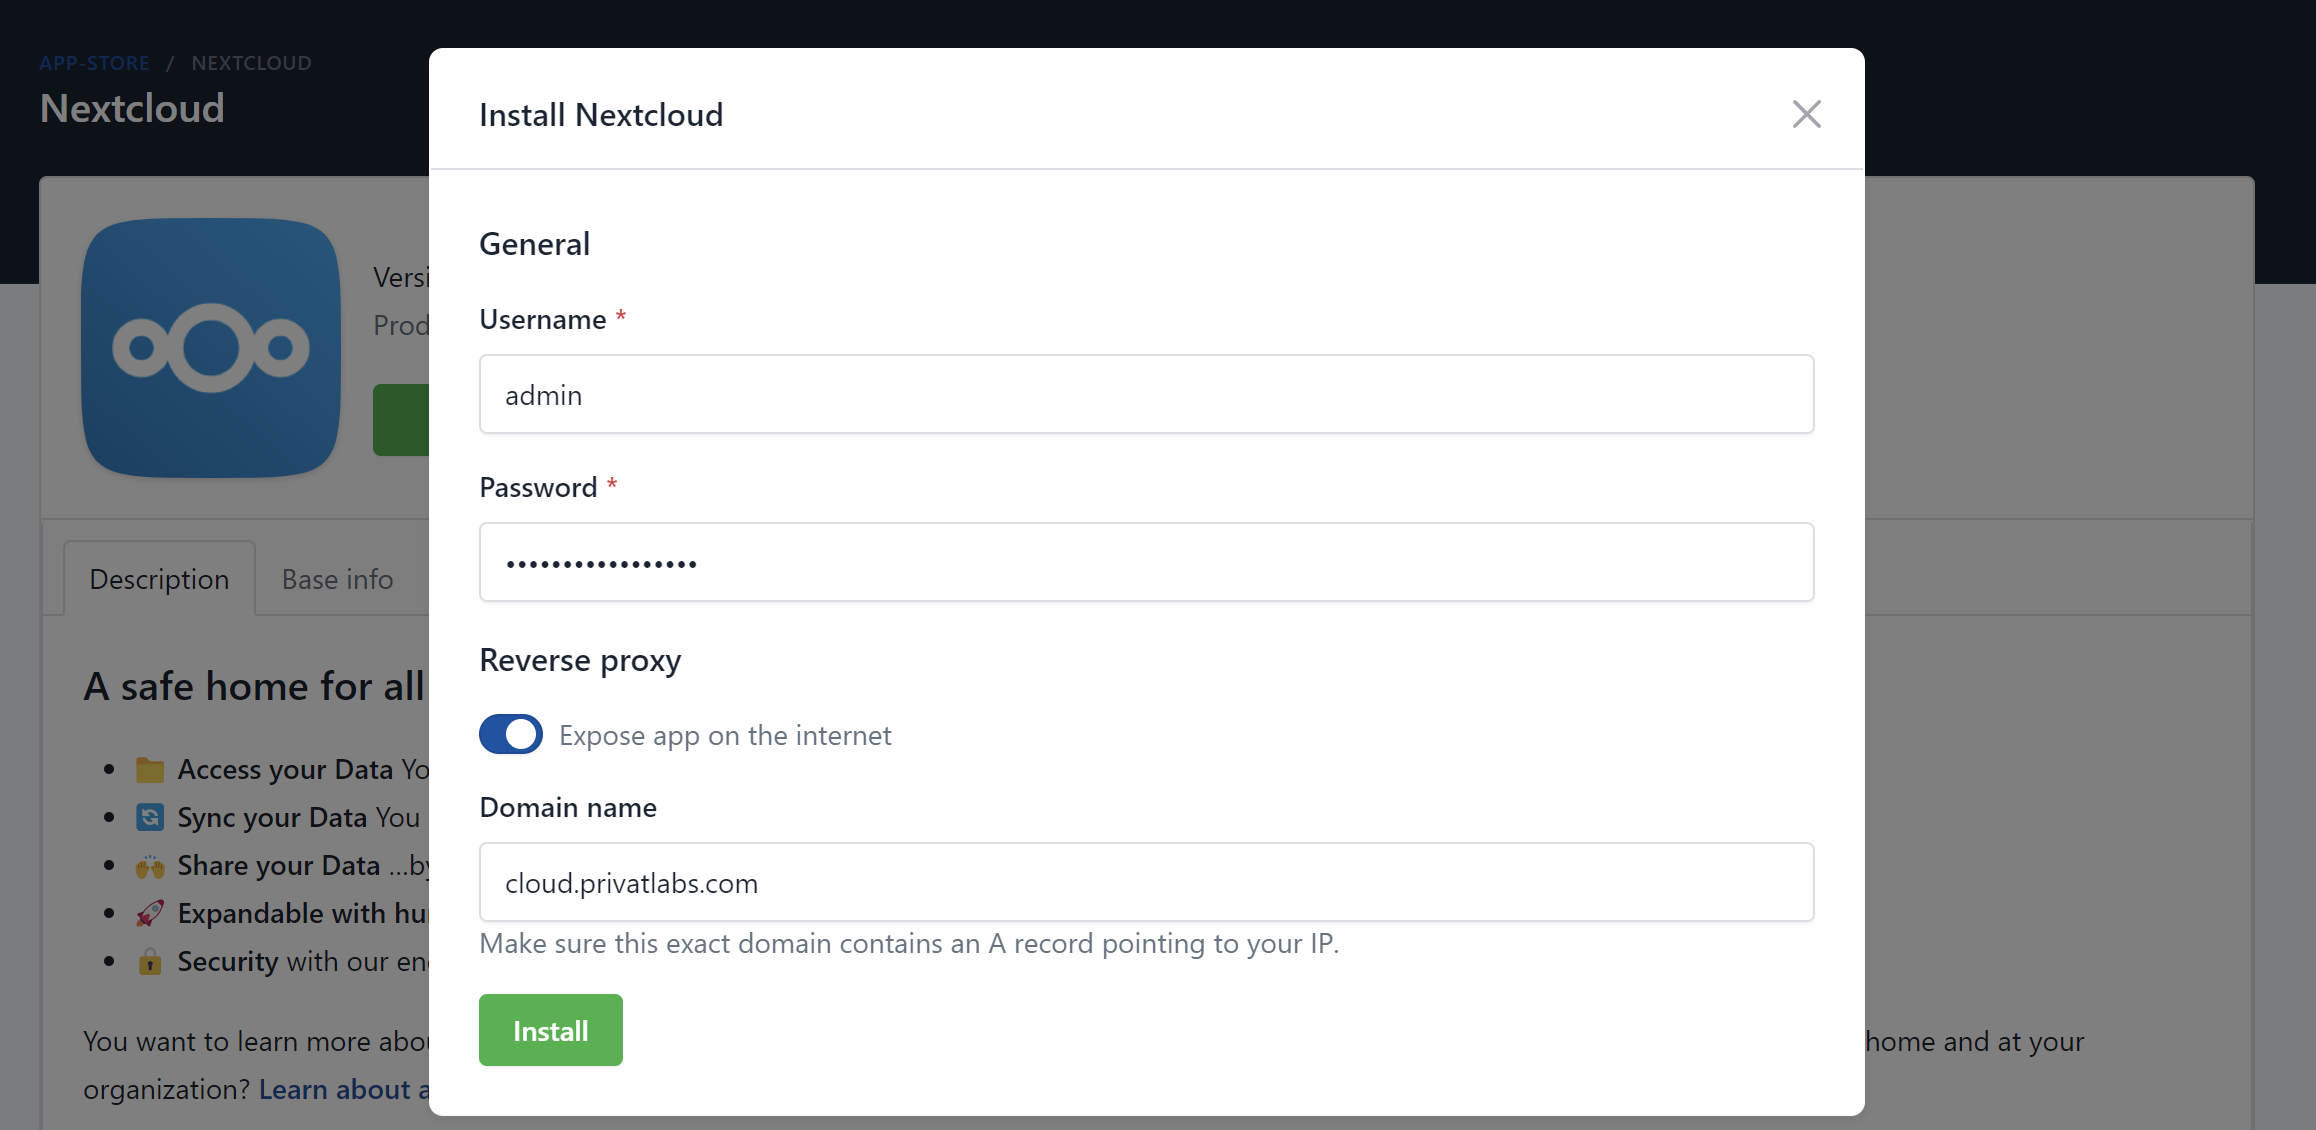
Click the install button, and after the process completes, you should be able to access your app via the subdomain.
Although Tipi is new, the founder Nicolas Meienberger has skillfully created a platform that doesn't try to overcomplicate app environment variables or redesign existing Docker compose processes. It's a clean-cut, yet beautiful web UI that uses simple functions to deploy Docker containers that appeal to both new and advanced users. If you like Docker, you're going to love Tipi.
Read up on Tipi's documentation for more information, and if you encounter any SSL issues, we've found restarting Tipi solves most of them:
sudo ./runtipi-cli restartIf you found this helpful, please donate to Tipi's main developer:
This step-by-step guide ensures that your homelab setup is straightforward and efficient, thanks to Tipi and WireGuard. By following these instructions, you can enjoy the benefits of self-hosting without the typical hassles, allowing you to focus on utilizing your applications rather than configuring them.