

As we delve into 2024, we've already witnessed significant security breaches stemming from vulnerabilities in popular remote desktop applications such as AnyDesk, TeamViewer, and ConnectWise. Despite their convenience and user-friendly interfaces, these platforms pose a substantial risk, representing a preferred target for cybercriminals. Utilizing such services for remote access to your personal or work computer could introduce a critical security flaw, essentially making you the weakest link in your organization's cybersecurity chain. This is especially pertinent for businesses with employees who frequently travel or work remotely, as ensuring secure remote connections is crucial to prevent unauthorized access to your network. In this guide, we'll demonstrate the simplicity and effectiveness of using WireGuard alongside Windows 11 to establish a secure Remote Desktop connection. This setup not only restricts access to authorized users through the VPN tunnel but also incorporates WireGuard's firewall capabilities to control local IP access, significantly reducing the risk of internal network breaches.
Activating Remote Desktop Connection on Windows 11
Windows 11, particularly the Enterprise edition, boasts robust support for remote desktop functionality via RDP, incorporating user authentication through your Microsoft account. Unfortunately, users of the Home edition will not have access to this feature; however, upgrading to the Enterprise version is a viable option for just $99. To enable remote desktop support, navigate to the Windows settings menu and look for "Remote Desktop Settings." There, you'll find a toggle switch for Remote Desktop; simply switch it from Off to On.

It's important to note that the Windows Remote Desktop Connection permits only a single user login at any given time, authenticated via your Microsoft account. This means that if you're connected remotely, the desktop on the local machine becomes inaccessible until the remote session is terminated. Furthermore, the system does not support concurrent remote sessions, limiting remote access to one user at a time.
Generating WireGuard Configurations for Secure Connection
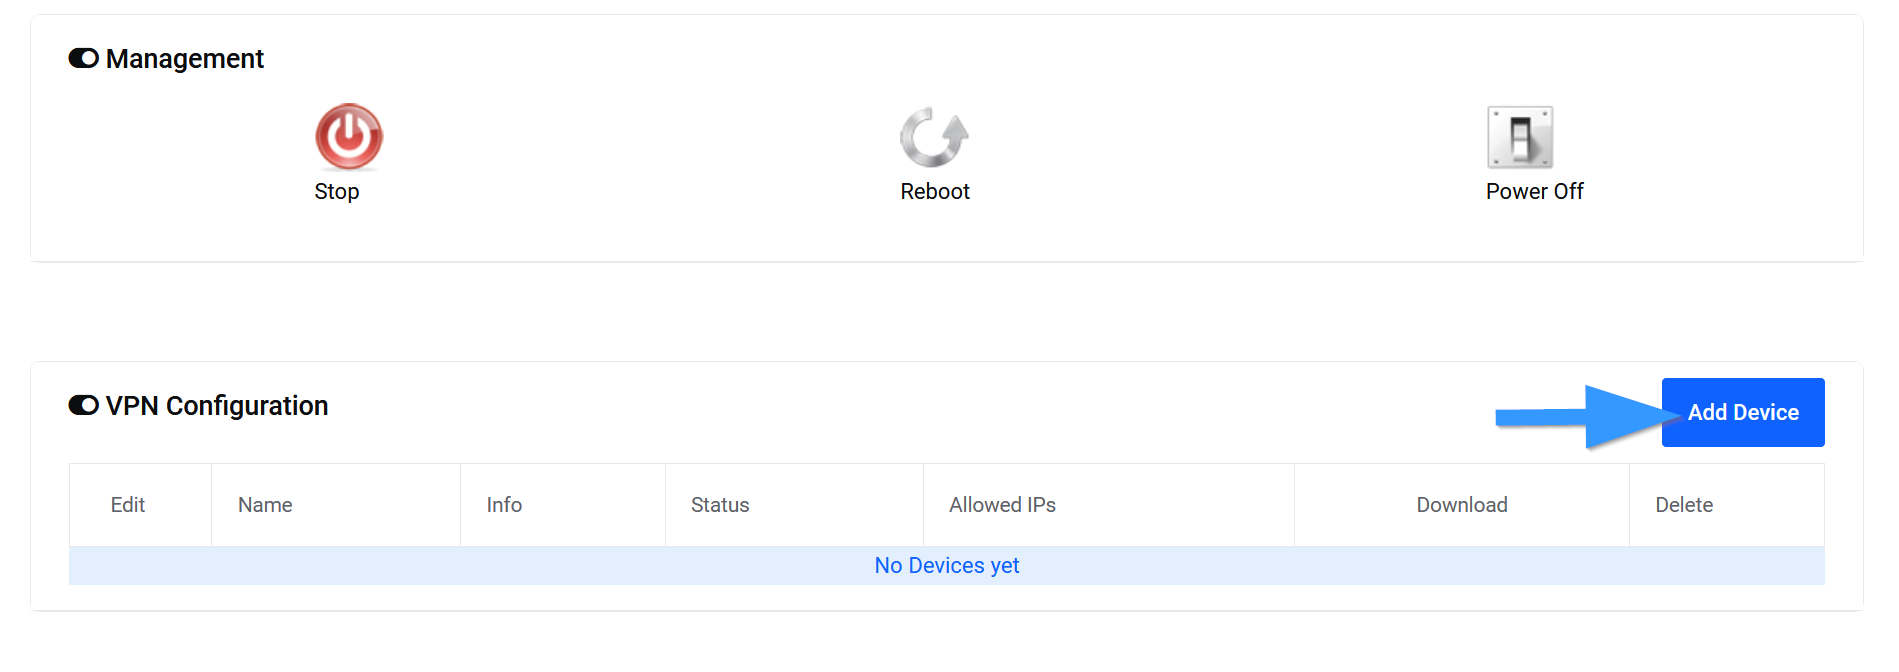
With the activation of remote desktop functionalities on your chosen Windows machine, the next pivotal step involves creating WireGuard configurations for this specific desktop and any other devices you intend to connect from. For a secure VPN remote access setup, you'll require the TorGuard Private VPN Cloud service, offering a dedicated WireGuard instance for your use. Begin by accessing the TorGuard members area, where you'll find the option to manage your Private VPN Cloud service. Here, initiate the process by clicking on "Add Device," which allows you to generate unique WireGuard configurations for each device. Assign recognizable names to each device, such as "Work Desktop" or "Laptop," to easily identify them later. When selecting the gateway, opt for the "default gateway" setting.

For those needing to connect to additional resources within the local network, such as routers or firewalls, specifying your requirements in the "Local subnet" field (e.g., 192.168.1.0/24) is crucial. If such access isn't necessary, leaving this section blank is advisable.
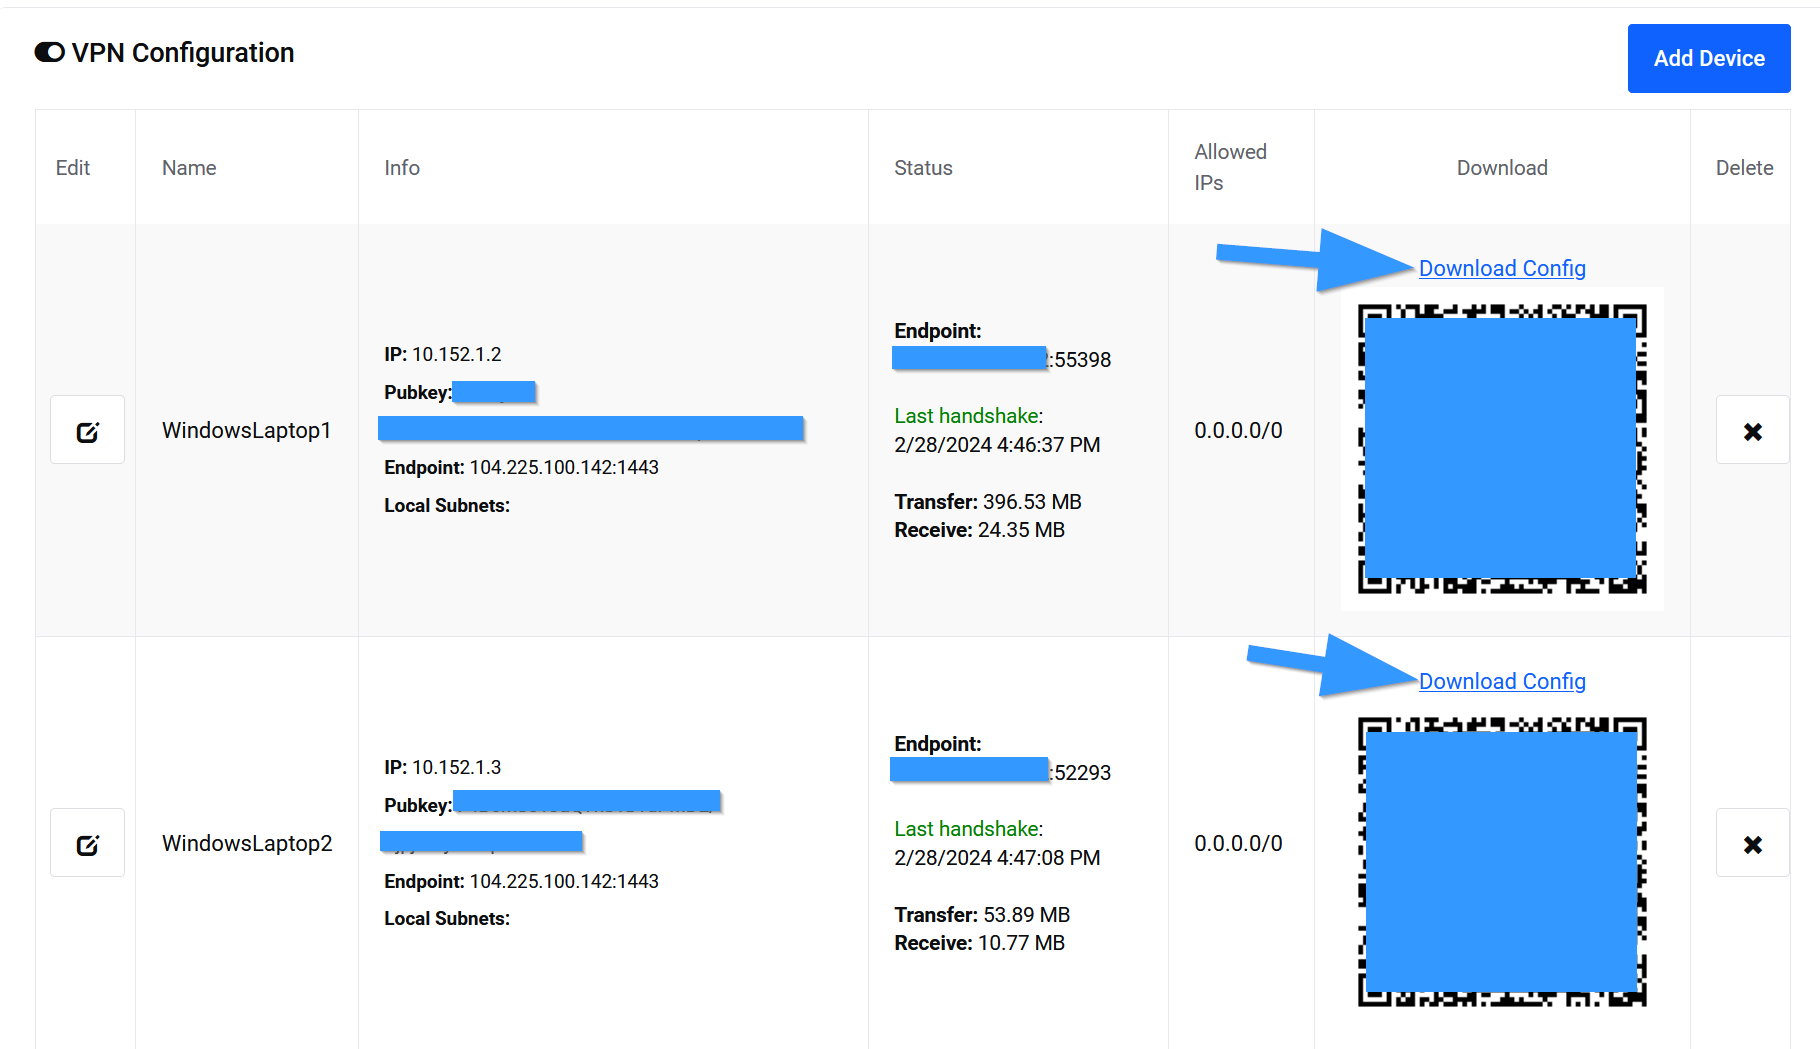
Following this setup, ensure the WireGuard client is installed on every device that will connect remotely. Download the configuration file for each device by selecting the "Download config" option. Open the WireGuard application, add a new tunnel by selecting the downloaded configuration file, and activate the connection with the "Activate" button. Deactivating the connection is just as simple, requiring only a click on the "Deactivate" button.

Continue this setup process for each device to ensure all your devices are securely connected to WireGuard, equipped with their respective configuration files. This method ensures a robust, secure connection to your desktop, safeguarding your remote desktop sessions against unauthorized access.
Initiating Remote Desktop Connection Over WireGuard
Now that WireGuard is operational on all your devices, it's the perfect moment to establish a remote connection to your designated desktop. Within your private WireGuard network, each device is allocated an internal IP address. This IP is unique to each device within the network; for instance, in our scenario, WindowsLaptop1 is assigned the IP 10.152.1.2, WindowsLaptop2 is assigned 10.152.1.3, and so forth. These private IP addresses are only accessible via the secure WireGuard tunnel, and they're the addresses we'll use for remote connections.
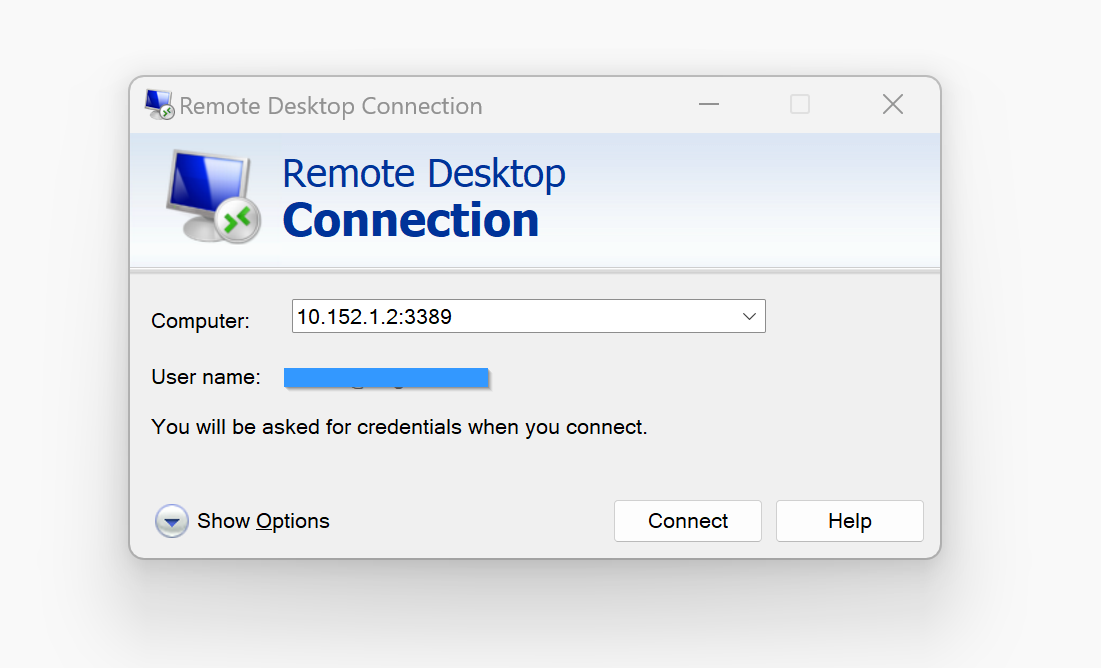
Let's say you've enabled Remote Desktop on WindowsLaptop1, which has the IP 10.152.1.2. On WindowsLaptop2, you would click the Start button, search for, and open the Remote Desktop Connection application. In the application, you'll input the WireGuard IP address of the device you wish to access remotely. For our example, you're connecting to WindowsLaptop1, so you would enter 10.152.1.2. To connect to the RDP port through the VPN tunnel, append ":3389" to the IP address, making it appear as "10.152.1.2:3389," and then click "Connect."
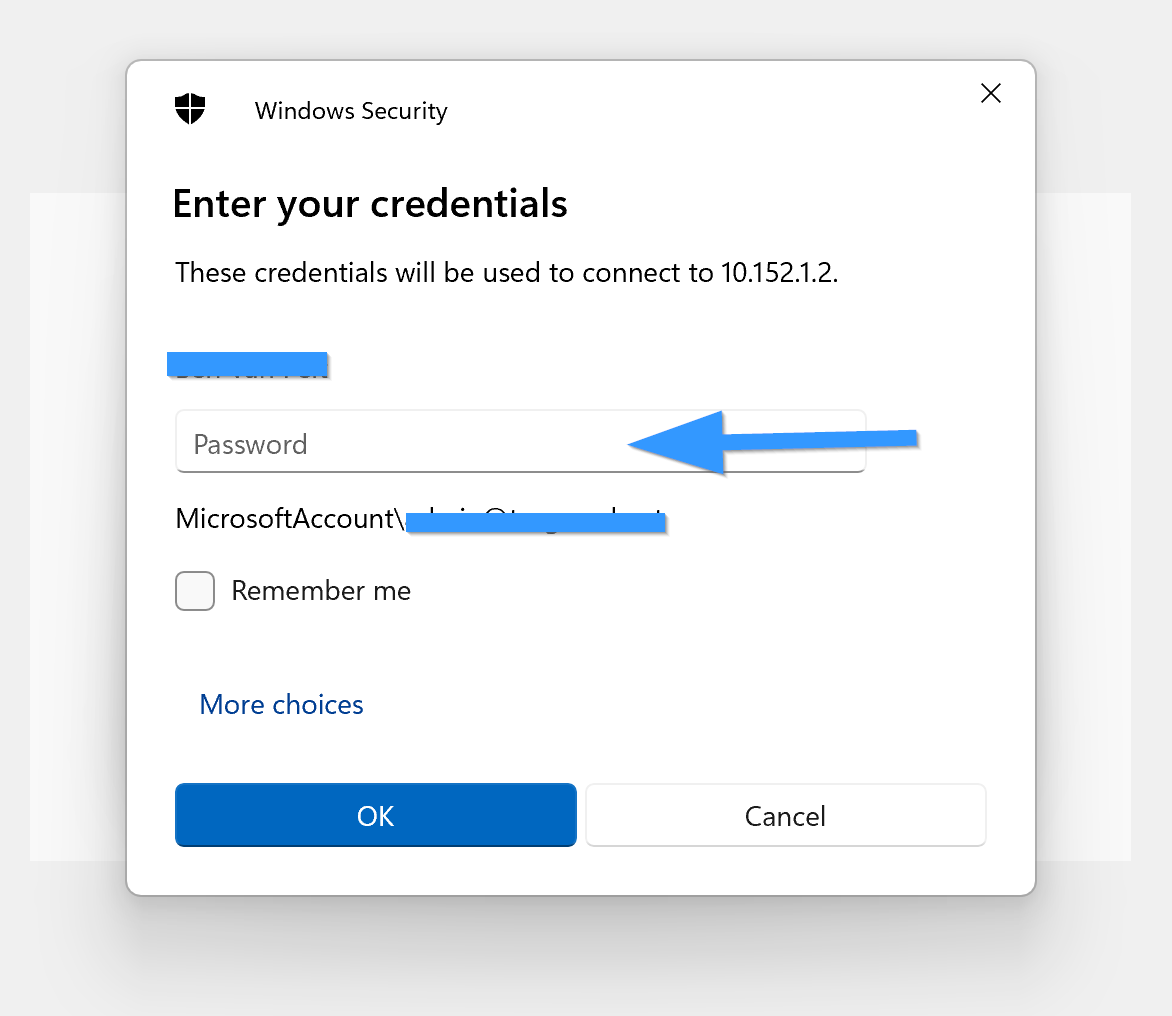
Following this, Windows Security will prompt you for your Windows VPN user password. It's important to note that this is not the device's PIN but rather the Windows user password linked to your device, the same one used for accessing your Microsoft account online. After entering your password, click "OK."
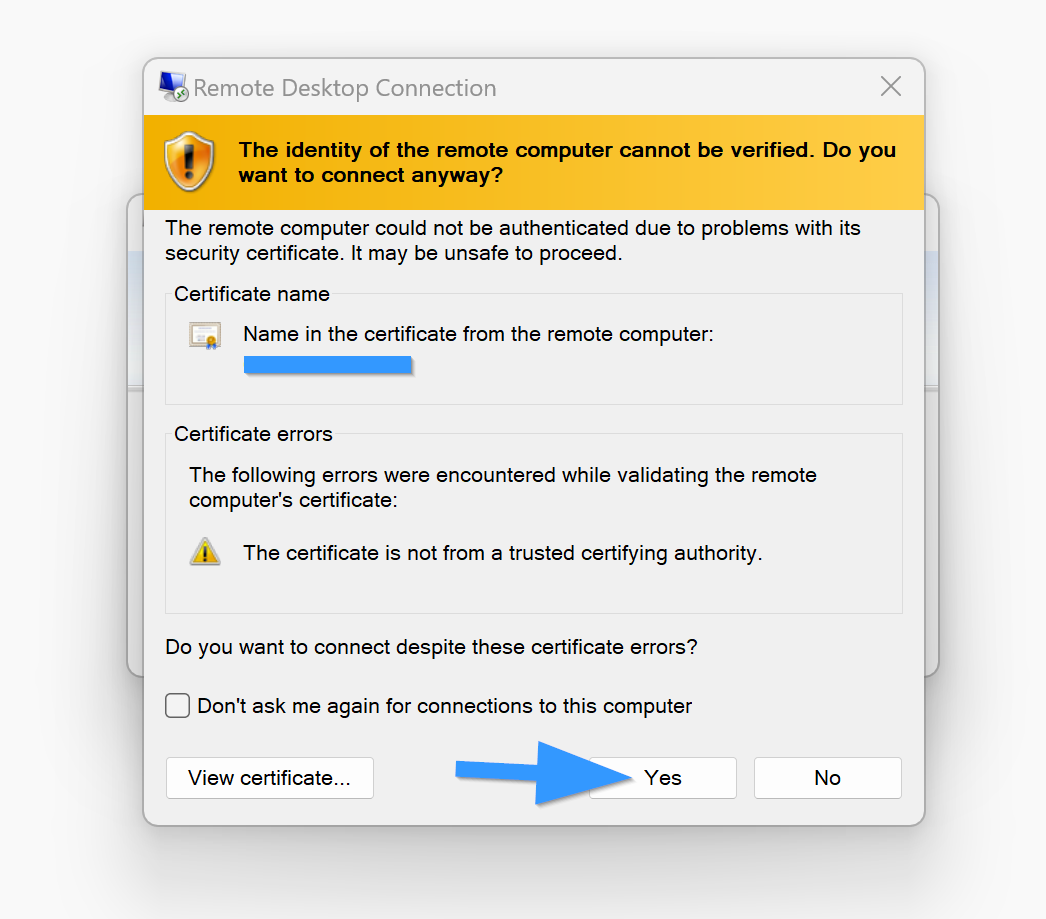
Subsequently, a prompt regarding the security certificate will appear. Since you're establishing this connection through a secure, encrypted VPN tunnel, you can safely select "YES." This action confirms the trust in the connection's security, thereby finalizing the process to securely access your desktop remotely via the WireGuard tunnel. This method ensures a secure, encrypted pathway to your desktop, mitigating risks and enhancing your remote desktop experience.
Securing Your Remote Desktop Connection: A Comprehensive Wrap-Up

Congratulations! At this juncture, you should be viewing your device's desktop interface within the remote desktop application window. The web traffic from both of your devices is now securely encrypted, passing through your personal WireGuard server, and you've successfully authenticated into your desktop utilizing your Microsoft.com account password. It's crucial to note that this type of connection is exclusively viable through WireGuard. This setup offers robust resistance against password compromise, brute force attacks, or breaches from central database hacks due to the dual-layer security provided by the secure VPN tunnel and your secure Microsoft account password.
The process, as you've seen, isn't daunting. Often, the most critical security vulnerabilities can be mitigated with simple enhancements to our daily computing practices. Leveraging TorGuard’s private WireGuard service, which is both cost-effective and performs more efficiently than widely-used alternatives like TeamViewer, AnyDesk, and ConnectWise, is a testament to its viability as a secure remote access solution. Far from being just an economical choice, securing your remote desktop sessions through a WireGuard server that you manage not only enhances security but also offers significant savings. With this level of cybersecurity prowess, suggesting a promotion to sysadmin is practically a no-brainer. Heck, why stop there? Might as well throw in the keys to the executive washroom while they're at it.